
Cleaning
1. Remove from the block of cylinders all external elements and electric switches/sensors. Ideally, for a complete cleaning, remove and smooth (rod) plugs (pic. 11.1). Drill a small hole in the removable plug and screw a self-tapping screw into it. Pull the screw with pliers and remove the plug. You can also use an impact puller.
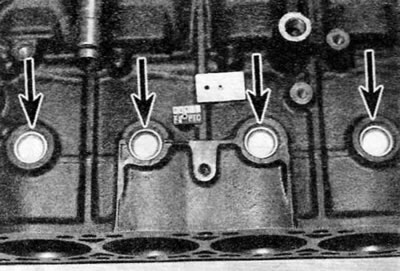
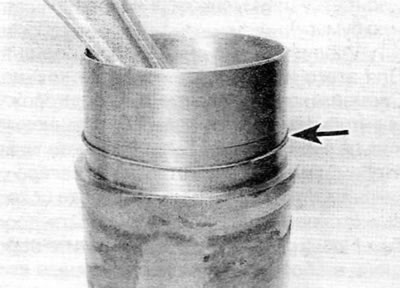
Pic. 11.1. Cylinder block rod plugs (marked with arrows)
2. On gasoline engines with an aluminum cylinder block and «wet» shell casings (1.4 l) remove the sleeves as described in paragraph 18.
3. If applicable, remove bolts and piston cooling oil jet tubes (one for each piston) from the inside of the cylinder block (pic. 11.3).
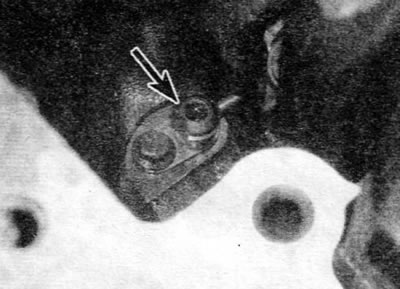
Pic. 11.3. Oil nozzle tube for piston lubrication (marked with an arrow) in the cylinder block
4. Remove all traces of gasket material from the cylinder block/crankcase and main bearing housing/caps (depending on design), being careful not to damage the mating/seal surfaces.
5. Remove all oil channel plugs (in the presence of). The plugs are usually very tightly fitted. It is possible that they will have to be drilled and re-threaded in the holes. When assembling the engine, use new plugs.
6. If any elements are heavily soiled, steam cleaning should be performed.
7. Then clean all oil holes and oil passages again. Rinse all internal channels with warm water. Rinse until clean water comes out. Dry thoroughly and apply a light coat of oil to all mating surfaces to prevent rust. On engines with a cast iron cylinder block, also lubricate the inner cylinder walls. If you have access to compressed air, use it to speed up drying and blow out all oil holes and passages.
Attention! Wear eye protection when working with compressed air.
8. If the block is not very dirty, you can use hot soapy water and a hard brush to clean it. Take your time and work carefully. Regardless of the cleaning method used, clean all lubrication holes and passages very thoroughly and dry all components well. To prevent rust, take protective measures as described above.
9. Clean all threaded holes; this will ensure the required tightening torques during assembly. To clean the threads, run a tap of the correct size on each of the holes. This will remove rust, corrosion products, thread sealant or sludge and repair damaged threads (pic. 11.9). If possible, use compressed air to clear holes from previous cleaning.
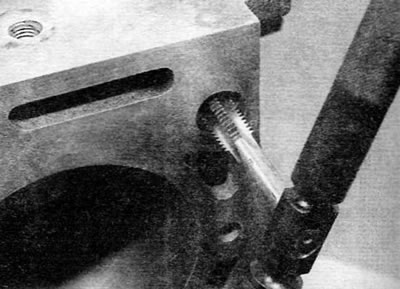
Pic. 11.9. Use a suitable tap to clean the threaded holes in the cylinder block
10. Apply appropriate sealant to the new oil port plugs and insert the plugs into the holes in the block. Tighten them securely. Also apply a suitable sealant to the new smooth plugs and use a piece of machined pipe or a socket to insert the plug into the cylinder block.
11. If applicable, clean the threads of the piston cooling oil jet tube bolts and apply a drop of locking compound (Peugeot/Citroen recommends Loctite Frenetanch) on the threads of these bolts. Install the oil pipes on the cylinder block, screw in the bolts and tighten them to the prescribed torque.
12. If the engine cannot be reassembled immediately, cover it with a large plastic bag or just cling film to keep it clean. Protect all mating surfaces and cylinders as described above to prevent rust.
Inspection
Cast iron cylinder block
13. Visually check the cylinder block for cracks, rust and corrosion. Inspect threaded holes for stripped threads. If there has been a case of an internal coolant leak, it may be helpful to take the cylinder block to an engine overhauler to have it checked with special equipment. At detection of defects eliminate them if it is possible, or replace the block of cylinders.
14. Check each cylinder for scratches and burrs. Check for a wear ridge in the top area of the cylinder. This ridge indicates increased cylinder wear.
15. Accurate measurement of cylinder diameter requires special equipment and experience. It is recommended to have the measurement performed by an engine rebuilder who is also able to provide the appropriate pistons (if it is possible), if the cylinder bore is required during engine repair.
16. If «mirrors» The cylinders and pistons are in acceptably good condition and show no increased wear and the clearances between the pistons and the cylinder walls are correct, only the piston rings need to be replaced. If this is the case, the cylinders should be honed to allow the new rings to properly «sit down» and provide the best (as much as possible) seal. An engine rebuilder will do the job for a reasonable price.
17. At the time of this writing, it was not known if oversize pistons were available for all models. See your Peugeot/Citroen dealer or engine rebuilder for the latest piston availability. If oversized pistons are available (purchased either from a Peugeot/Citroen dealer or from another source), you can bore the cylinders and install oversized pistons. If oversize pistons are not available and the cylinders are worn out, block replacement seems to be the only option.
Aluminum block
18. Remove the sleeve fixing clips (if used), and then use a wooden drift to knock out each sleeve from the inside of the cylinder block. After releasing all the liners, tilt the cylinder block to one side and remove the liners from the top side of the block. After removing each sleeve, stick on its left (from the gearbox side) surface of masking tape and write the cylinder number on the tape. Cylinder #1 is located at the end of the engine where the timing belt is located. Remove the O-ring from the base of each sleeve and discard (pic. 11.18, a, b).
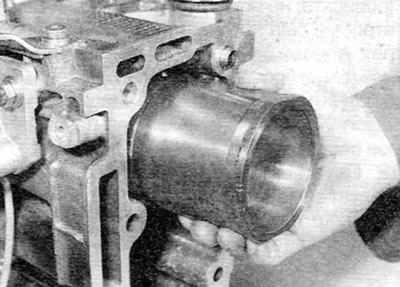
Pic. 11.18 a. On engines with an aluminum cylinder block, remove each liner in turn...
Pic. 11.18, b.... and remove the lower sealing ring from it (marked with an arrow)
19. Check each cylinder liner for scratches and burrs. Check for a narrow wear ridge in the top area of the liner, indicating that the cylinder has excessive wear.
20. Show the sleeves to an engine rebuilder to take the necessary measurements and determine if replacement is required. If required, a specialist is able to provide the necessary information on the presence of pistons / liners.
21. Before installing the sleeves, check the protrusion of the sleeve as described below. Thoroughly clean the mating surfaces of the liner and cylinder block. Insert all liners into the cylinder block properly. If previously removed sleeves are used, install them in their original position. After correctly installing all four sleeves, using a dial indicator (or ruler and fan «probe»), check the protrusion of each liner above the upper mating surface of the cylinder block for compliance with the value specified in «Specifications». The maximum value difference between any two sleeves must not be exceeded.
Note. If new sleeves are installed, it is allowed to rearrange them in order to bring the difference in protrusion to normal. Store each piston with its corresponding sleeve. If the liner protrusion is not correct, seek the advice of an engine rebuilder before proceeding with engine repairs.
22. After checking the protrusion, remove the sleeves from the block and carefully place a new O-ring on the base of each sleeve. Apply a small amount of lubricant to the base of each sleeve to facilitate installation.
23. Insert each sleeve into the cylinder block, being careful not to damage the O-ring. Insert each liner into the cylinder block and manually push it in as far as it will go. By lightly tapping with a hammer through a block of wood, fully insert the sleeve into place; the shoulder of the sleeve should sit on the appropriate stop. If previously removed sleeves are installed, using the markings made upon removal, ensure that each sleeve is correctly oriented and inserted into the original hole.
24. Wipe clean and lightly grease all exposed sleeve surfaces to prevent rusting. If necessary, fix the sleeves with clamps.