
Cleaning
1. Remove all parts and electrical sensors from the cylinder block. For complete cleaning, remove process plugs. To remove the plugs, drill small holes in them and screw a self-tapping screw into the holes. Pull the screw head to remove the plug.
2. On aluminum cylinder blocks, remove the steel cylinder liners.
3. Where installed, unscrew the bolts and remove the oil spray pipe from the inside of the cylinder block.
4. Remove all traces of gaskets from the mating surfaces of the engine block.
5. Remove all oil line plugs. When installing, use new plugs.
6. Clean the most polluted places with steam.
7. Clean all lubrication holes and oil line. Rinse all internal channels with a stream of warm water until the water comes out clean. It is necessary to completely dry the cylinder block and lubricate all mating surfaces with a thin layer of oil to prevent corrosion. On cast iron cylinder blocks, also lubricate the engine cylinders. If compressed air is available, use it to speed up the drying process and blow out all oil holes and lines.
8. If the cylinder block is not very dirty, it can be washed with warm soapy water and a stiff brush.
9. Thoroughly clean all threaded holes using a properly threaded tap, then blow out the holes with compressed air.
10. Install plugs in the oil line in the engine block and fasten them securely.
11. Clean and install the oil spray pipe in the cylinder block and secure it with the bolt.
12. If the engine cannot be reassembled immediately, cover the cylinder block with a large plastic bag to protect it from contamination.
Examination
Cast iron engine block
1. Visually inspect the cylinder block for cracks and corrosion. Check the integrity of the threads in the threaded holes.
2. Check the diameter of the engine cylinders for wear by the presence of a step at the top of the cylinder.
3. If you have a measuring tool, measure the liner diameter of each cylinder at the top (under the wear step), in the center and at the base parallel to the axis of the crankshaft.
4. Then take the same measurements perpendicular to the crankshaft axis and compare them with the technical data (see subsection 3.3).
Aluminum cylinder block with wet liners
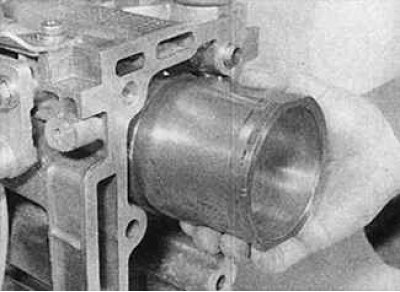
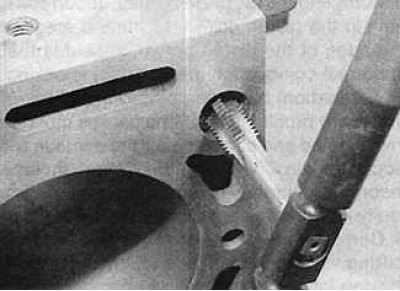
5. Remove the cylinder liner retainer, then using a hard wooden drift, tap the liner out of the inside of the cylinder block. Remove the liners from the top of the cylinder block and mark them.
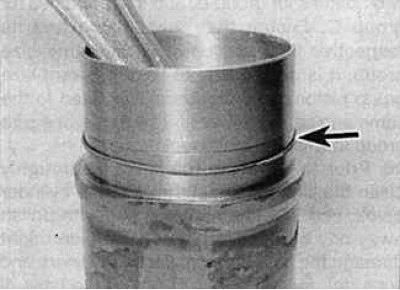
6. Remove the o-ring from each sleeve (indicated by an arrow) round section.
7. Check each sleeve for wear and damage.
8. If you have a measuring tool, measure the diameter of the sleeve at the top (under the wear step), in the center and at the base parallel to the axis of the crankshaft.
9. Then take the same measurements perpendicular to the crankshaft axis and compare them with the technical data (see subsection 3.3).
10. Repeat the measurement procedure on the remaining sleeves.
11. If the wear of the sleeve exceeds the permissible values or there are other damages, it is necessary to replace the sleeves.
12. New liners are supplied complete with pistons and piston rings.
13. Pistons and liners are divided into three size groups. The size group of each piston is indicated by the symbol (A, B or C), printed on the top of the piston, and the size group of each sleeve is indicated by notches (1 to 3) on the upper end of the sleeve; one notch for group A, two notches for group B, three notches for group C. Check that each piston and corresponding sleeve are in the same size group. It is not allowed to use a piston of one size group and a sleeve of another size group.
14. Before installing the liners, thoroughly clean the liner mating surfaces in the cylinder block and, using fine sandpaper, sand off any nicks or sharp edges that could damage the O-ring. Clean the sleeves and wipe them dry. Install a new O-ring on the sleeve. To facilitate the installation of the O-ring, lubricate it and the outer surface of the sleeve with engine oil.
15. If sleeves previously removed from the engine are installed, install them in their places in accordance with the previously made markings. Insert each sleeve into the cylinder block and push it in by hand until it stops. Using a hammer and a block of wood, fully install the sleeve into place.
16. After installing all liners, use a ruler and feeler gauge to check that the protrusion of each liner above the cylinder block is within specifications (see subsection 3.3).
17. When installing new liners, it is allowed to change their places in order to match their protrusion from the engine block.
18. If the liner protrusion is out of specification, contact an engine rebuilder.