



Table of contents: Inspection 🠇 Renewal 🠇
Inspection
1. If improved access is required, raise the front of the car and support it securely on axle stands (see "Jacking and vehicle support").
2. Check the mounting rubber to see if it is cracked, hardened or separated from the metal at any point; renew the mounting if any such damage or deterioration is evident.
3. Check that all'the mounting's fasteners are securely tightened; use a torque wrench to check if possible.
4. Using a large screwdriver or a crowbar, check for wear in the mounting by carefully levering against it to check for free play. Where this is not possible, enlist the aid of an assistant to move the engine/transmission unit back and forth, or from side to side, while you watch the mounting. While some free play is to be expected even from new components, excessive wear should be obvious. If excessive free play is found, check first that the fasteners are correctly secured, then renew any worn components as described below.
Renewal
Right-hand mounting
5. Disconnect the battery negative terminal (refer to "Disconnecting the battery").
6. Place a jack beneath the engine, with a block of wood on the jack head. Raise the jack until it is supporting the weight of the engine.
7. Slacken and remove the three nuts securing the right-hand engine mounting upper bracket to the bracket on the cylinder block. Remove the nut securing the bracket to the mounting rubber, and lift off the bracket (see illustrations).
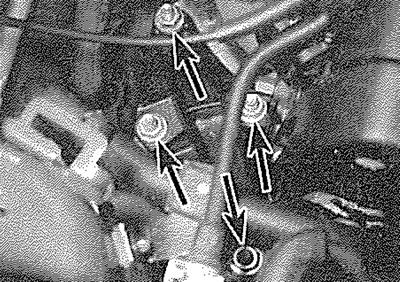
19.7a. Undo the retaining nuts (arrowed)...
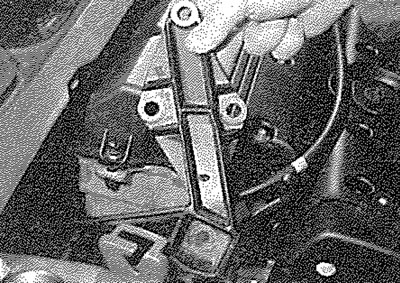
19.7b.... and remove the right-hand engine/transmission mounting bracket (diesel engine shown)
8. On 954 cc and 1124 cc models, slacken and remove the nut and bolt securing the rubber mounting to the vehicle body, and remove it from the vehicle.
9. On all other models, lift the buffer plate off the mounting rubber stud, then unscrew the nut and remove the mounting rubber from the body.
10. Check carefully for signs of wear or damage on all components, and renew them where necessary.
11. On reassembly, securely tighten the nut (or nut and bolt, as applicable) securing the mounting rubber to the body.
12. Refit the buffer plate (where fitted) to the mounting rubber stud, then install the mounting bracket.
13. Tighten the mounting bracket retaining nuts to the specified torque setting.
14. Remove the jack from underneath the engine, and reconnect the battery negative lead.
Left-hand mounting
15. Remove the battery as described in Chapter 5A.
16. Place a jack beneath the transmission, with a block of wood on the jack head. Raise the jack until it is supporting the weight of the transmission.
17. Slacken and remove the mounting rubber's centre nut, and the two bolts securing the bracket to the body. Remove the mounting rubber, and slide the spacer off the mounting bracket stud (see illustrations).
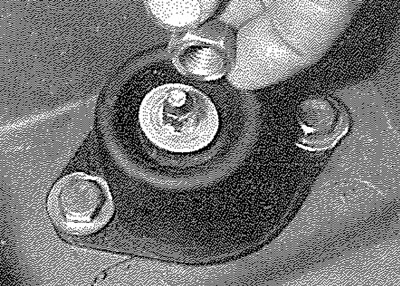
19.17a. Remove the left-hand engine/transmission mounting centre nut and washer
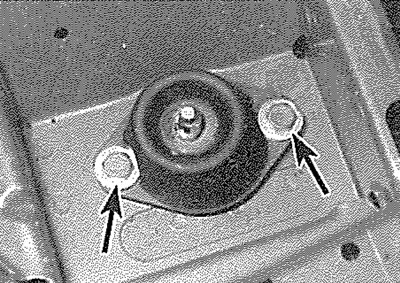
19.17b. Undo the two retaining bolts (arrowed)...
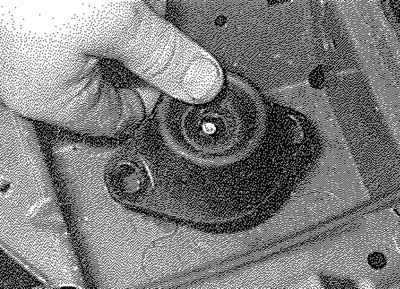
19.17c.... then lift off the mounting...
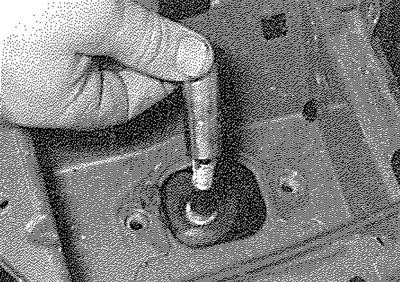
19.17d.... and recover the spacer
18. Where necessary, unscrew the nuts and remove the bracket from the transmission.
(Article republished from the website www.PeugeotBook.ru)
19. Check carefully for signs of wear or damage on all components, and renew them where necessary.
20. Refit the bracket to the transmission, tightening its mounting nuts to the specified torque.
21. Refit the spacer, then fit the mounting to the body, and tighten its retaining bolts to the specified torque. Refit the mounting centre nut, and tighten it to the specified torque.
22. Remove the jack from underneath the transmission, then refit the battery as described in Chapter 5A.
Rear mounting
23. If not already done, firmly apply the handbrake, then jack up the front of the vehicle and support it securely on axle stands (see "Jacking and vehicle support").
24. Unscrew and remove the bolt securing the rear mounting link to the mounting on the rear of the transmission.
25. Remove the bolt securing the rear mounting link to the bracket on the underbody. Withdraw the link.
26. Unbolt the mounting from the rear of the transmission.
27. Check carefully for signs of wear or damage on all components, and renew them where necessary.
28. On reassembly, fit the rear mounting assembly to the rear of the transmission, and tighten its retaining bolts to the specified torque.
29. Refit the rear mounting link, and tighten both its bolts to the specified torque.
30. Lower the vehicle to the ground.