
English Русский
Български
Беларускі
Український
Српски
Hrvatski
Română
Polski
Slovenský
Magyar
Bookmark Articles Sitemap Contacts
Company Hyundai Company Opel Company Skoda Company Kia Company Mitsubishi Company LADA Company Audi
PeugeotBook.ru


Series 100   Series 200   Series 300   400-500   Series 600   Crossovers   Others
 
Peugeot 106 (1991-2003)

Fuel pump — removal and refitting (Peugeot 106)

  • Main
  • 10X
  • Peugeot 106 (1991-2003)
  • Power unit
  • Single point injection (petrol)
  • Fuel pump — removal and refitting
0
Table of contents: Removal 🠇 Refitting 🠇
Note: Refer to the warning note in Section 1 before proceeding.


Removal


1. Disconnect the battery negative terminal (refer to "Disconnecting the battery").

2. For access to the fuel pump, fold the rear seat cushion forwards.

3. Using a screwdriver, carefully prise the plastic access cover from the floor to expose the fuel pump. Where two access covers are fitted, the pump is located under the righthand cover.

4. Disconnect the wiring connector from the fuel pump (see illustration). Tape the connector to the vehicle body, to prevent it disappearing behind the tank.
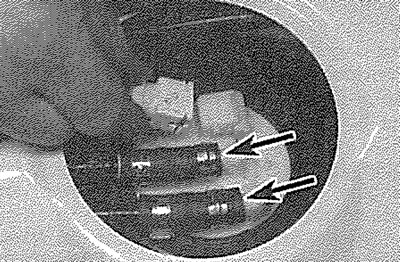
9.4. Disconnect the wiring connector, then release the fuel feed and return hoses (arrowed) from…

9.4. Disconnect the wiring connector, then release the fuel feed and return hoses (arrowed) from the fuel pump


5. Mark the hoses for identification purposes, then slacken the feed and return hose retaining clips. Where crimped-type hose clips are fitted, cut the clips and discard them; replace them with standard worm-drive hose clips when refitting. Disconnect both hoses from the top of the pump and plug the hose ends (see illustration 9.4).

6. Noting the alignment marks on the tank, pump cover and the locking ring, unscrew the ring and remove it from the tank. This is best accomplished by using a screwdriver on the raised ribs of the locking ring. Carefully tap the screwdriver to turn the ring anti-clockwise until it can be unscrewed by hand (see illustration).
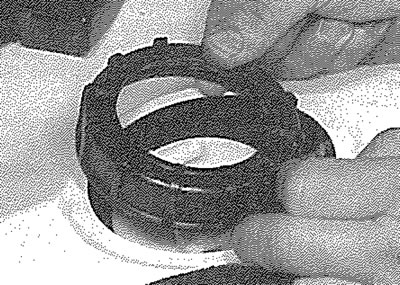


9.6. Unscrew the locking ring...

9.6. Unscrew the locking ring...


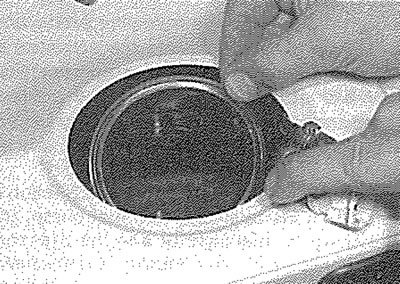
7. Carefully lift the fuel pump assembly out of the fuel tank, taking great care not to damage the filter, or to spill fuel onto the interior of the vehicle. Recover the rubber sealing ring and discard it; a new one must be used on refitting (see illustrations).
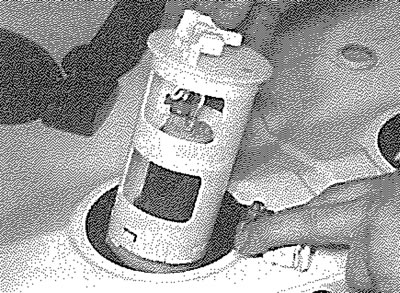
9.7a.... then lift out the fuel pump...
9.7a.... then lift out the fuel pump...


9.7b.... and recover the rubber sealing ring

9.7b.... and recover the rubber sealing ring


8. Note that the fuel pump assembly is only available as a complete assembly; no individual components are available separately.

Refitting


9. Ensure that the fuel pump pick-up filter is clean and free of debris. Fit a new sealing ring to the top of the fuel tank.

(Source can be seen at www.PEUGEOTBOOK.ru)

10. Carefully manoeuvre the pump assembly into the fuel tank, aligning the mark noted on removal.

11. Refit the locking ring, tightening it so that its mark is correctly aligned with the line on the fuel tank, as noted prior to removal (see illustration).
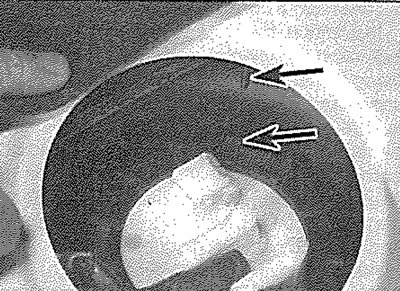
9.11. When refitting, tighten the locking ring until it is correctly aligned with the fuel tank…

9.11. When refitting, tighten the locking ring until it is correctly aligned with the fuel tank mark (arrowed)


12. Reconnect the feed and return hoses to the top of the fuel pump, using the marks made on removal to ensure that they are correctly reconnected and securely tighten their retaining clips.

13. Reconnect the pump wiring connector.

14. Reconnect the battery negative terminal and start the engine. Check the fuel pump feed and return hose unions for signs of leakage.

15. If all is well, refit the plastic access cover and fold back the rear seat cushion.
This article is available at russian, bulgarian, belarusian, ukrainian, serbian, croatian, romanian, polish, slovak, hungarian
Article reviewed by editor: Matveev Demid
Share information:
Previous
Peugeot 106: Single point injection (petrol)
Next

Fuel system — depressurisation
Fuel injection systems — general information
Unleaded petrol — general information and usage
Accelerator cable — removal, refitting and adjustment
General information and precautions
Fuel gauge sender unit — removal and refitting
Throttle body — removal and refitting
Fuel injection system — testing and adjustment
Bosch Monopoint system components — removal and refitting
Magneti Marelli system components — removal and refitting
See similar information for other Peugeot models

➨ Fuel lift pump (low pressure) Peugeot 207 (2006-2014)
➨ Fuel injection pump (Lucas CAV/Roto-Diesel) — checking and… Peugeot 305 (1977-1989)
➨ Removal and installation the high pressure fuel pump Peugeot 405 (1987-1997)
➨ High pressure fuel pump — removal, installation and adjustment Peugeot 605 (1989-2000)
➨ High-pressure fuel pump — removal and installation Peugeot Partner I (1996-2008)
Link to this article in different formats
Comments and feedback from visitors
No comments yet


Add two numbers 33 + 34


Peugeot 106 (1991-2003) 
  • General information
  • Introduction to manual
  • Weekly checks
  • Maintenance (petrol)
  • Maintenance (diesel)
  • Troubleshooting
  • Power unit
  • Petrol engines
  • Diesel engines
  • Engine overhaul
  • Cooling and heating
  • Fuel system (carburetor)
  • Single point injection (petrol)
  • Multipoint injection (petrol)
  • Fuel system (diesel)
  • Emission control system
  • Engine electrical equipment
  • Ignition system
  • Diesel heating
  • Transmission
  • Clutch
  • Manual gearbox
  • Automatic gearbox
  • Drive shafts
  • Chassis, running gear
  • Brake system
  • Car suspension
  • Steering
  • Body and interior
  • Exterior (external elements)
  • Interior (internal elements)
  • Doors, locks and windows
  • Electrical equipment
  • Equipment and devices
  • Electrical diagrams
PeugeotBook.ru © 2018–2026 | Mobile version | Sitemap: EN BG BY UA RS HR RO PL SK HU | Write message | Site search | Add to bookmarks | Peugeot owners
106 (1991-2003) | 206 (1998-2012) | 207 (2006-2014) | 305 (1977-1989) | 306 (1993-2002) | 307 (2001-2008) | 405 (1987-1997) | 406 (1995-2004) | 605 (1989-2000) | Partner-I (1996-2008) | Eurovans-807 (2002-2014) | Eurovans-806 (1994-2002) | J5 (1981-1993) |
Cookies are used to ensure the correct display of pages on the site.