



Table of contents: Removal 🠇 Cars with air conditioning 🠇 Cars without air conditioning 🠇 All cars 🠇 Installation 🠇
Removal
Disconnect the battery.
Remove the decorative engine cover.
Raise and secure the vehicle with the wheels off the ground.
Remove the following components:
- protective shield under the engine;
- right front fender liner;
- drive belt for attachments.
Remove the dual air metering unit.
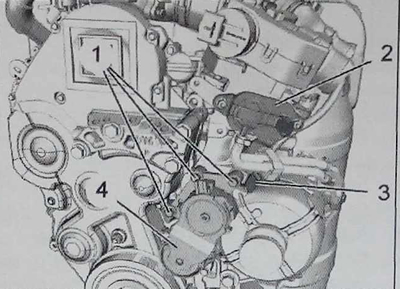
Remove and move aside the exhaust gas pressure sensor (2).
Remove the bracket (3).
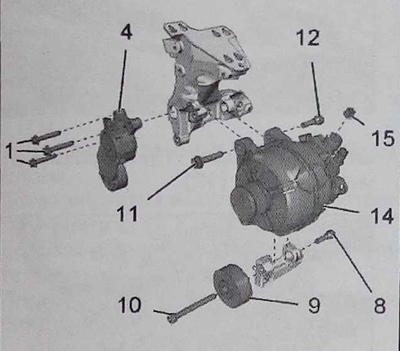
Loosen the bolts (1) and remove the tension roller (4).
Cars with air conditioning
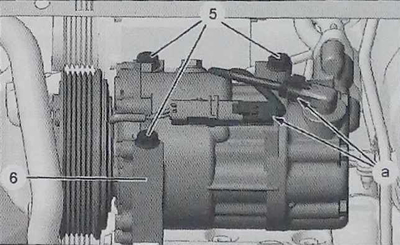
Disconnect the connectors in area "a".
Loosen the bolts (5), move aside and secure the compressor (6) (without disconnecting the tubes).
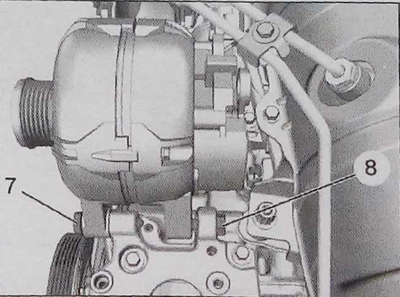
Loosen the bolt (8) three turns.
Remove the bolt (7).
Cars without air conditioning
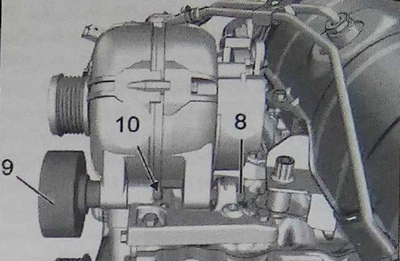
Note: Remove the idler pulley cap to gain access to the idler pulley mounting bolt.
Loosen the bolt (8) three turns.
Loosen the bolt (10) securing the idler pulley (9).
All cars
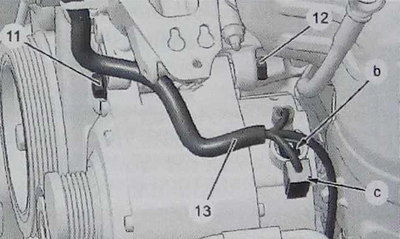
Remove the generator power supply cover (in area "b").
Disconnect the connector in area "c" and the generator power supply wire (in area "b").
Disconnect and move aside the wiring harness (13).
Loosen the bolt (12) three turns. Remove the bolt (11).
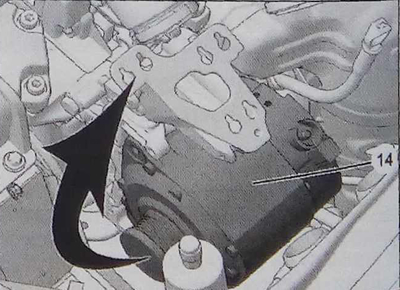
Remove the generator (14) from the top (as shown by the arrow).
Installation
Caution: Check the free rotation of the idler pulleys (no play or jamming), replace faulty parts.
Apply fastening paste with index E3 to the idler pulley bolt.
Cars with air conditioning
Install the generator (14) with a set of slotted rings and bolts (8) and (12) (tighten to 49 Nm). Tighten the bolt (7) to a torque of 55 Nm.
Tighten the bolt (11) to a torque of 41 Nm. Install the cooling system compressor (6).
Tighten the bolts (5) to a torque of 24 Nm.
Cars without air conditioning
Install the generator (14) with a set of slotted rings and bolts (8) and (12) (tighten to 49 Nm). Install the idler pulley (9).
Tighten bolt (10) to 45 Nm. Tighten bolt (11) to 41 Nm.
All cars
Install the tension roller (4). Tighten the bolts (1) to 21 Nm. Install the remaining parts in reverse order.
Tighten the nut (15) to 16 Nm.