
English Русский
Български
Беларускі
Український
Српски
Hrvatski
Română
Polski
Slovenský
Magyar
Bookmark Articles Sitemap Contacts
Company Hyundai Company Opel Company Skoda Company Kia Company Mitsubishi Company LADA Company Audi
PeugeotBook.ru


Series 100   Series 200   Series 300   400-500   Series 600   Crossovers   Others
 
Peugeot 605 (1989-2000)

Power unit — installation (Peugeot 605)

  • Main
  • 60X
  • Peugeot 605 (1989-2000)
  • Power unit
  • Petrol engines «ES9J4»
  • Power unit — installation
0
The power unit is installed in the reverse order of removal, taking into account the following:

41. Always replace self-locking nuts with new ones.

42. The main gear seals must be replaced after each dismantling.

43. Place the tip 38 on the speedometer shaft drive, having previously applied a small amount of PCAS SPAGRAM grease to the shaft (see illustration).
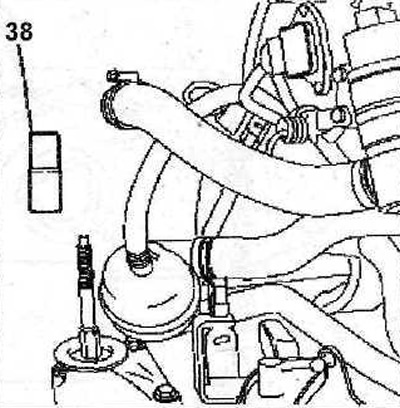
7.43 Place tip 38 on the speedometer shaft drive

7.43 Place tip 38 on the speedometer shaft drive


44. Install the power unit.

45. Install the right support 33 of the engine mount, tighten the bolts 39, 40 and 41 of the support with a force of 45 Nm (see illustration).
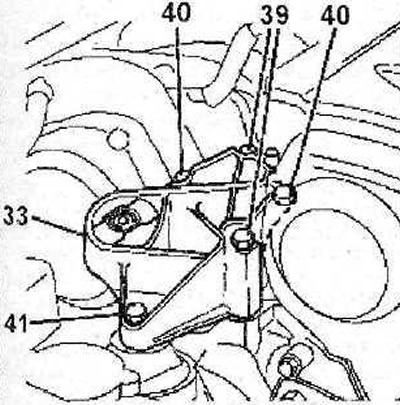
7.45 Install the right support 33 of the engine mount, tighten the bolts 39, 40 and 41 of the…

7.45 Install the right support 33 of the engine mount, tighten the bolts 39, 40 and 41 of the support with a force of 45 Nm


46. Install bracket 36, tighten its mounting bolts 35 with a force of 20 Nm (see illustration).
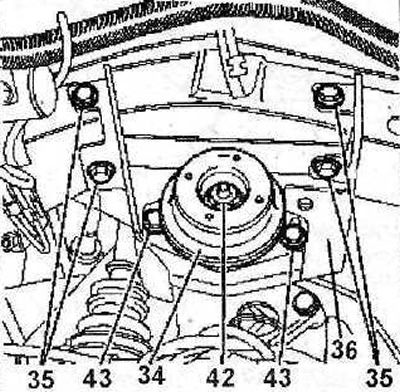


7.46 Install bracket 36, tighten its mounting bolts 35 with a force of 20 Nm

7.46 Install bracket 36, tighten its mounting bolts 35 with a force of 20 Nm


47. Install support 34, screw in central nut 42 and bolts 43 for its fastening (see illustration 7.46), then lower the power block.

48. Tighten the central nut 42 of the support with a force of 65 Nm, having previously lubricated it with LOCTITE FRENETANCH sealant, and tighten the boots 43 with a force of 32 Nm (see illustration 7.46).

49. Connect the reaction rod 32, tighten the bolts 44 and 45 of its fastening with a force of 50 Nm (see illustration).
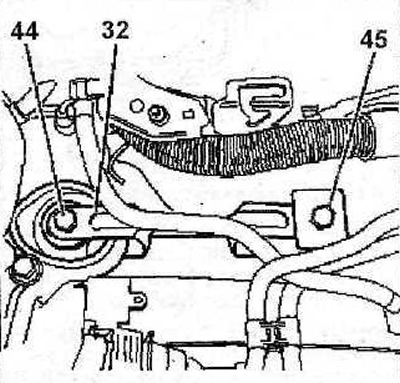
7.49 Connect the reaction rod 32, tighten the bolts 44 and 45 of its fastening with a force of 50 Nm

7.49 Connect the reaction rod 32, tighten the bolts 44 and 45 of its fastening with a force of 50 Nm


50. Connect the reaction rod 28, tighten bolt 46 with a force of 55 Nm, and bolt 47 of its fastening with a force of 82.5 Nm (see illustration).
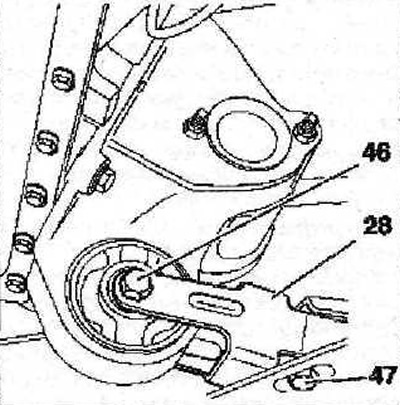


7.50 Connect the reaction rod 28, tighten bolt 46 with a force of 55 Nm, and bolt 47 of its…

7.50 Connect the reaction rod 28, tighten bolt 46 with a force of 55 Nm, and bolt 47 of its fastening with a force of 82.5 Nm


51. Install the drive shafts (see the relevant chapter). Tighten the wheel hub nuts to 325 Nm.

52. Install the belt pulley in its seat on the crankshaft, tighten its mounting bolts with a force of 25 Nm.

53. Install the air conditioner compressor 25 together with the bracket on its mounting place, tighten the mounting bolts 48 with a force of 39 Nm (see illustration).

Information posted on the website (PeugeotBook.ru)
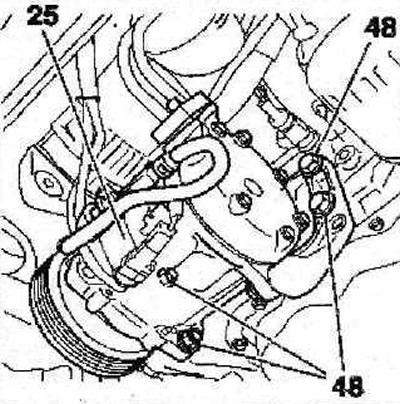
7.53 Install the air conditioner compressor 25 together with the bracket on its mounting place

7.53 Install the air conditioner compressor 25 together with the bracket on its mounting place


Attention! All work related to the air conditioner should be entrusted to a specialized workshop. Do not open the refrigerant circulation system yourself - risk of frostbite!


54. Install the power steering pump.

55. Install the power steering pump pulley.

56. Tighten the power steering pump mounting bolts to 20 Nm.

57. After completing the work, fill in fresh transmission oil (if it merged), as well as fresh motor oil (if it merged).

58. Fill with coolant and bleed air from the cooling system.
This article is available at russian, bulgarian, belarusian, ukrainian, serbian, croatian, romanian, polish, slovak, hungarian
Article reviewed by editor: Nikonova Veronica
Share information:
Previous
Peugeot 605: Petrol engines «ES9J4»
Next

Power Block — Removal
Cylinder head — installation
Cylinder head — removal
Rear Crankshaft Oil Seal (Flywheel Side) — Replacement
Front crankshaft oil seal (timing belt side) — replacement
Engine lubrication system — general information
Oil pump — removal
Oil pump — installation
See similar information for other Peugeot models

➨ Power steering fluid level Peugeot 106 (1991-2003)
➨ Executive mechanism (power steering electric pump unit) Peugeot 207 (2006-2014)
➨ Removal and installation of the power unit Peugeot 306 (1993-2002)
➨ Removal and installation of the power unit Peugeot 405 (1987-1997)
➨ Removal and installation of the power unit Peugeot J5 (1981-1993)
Link to this article in different formats
Comments and feedback from visitors
No comments yet


Add two numbers 20 + 37


Peugeot 605 (1989-2000) 
  • General information
  • User manual
  • Maintenance
  • Troubleshooting
  • Power unit
  • Petrol engines «XU»
  • Petrol engines «ZPJ»
  • Petrol engines «ES9J4»
  • Diesel engines
  • Cooling and heating
  • Fuel system
  • Exhaust system
  • Transmission
  • Clutch
  • Mechanical gearbox
  • Automatic gearbox
  • Chassis, running gear
  • Brake system
  • Car suspension
  • Steering
  • Body and interior
  • Body elements
  • Electrical equipment
  • Power devices
  • Electrical circuits
PeugeotBook.ru © 2018–2026 | Mobile version | Sitemap: EN BG BY UA RS HR RO PL SK HU | Write message | Site search | Add to bookmarks | Peugeot owners
106 (1991-2003) | 206 (1998-2012) | 207 (2006-2014) | 305 (1977-1989) | 306 (1993-2002) | 307 (2001-2008) | 405 (1987-1997) | 406 (1995-2004) | 605 (1989-2000) | Partner-I (1996-2008) | Eurovans-807 (2002-2014) | Eurovans-806 (1994-2002) | J5 (1981-1993) |
Cookies are used to ensure the correct display of pages on the site.