
English Русский
Български
Беларускі
Український
Српски
Hrvatski
Română
Polski
Slovenský
Magyar
Bookmark Articles Sitemap Contacts
Company Hyundai Company Opel Company Skoda Company Kia Company Mitsubishi Company LADA Company Audi
PeugeotBook.ru


Series 100   Series 200   Series 300   400-500   Series 600   Crossovers   Others
 
Partner I (1996-2008) Peugeot 807 (2002-2014) Peugeot 806 (1994-2002) Peugeot J5 (1981-1993)

Front suspension strut repair (Peugeot Partner I)

  • Main
  • Пежо
  • Partner I (1996-2008)
  • Chassis, running gear
  • Car suspension
  • Front suspension strut repair
0
Caution: Before disassembling the front suspension strut, you must obtain the appropriate tool to hold the spring in a compressed state. Adjustable spring compressors are available and recommended for this procedure (spring compressors), providing rigid fixation relative to the spring. Any attempt to disassemble the rack without such a tool may result in damage to the vehicle or personal injury.


1. After removing the rack from the car, clean it from any dirt that has stuck to it. Clamp the stand in a vice in a vertical position.

2. Install the pullers on the spring (if you haven't done so yet). Use pullers that can be firmly fixed on the spring (usually with a small clamping bolt). Any other type of fixture may jump or slide off the spring as it tightens. Tighten the pullers just enough to remove the load from the spring plate.

3. Remove the protective cover, then unscrew the piston rod nut while holding the piston rod with a suitable internal Allen key (figure 5.3). Please note that you will need a new nut for assembly.
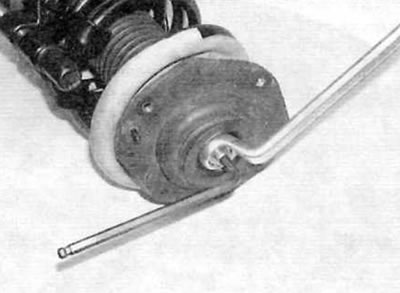
Figure 5.3. Loosen the strut piston rod nut while holding the piston rod with a suitable Allen key

Figure 5.3. Loosen the strut piston rod nut while holding the piston rod with a suitable Allen key


4. Remove the nut, washer, then remove the spacer ring, backing plate, bearing, upper spring plate and flat washer. Remove the coil spring, then remove the piston dust boot and the rubber dynamic deflection limiter (figure 5.4). The spring can be left in a compressed state, ready to be installed on the suspension strut. If you are going to install a new spring, you should carefully remove the spring pullers from the "old" spring.
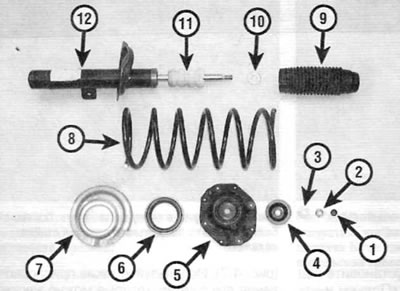
Figure 5.4. Elements of the front suspension strut

Figure 5.4. Elements of the front suspension strut
1. Protective cap
2. Piston rod nut
3. Washer
4. Ring
5. Support plate
6. Bearing
7. Upper spring plate
8. Coil spring
9. Piston dust cover
10. Flat washer
11. Dynamic deflection limiter
12. Rack housing


5. Now that the rack is completely disassembled, inspect all components for wear, damage, and deformation, and check the smooth operation of the bearing. Replace the necessary elements.

6. Inspect the strut housing for signs of fluid leakage or damage. Inspect the strut piston along its entire length for signs of pitting. Check the operation of the rack. Holding the shock absorber vertical, check its operation by moving the piston rod through its full stroke and then making short strokes of 50-100 mm. In both cases, the resistance should be smooth and consistent. If you feel uneven resistance or jerking, or if there are visible signs of wear or damage to the shock absorber, it needs to be replaced.


7. If there is any doubt about the condition of the spring, carefully remove the spring compressors and inspect the spring for deformation and signs of cracks. Replace the spring if it is damaged or deformed.

8. Follow the accompanying photographs to assemble the suspension strut. Follow the prescribed sequence and strictly adhere to the captions under the figures (figure 5.8, a-l).
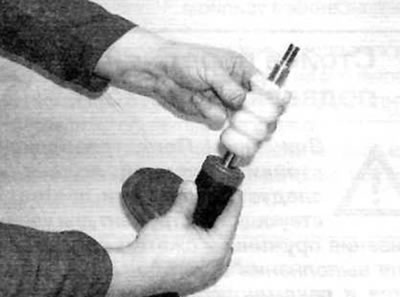
Figure 5.8, a. Extend the piston rod as far as possible and install the dynamic deflection limiter
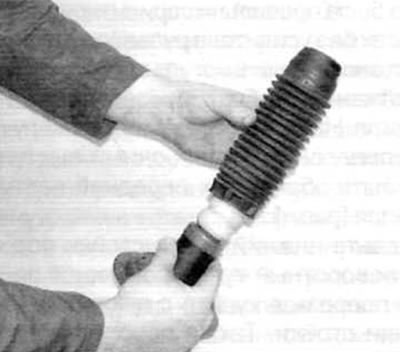
Figure 5.8, a. Extend the piston rod as far as possible and install the dynamic deflection limiter


5.8, b. Install the piston dust cover...
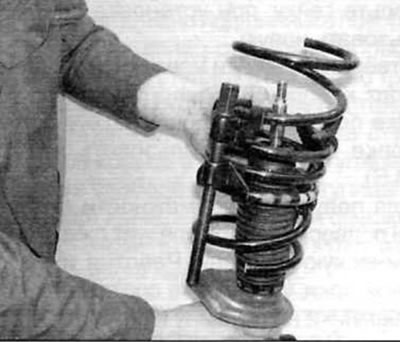
5.8, b. Install the piston dust cover...


5.8, in....compressed spring...
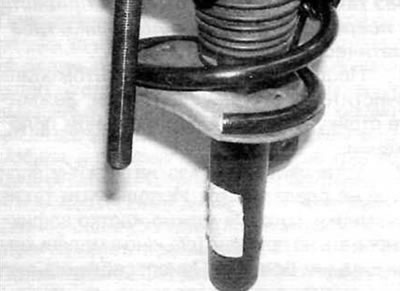
5.8, in....compressed spring...


Figure 5.8, g....making sure that the end of the lower turn is correctly positioned on the lower…

Figure 5.8, g....making sure that the end of the lower turn is correctly positioned on the lower plate
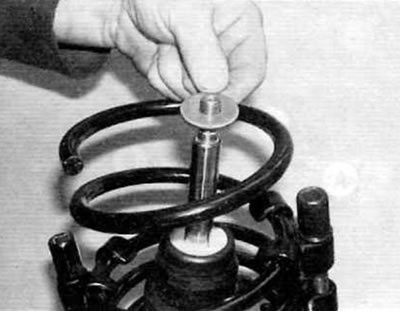

5.8, d. Install flat washer...
5.8, d. Install flat washer...


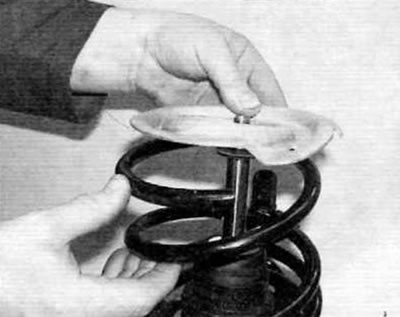
Figure 5.8, e....the upper plate of the spring...
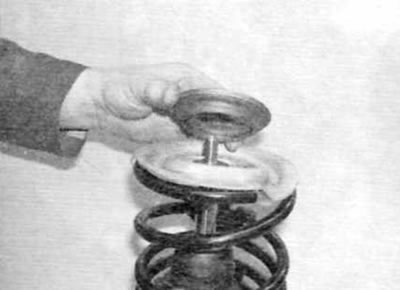
Figure 5.8, e....the upper plate of the spring...


Figure 5.8, f....bearing...
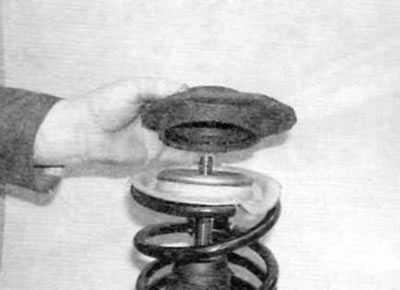
Figure 5.8, f....bearing...


Figure 5.8, z....and the support plate
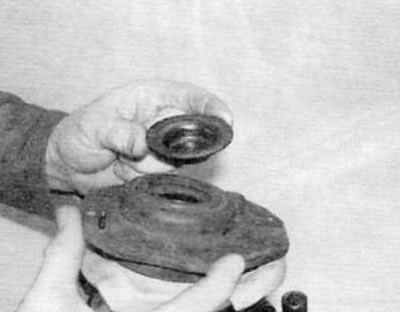
Figure 5.8, z....and the support plate


Figure 5.8, i. Install the spacer ring on the support plate...
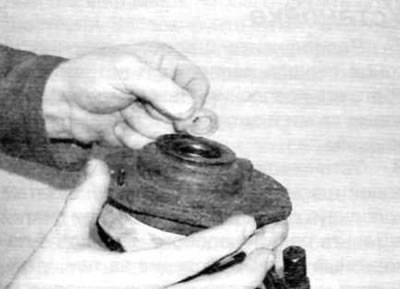
Figure 5.8, i. Install the spacer ring on the support plate...


Figure 5.8, k....install the upper washer...
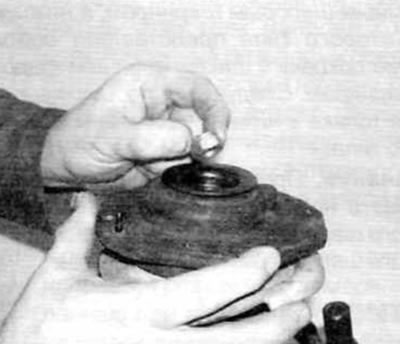
Figure 5.8, k....install the upper washer...


Figure 5.8, l....and then screw on and tighten the piston rod nut

Figure 5.8, l....and then screw on and tighten the piston rod nut


9. Once assembly is complete, install the suspension strut onto the vehicle as described in paragraph 4.
This article is available at russian, bulgarian, belarusian, ukrainian, serbian, croatian, romanian, polish, slovak, hungarian
Article reviewed by editor: Nikonova Veronica
Share information:
Previous
Partner I: Car suspension
Next

Front suspension strut — removal and installation
Front hub bearings and steering knuckle — replacement
Steering knuckle assembly — removal and installation
General information about suspension and steering
Suspension and steering specifications
Lower control arm of the front suspension — removal, repair and…
Front lower control arm ball joint — removal and installation
Front anti-roll bar — removal and installation
Front Anti-Roll Bar — removal and installation
Front subframe — removal and installation
See similar information for other Peugeot models

➨ Front suspension strut — removal, overhaul and refitting Peugeot 106 (1991-2003)
➨ Features of front suspension wheel bearings Peugeot 207 (2006-2014)
➨ Front suspension strut — bulkhead Peugeot 305 (1977-1989)
➨ Front suspension anti-roll bar linkage Peugeot 406 (1995-2004)
➨ Front suspension shock absorber strut — disassembly Peugeot 605 (1989-2000)
Link to this article in different formats
Comments and feedback from visitors
No comments yet


Add two numbers 18 + 42


Partner I (1996-2008) 
  • General information
  • Introduction to the guide
  • Faults en route
  • Weekly checks
  • User manual
  • Maintenance (petrol)
  • Maintenance (diesel)
  • Power unit
  • Petrol engines
  • Diesel engines «XUD»
  • Diesel engines «DW»
  • Overhaul of petrol engines
  • Overhaul of diesel engines
  • Cooling and heating
  • Power and exhaust (petrol)
  • Power and exhaust (XUD diesels)
  • Power and exhaust (DW diesels)
  • Emission reduction
  • Starting and charging system
  • Transmission
  • Clutch
  • Mechanical gearbox
  • Drive shafts
  • Chassis, running gear
  • Brake system
  • Car suspension
  • Steering
  • Body and interior
  • Exterior (external elements)
  • Interior (internal elements)
  • Doors, locks and windows
  • Electrical equipment
  • Equipment and devices
  • Electrical circuits
Peugeot 807 (2002-2014) 
  • General information
  • Operating instructions
  • Maintenance
  • Troubleshooting
  • Power unit
  • Gasoline engines
  • Diesel engines
  • Cooling and heating
  • Fuel injection (petrol)
  • Fuel system (diesel)
  • Fuel system
  • Exhaust system
  • Ignition system
  • Transmission
  • Clutch
  • Manual gearbox
  • Automatic gearbox
  • Chassis, running gear
  • Brake system
  • Car suspension
  • Steering system
  • Body and interior
  • Exterior (external elements)
  • Interior (internal elements)
  • Electrical equipment
  • Power devices
  • Electrical circuits
Peugeot 806 (1994-2002) 
  • General information
  • User manual
  • Maintenance
  • Power unit
  • Petrol engines
  • Diesel engines
  • Lubrication system
  • Cooling system
  • Fuel injection (petrol)
  • Fuel system (diesel)
  • Ignition and exhaust systems
  • ECM Bosch Motronic MP 3.2
  • ECM Magneti-Marelli (MM)
  • Transmission
  • Clutch
  • Mechanical gearbox
  • Chassis, running gear
  • Brake system
  • Car suspension
  • Steering
  • Electrical equipment
  • Equipment and devices
  • Electrical circuits
Peugeot J5 (1981-1993) 
  • General information
  • Introduction to manual
  • Specifications
  • Gasoline engine
  • Engine repair
  • Lubrication system
  • Cooling system
  • Fuel system
  • Ignition system
  • Diesel engine
  • Engine repair (DB9)
  • Lubrication system (DB9)
  • Cooling system (DB9)
  • Fuel injection (DB9)
  • Engine repair (U25)
  • Lubrication system (U25)
  • Cooling system (U25)
  • Fuel injection (U25)
  • Transmission
  • Clutch
  • Gearbox
  • Drive shafts
  • Chassis, running gear
  • Steering system
  • Car suspension
  • Brake system
  • Electrical equipment
  • Power devices
  • Electrical circuits
PeugeotBook.ru © 2018–2026 | Mobile version | Sitemap: EN BG BY UA RS HR RO PL SK HU | Write message | Site search | Add to bookmarks | Peugeot owners
106 (1991-2003) | 206 (1998-2012) | 207 (2006-2014) | 305 (1977-1989) | 306 (1993-2002) | 307 (2001-2008) | 405 (1987-1997) | 406 (1995-2004) | 605 (1989-2000) | Partner-I (1996-2008) | Eurovans-807 (2002-2014) | Eurovans-806 (1994-2002) | J5 (1981-1993) |
Cookies are used to ensure the correct display of pages on the site.