



Table of contents: Removal 🠇 Installation 🠇
Note: Two different types of lower control arms may be used. The Type 1 lower control arm is a stamped steel structure with a removable ball joint, while the Type 2 lower control arm is a steel forging with a fixed ball joint. The following procedures apply to the Type I lower control arm only.
Note: A new ball joint clamp bolt nut and new ball joint mounting nuts must be used during installation.
Removal
1. Place wheel chocks under the rear wheels. Raise the front of the vehicle and support it securely (see "Lifting and installing the car on supports"). Remove the corresponding front wheel.
2. Loosen the nut, then remove the lower control arm ball joint clamp bolt from the steering knuckle. Throw away the nut; when installing, you should use a new one.
3. Drive a small chisel into the slot on the steering knuckle to widen the slot slightly to allow removal of the ball joint pin. Pull the lower control arm down to release the ball joint pin from the steering knuckle. To do this, you will need to use a long rod and a wooden block, which is placed under the front subframe. Secure the rod to the suspension arm as shown. It is preferable to use a chain or, alternatively, a strong clamp or cable. Press the outer edge of the rod down to release the ball joint from the steering knuckle.
4. After releasing the ball joint, remove the protective plate that is installed on the ball joint pin.
5. Unscrew the three nuts, then remove the ball joint mounting bolts and remove the joint from the lower arm (figure 7.5, a, 6). Throw away the nuts; when installing, new ones should be used.
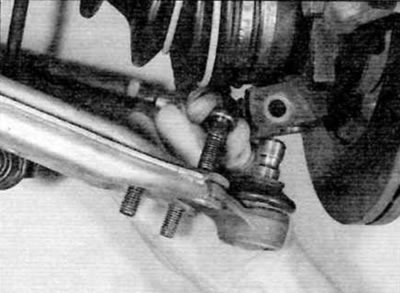
Figure 7.5, a. Remove three bolts...
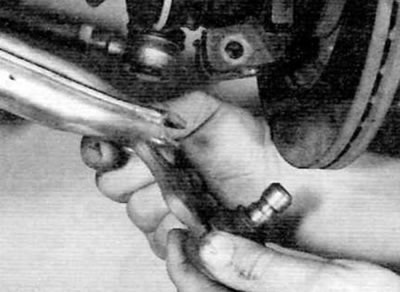
Figure 7.5, b....and remove the lower arm ball joint
6. Make sure that the lower control arm ball joint moves freely, without any signs of binding. Inspect the ball joint dust boot for signs of deterioration, cuts or cracks. Replace worn or damaged parts if necessary.
Installation
7. Position the ball joint on the end of the control arm and insert the three mounting bolts. Thread new nuts onto the bolts and tighten them to the specified torque.
8. Install the protective plate onto the lower control arm ball joint, then, using the same method as removal, insert the ball joint pin into the steering knuckle, making sure that the protrusion on the protective plate fits correctly into the clamp slot. Insert the ball joint clamp bolt (from the rear of the steering knuckle), and then screw on the new nut and tighten it to the specified torque.
Source of the article is posted at peugeotbook.ru
9. Install the wheel, lower the vehicle and tighten the wheel bolts to the specified torque.