



Note: A new hub carrier-to-lower arm balljoint clamp nut must be used on refitting.
Removal
1. Chock the rear wheels then jack up the front of the vehicle and support it on axle stands (see "Jacking and vehicle support"). Remove the appropriate front roadwheel.
2. On models where the anti-roll bar is mounted onto the suspension lower arm, remove the two screws and washers securing the anti-roll bar end clamp to the lower arm. Remove the clamp and the rubber bush.
3. Undo the nut and withdraw the hub carrier-to-lower arm clamp bolt, noting which way round it is fitted.
4. Using a suitable metal bar, lever the lower arm downwards just enough to release the balljoint taper from the lower arm. If the taper is a tight fit in the hub carrier, use a large flat-bladed screwdriver to carefully open up the clamp a little.
5. Working inside the passenger compartment, release the securing clips (and the throttle pedal stop, where applicable) and lift the carpet and sound insulation panels for access to the two lower arm rear bracket securing nuts. Where applicable, unbolt the bonnet release iever to enable the carpet panel to be released. On certain models, it may be necessary to pull the foam sealing panel from the floor for access to the nuts. Unscrew the securing nuts (see illustrations).
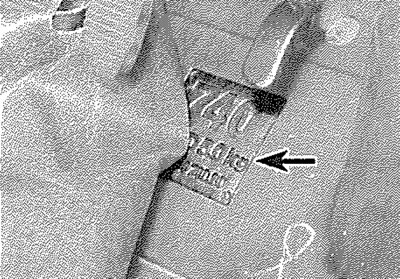
4.5a. Lift the carpet and the insulation panel (arrowed)...
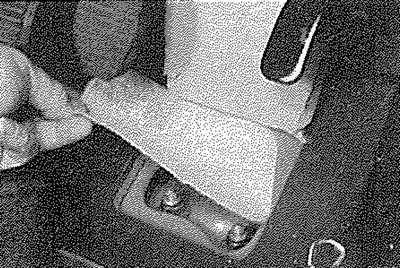
4.5b.... and pull off the foam sealing panel for access to the lower arm bracket securing nuts
6. Working under the vehicle, unscrew the nut and remove the through-bolt securing the front of the lower arm to the bracket on the body (see illustration).
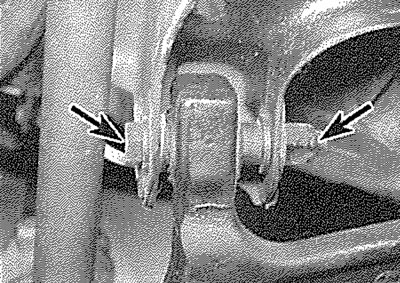
4.6. Lower arm front securing bolt and nut (arrowed)
7. Pull the lower arm down to disengage the front mounting studs from the holes in the body and withdraw the lower arm from under the vehicle.
Overhaul
8. It is possible to renew the lower arm pivot bushes, but due to the requirement for Peugeot special tools (a suitable press, positioning jig and socket adapter will be required), it is recommended that the job is entrusted to a Peugeot dealer. Similarly, it is also possible to renew the lower arm balljoint, which is a press-fit in the end of the lower arm.
Refitting
9. Commence refitting by ensuring that the bushes, the bush contact faces on the body and the lower arm securing bolt and studs, are clean.
10. Place the lower arm in position under the vehicle, then refit the front through-bolt and nut and tighten to the specified torque.
11. Working inside the passenger compartment, refit the rear bracket securing nuts and tighten them to the specified torque. Fit the carpet and sound insulation panels back in to position.
12. Ensure that the protector plate is in place over the lower arm balljoint, then engage the balljoint taper with the hub carrier. If necessary, lever the arm downwards just enough to engage the balljoint, as during removal. Similarly, use a screwdriver to open up the clamp a little if necessary.
13. Fit the hub carrier-to-lower arm clamp bolt (insert the bolt from the front of the strut) and a new nut and tighten to the specified torque.
14. Where applicable, refit the anti-roll bar end clamp and bush. Position the end of the anti-roll bar on the lower arm and refit the securing screws and washers. Tighten the screws to the specified torque.
15. Refit the roadwheel and lower the vehicle to the ground.
16. If the driver's side lower arm has been removed, ensure that the sound insulation and carpet panels have been correctly refitted. Check the operation of the throttle pedal and check that the pedal can be depressed smoothly to the full-throttle position (check that full-throttle is available at the engine with the pedal fully depressed - see the relevant Part of Chapter 4 as applicable).