
Attention! Take special precautions when working on fuel injectors. Never expose your hands or any other part of your body to the jet of fuel from the injector, as the high operating pressure can cause fuel to penetrate the skin, potentially resulting in death. It is highly recommended that you have your dealer or diesel fuel system technician check the pressurized injectors.
Examination
1. The condition of the injectors deteriorates with prolonged use, and it can be expected that after 100,000 km of run (or so) they need to be repaired or replaced. Accurate inspection, repair and calibration of injectors should be entrusted to a specialist. A defective injector that causes detonation or excessive smoke can be identified without disassembly by proceeding as follows.
2. Allow the engine to idle at a higher RPM. Loosen the connection on each injector in turn, after wrapping the connection with a rag to prevent fuel from spilling out. Be careful not to get fuel on your skin. Releasing the connection on the faulty injector will stop knocking or smoking.
Removing
3. For easier access on 1.9L models, remove the air distribution housing as described in paragraph 3. If necessary, also remove the air intake duct and disconnect the vent hose from the oil filler pipe. For more information, please refer to the relevant paragraphs in this chapter.
4. Thoroughly clean the area around the injectors and union nuts of the injector fuel lines.
5. Disconnect fuel return lines from injectors (pic. 10.5).
Pic. 10.5. Disconnecting the fuel return line from the fuel injector
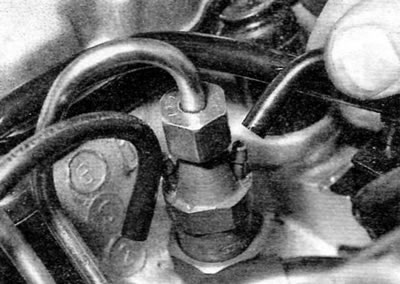
6. Turn away cap nuts of fastening of fuel lines of atomizers to the high pressure fuel pump. Hold the fittings on the pump while unscrewing the nuts. Plug open ports to prevent dirt from entering. To do this, you can use small plastic bags or «fingers», cut off from «old» (but clean!) rubber gloves.
7. Turn away union nuts and disconnect fuel lines from atomizers (pic. 10.7). If necessary, the fuel injector lines can be removed completely. Carefully mark the location of the fuel line clamps for ease of installation. Plug ports on nozzles to prevent dirt from entering.
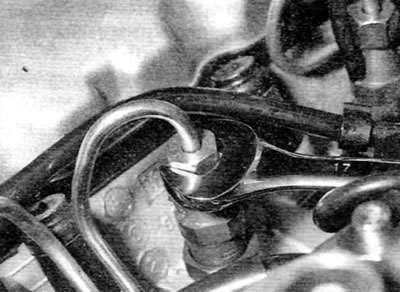
Pic. 10.7. Unscrewing the union nut on the injector fuel line
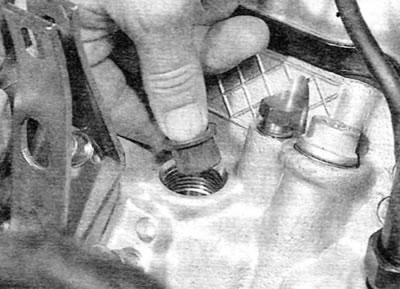
8. Unscrew the nozzles using a long socket or ring wrench (for flats with a spanner size of 27 mm) and remove them from the cylinder head (pic. 10.8).
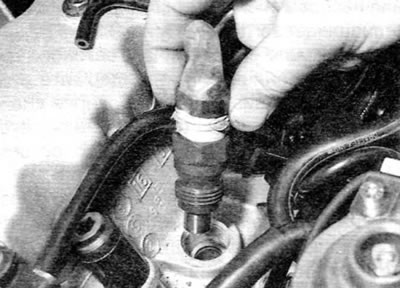
Pic. 10.8. Unscrew the injectors and remove them from the cylinder head
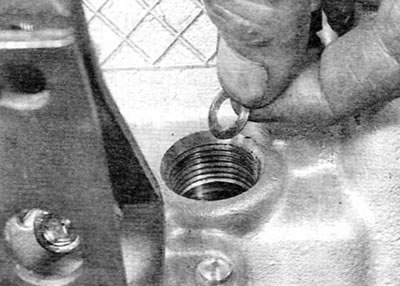
9. Remove the copper washers and flame deflectors from the mounting holes in the cylinder head. Also remove the bushings if they are not secured (pic. 10.9, a-c).
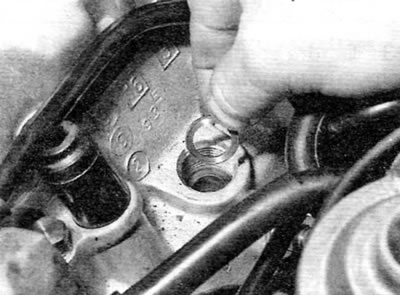
Pic. 10.9, a. Removing the copper washer from the fuel injector...
Pic. 10.9, b.... flame deflector...
Pic. 10.9, c....and bushings
Installation
10. Purchase new copper washers and flame washers. Also replace the bushings if they are damaged.
11. Do not drop the nozzles and be careful not to damage the nozzle tips. The nozzles are manufactured to very precise tolerances and must be handled with care. For example, never clamp them in a vise.
12. Start installation by installing bushings (if they were removed) into the cylinder head. Then install the flame deflectors (convex side up) and copper washers.
13. Screw in the nozzles and tighten them to the prescribed torque.
14. Install the injector lines and tighten the union nuts. Install the fuel line clamps according to the pre-marked position. If the clamps are incorrectly positioned or missing, problems may arise, resulting in breakage or cracking of the pipelines.
15. Connect return lines.
16. Install items removed to gain access (see relevant paragraphs of this chapter).
17. Start the engine. If difficulty occurs, bleed the fuel system as described in paragraph 2.