



Table of contents: General information 🠇 Removal 🠇
General information
1. On 954 and 1124 cc models, the exhaust system consists of three sections; the front pipe, the intermediate pipe and catalytic converter and the tailpipe and main silencer box. All exhaust sections are connected by a flanged joint. The front pipe joints are secured by nuts and bolts, the intermediate pipe joint being of the spring-loaded ball type, to allow for movement in the exhaust system. The intermediate pipe-to-tailpipe joint is secured by a clamping ring.
2. On 1360 cc models, the exhaust system consists of four sections; the front pipe, the catalytic converter, the intermediate pipe and the tailpipe and main silencer box. All exhaust sections are joined by a flanged joint. The front pipe joints are secured by nuts and bolts, the catalytic converter joint being of the spring-loaded ball type, to allow for movement in the exhaust system. The catalytic converter-to-intermediate pipe joint and the intermediate pipe-to-silencer joint are secured by a clamping ring,
3. The system is suspended throughout its entire length by rubber mountings.
Removal
4. Each exhaust section can be removed individually or, alternatively, the complete system can be removed as a unit.
5. To remove the system or part of the system, first jack up the front or rear of the car and support it on axle stands. Alternatively, position the car over an inspection pit, or on car ramps.
Front pipe
6. Trace the wiring back from the lambda (oxygen) sensor to its wiring connectors, which are clipped onto the top of the transmission and disconnect them from the main wiring harness.
7. Undo the nuts securing the front pipe flange joint to the manifold and, where necessary, the single bolt securing the front pipe to its mounting bracket (see illustrations). Separate the flange joint and collect the gasket.
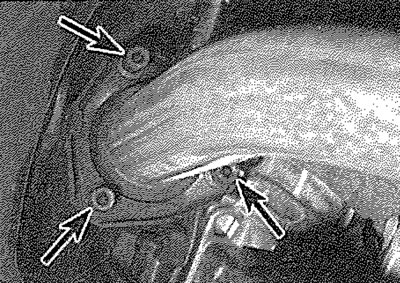
18.7a. Front pipe-to-manifold retaining nuts (arrowed)...
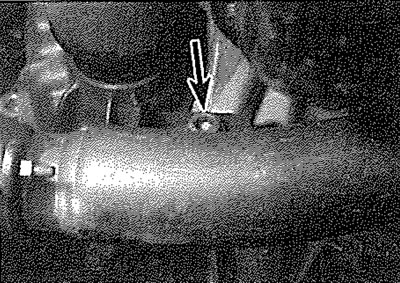
18.7b.... and front pipe mounting bolt (arrowed)
8. Slacken and remove the two nuts securing the front pipe to the catalytic converter/ intermediate pipe (as applicable) and recover the spring cups and springs (see illustration). Remove the bolts, then withdraw the front pipe from underneath the vehicle, taking great care not to damage the lambda sensor. Recover the wire-mesh gasket from the joint.
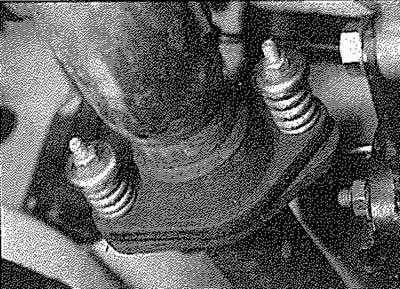
18.8. Front pipe-to-catalytic converter joint
Catalytic converter -1360 cc models
9. Undo the two nuts securing the front pipe flange joint to the catalytic converter. Recover the springs and spring cups and withdraw the bolts.
10. Slacken the catalytic converter-to-intermediate pipe clamping ring bolts and disengage the clamp from the flange joint
11. Free the catalytic converter from the intermediate pipe, then withdraw it from underneath the vehicle. Do not drop the catalytic converter, as it contains a fragile ceramic element. Recover the wire-mesh gasket from the front pipe joint.
Intermediate pipe - 954 and 1124 cc models
12. Undo the two nuts securing the front pipe flange joint to the intermediate pipe. Recover the springs and spring cups and withdraw the bolts.
13. Slacken the clamping ring bolts and disengage the clamp from the intermediate pipe-to-tailpipe flange joint (see illustration).
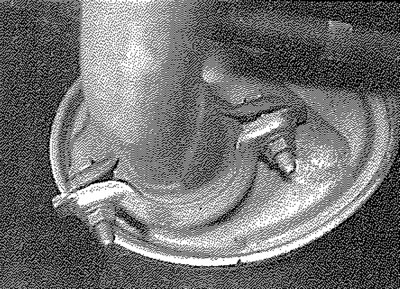
18.13. Intermediate pipe-to-tailpipe clamping ring
14. Free the intermediate pipe from its mounting rubbers, then disengage it from the tailpipe and the front pipe and remove it from underneath the vehicle. Recover the wiremesh gasket from the front pipe joint.
Intermediate pipe - 1360 cc models
15. Slacken the clamping ring bolts and disengage the clamps from both the intermediate pipe flange joints.
16. Free the intermediate pipe from its mounting rubbers, then disengage it first from the tailpipe then the catalytic converter and remove it from underneath the vehicle.
Tailpipe
17. Slacken the intermediate pipe-to-tailpipe clamping ring bolts and disengage the clamp from the flange joint.
18. Unhook the tailpipe from its mounting rubbers and remove it from the vehicle.
Complete system
19. Disconnect the front pipe from the manifold as described in paragraphs 6 and 7.
20. With the aid of an assistant, free the system from its mounting rubbers and manoeuvre It out from underneath the vehicle.
Heat shield
21. The heat shields are secured to the underside of the body by a mixture of nuts and bolts. Each shield can be removed once the relevant exhaust section has been removed. If the shield is being removed to gain access to a component located behind it, in some cases it may prove sufficient to remove the retaining nuts and/or bolts and simply lower the shield, without disturbing the exhaust system.
Refitting
22. Each section is refitted by a reverse of the removal sequence, noting the following points:
- a) Ensure that all traces of corrosion have been removed from the flanges and renew all necessary gaskets.
- b) Inspect the rubber mountings for signs of damage or deterioration and renew as necessary.
- c) Prior to assembling the spring-loaded ball type joint, a smear of high-temperature grease should be applied to the joint mating surfaces.
- d) On Joints which are secured by clamping rings, apply a smear of exhaust system jointing paste to the joint mating surfaces, to ensure an air-tight seal. Tighten the clamping ring nuts evenly and progressively to the specified torque, so that the clearance between the clamp halves is equal on either side.
- e) Prior to tightening the exhaust system fasteners, ensure that all rubber mountings are correctly located and that there is adequate clearance between the exhaust system and vehicle underbody (see illustration).
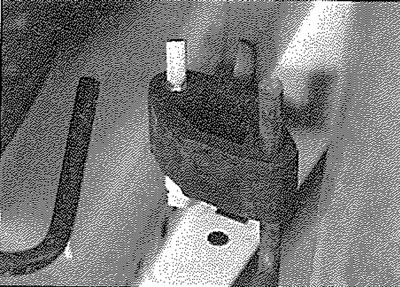
18.22. Ensure that the exhaust system is correctly located on its rubber mountings before tightening its fasteners securely