



Warning: Dust created by clutch wear and deposited on the clutch components may contain asbestos, which is a health hazard. DO NOT blow it out with compressed air or inhale any of it. DO NOT use petrol or petroleum based solvents to clean off the dust. Brake system cleaner or methylated spirit should be used to flush the dust into a suitable receptacle. After the clutch components are wiped clean with rags, dispose of the contaminated rags and cleaner in a sealed, marked container. Although some friction materials may no longer contain asbestos, it is safest to assume that they DO and to take precautions accordingly.
Removal
1. Unless the engine/transmission is to be removed from the car and separated for major overhaul (Chapter 2A), the clutch can be reached by removing the transmission alone, as described in Chapter 7A.
2. Before disturbing the clutch, use chalk or a marker pen to mark the relationship of the pressure plate assembly to the flywheel.
3. Working in a diagonal sequence, slacken the pressure plate bolts by half a turn at a time, until spring pressure is released and the bolts can be unscrewed by hand.
4. Prise the pressure plate assembly off its locating dowels and collect the friction plate, noting which way round the friction plate is fitted (see illustration).
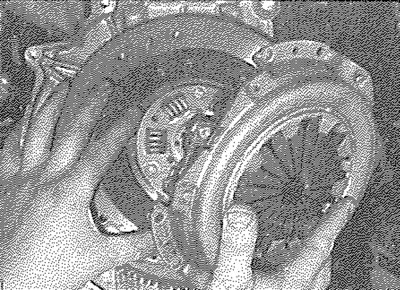
5.4. Remove the pressure plate and friction plate, noting which way around the friction plate is fitted
Inspection
Note: Due to the amount of work necessary to gain access to the clutch components, it is usually considered good practice to renew the clutch friction plate, pressure plate assembly and release bearing as a matched set, even if only one of these is actually worn enough to require renewal.
Original is located at PeugeotBook.ru
5. Remove the clutch assembly.
6. When cleaning clutch components, read first the warning at the beginning of this Section; remove any dust using a clean, dry cloth and working in a well-ventilated atmosphere.
7. Check the friction plate facings for signs of wear, damage or oil contamination. If the friction material is cracked, burnt, scored or damaged, or if it is contaminated with oil or grease (shown by shiny black patches), the friction plate must be renewed.
8. If the friction material is still serviceable, check that the centre boss splines are unworn, that the torsion springs are in good condition and securely fastened and that all the rivets are tightly fastened. If any wear or damage Is found, the friction plate must be renewed.
9. If the friction material is fouled with oil, this must be due to an oil leak from the crankshaft left-hand oil seal, from the sump-to-cyiinder block joint, or from the transmission input shaft. If a leak is evident, renew the seal or repair the joint (as appropriate) as described in the relevant Part of Chapter 2 or 7, before installing the new friction plate.
10. Check the pressure plate assembly for obvious signs of wear or damage. Shake it to check for loose rivets or damaged fulcrum rings; check that the drive straps securing the pressure plate to the cover do not show signs (such as a deep yellow or blue discoloration) of overheating. If the diaphragm spring is worn or damaged, or if its pressure is in any way suspect, the pressure plate assembly should be renewed.
11. Examine the machined bearing surfaces of the pressure plate and of the flywheel; they should be clean, completely fiat and free from scratches or scoring (minor damage of this nature can sometimes be polished away using emery paper). If either is discoloured from excessive heat, or shows signs of cracking, it should be renewed.
12. Check that the release bearing contact surface rotates smoothly and easily, with no sign of noise or roughness and that the surface itself is smooth and unworn, with no signs of cracks, pitting or scoring. If there is any doubt about its condition, the bearing must be renewed.
Refitting
13. On reassembly, ensure that the bearing surfaces of the flywheel and pressure plate are completely clean, smooth and free from oil or grease. Use solvent to remove any protective grease from new components.
14. Fit the friction plate so that its spring hub assembly faces away from the flywheel; there may also be a marking showing which way round the plate is to be refitted.
15. Refit the pressure plate assembly, aligning the marks made on dismantling (if the original pressure plate is re-used) and locating the pressure plate on its three locating dowels. Fit the pressure plate bolts, but tighten them only finger-tight, so that the friction plate can still be moved.
16. The friction plate must now be centralised, so that when the transmission is refitted, its input shaft will pass through the splines at the centre of the friction plate.
17. Centralisation can be achieved by passing a screwdriver or other long bar through the friction plate and into the hole in the crankshaft; the friction plate can then be moved around until it is centred on the crankshaft hole.
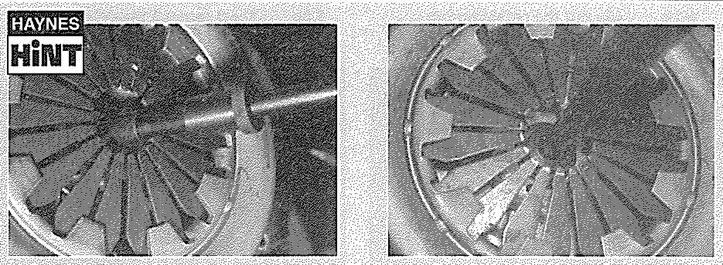
A clutch-aligning tool can be used to eliminate the guesswork when fitting the friction plate; these can be obtained from most accessory shops, or can be made up from a length of metal rod or wooden dowel which fits closely inside the crankshaft hole, and has insulating tape wound around it to match the diameter of the friction plate splined hole.
18. When the friction plate is centralised, tighten the pressure plate bolts evenly and in a diagonal sequence to the specified torque setting (see illustration).
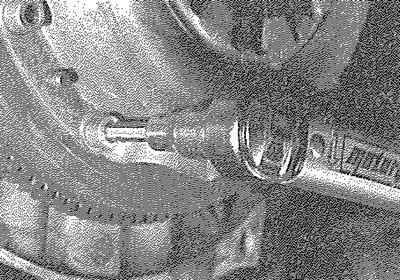
5.18. Once the friction plate is centralised, tighten the pressure plate retaining bolts to the specified torque
19. Apply a thin smear of high-melting point grease to the splines of the friction plate and the transmission input shaft, also to the release bearing bore and release fork shaft.
20. Refit the transmission as described in Chapter 7A.