
English Русский
Български
Беларускі
Український
Српски
Hrvatski
Română
Polski
Slovenský
Magyar
Bookmark Articles Sitemap Contacts
Company Hyundai Company Opel Company Skoda Company Kia Company Mitsubishi Company LADA Company Audi
PeugeotBook.ru


Series 100   Series 200   Series 300   400-500   Series 600   Crossovers   Others
 
Peugeot 206 (1998-2012) Peugeot 207 (2006-2014)

Replacing the rear lights (Peugeot 207)

  • Main
  • 20X
  • Peugeot 207 (2006-2014)
  • General information
  • Car care
  • Replacing the rear lights
0
Table of contents: Rear lights (hatchback) 🠇 Rear lights (SW) 🠇

Rear lights (hatchback)
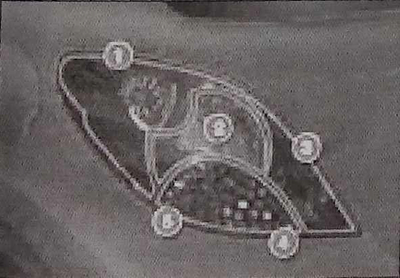


1 - brake lights (P21 W).

1 - brake lights (P21 W).
2 - parking lights (R5 W).
3 - fog lights (P21 W).
4 - direction indicators (PY 21 W with yellow bulb).
5 - reversing lights (P21 W).


Note: Lamps with yellow bulbs (used in direction indicator lights and side repeaters) should be replaced with lamps with similar technical parameters and bulbs of the same color.


If the car is equipped with a JBL audio system, then when replacing the lamp on the right side, you must first open the hatch to access the mounting screw.

Replacing lamps


Five lamps are replaced from the outside of the luggage compartment.

1. Loosen the screw securing the light.

2. Remove the flashlight from the outside.

3. Disconnect the electrical connector from the light.

4. Remove the headlight sealing gasket.
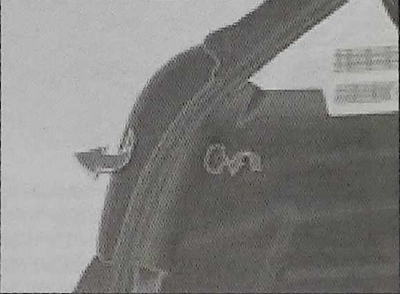
4. Remove the headlight sealing gasket.


5. Press the four tabs and remove the board with the lamps.


6. Turn the bulb a quarter turn and replace it.
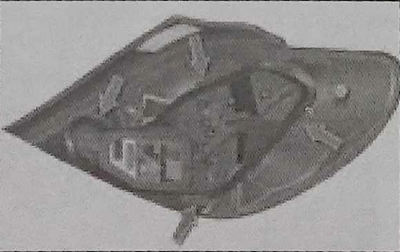
6. Turn the bulb a quarter turn and replace it.


The installation of the lantern is carried out in reverse order.

Rear lights (SW)
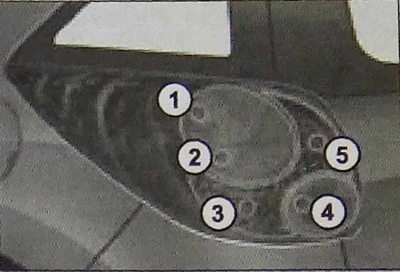


1 - brake lights (P21 W).

1 - brake lights (P21 W).
2 - parking lights (R 5 W).
3 - direction indicators (PY 21 W with yellow bulb).
4 - fog lights (P21 W).
5 - reversing lights (P21 W).


Five lamps are replaced from the outside of the luggage compartment.

1. Remove the cover that covers the access to the flashlight.

2. Disconnect the electrical connector from the light.

3. Loosen the screw securing the light.

4. Remove the flashlight from the outside.
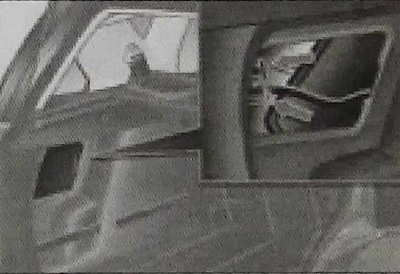
4. Remove the flashlight from the outside.


5. Press the four tabs and remove the board with the lamps.


6. Turn the bulb a quarter turn and replace it.
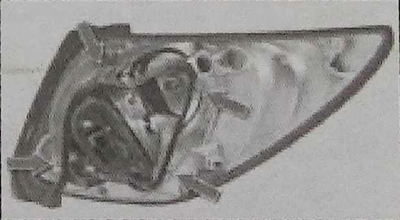
6. Turn the bulb a quarter turn and replace it.


The installation of the lantern is carried out in reverse order.

Make sure that the lamp is positioned precisely on its guides, ensuring that it is installed in alignment with the longitudinal axis of the vehicle.

Tighten the screw securely to ensure the light is sealed.
This article is available at russian, bulgarian, belarusian, ukrainian, serbian, croatian, romanian, polish, slovak, hungarian
Article reviewed by editor: Matveev Demid
Share information:
Previous
Peugeot 207: Car care
Next

Replacing the side turn signal repeater assembly with the lamp
Replacement of daytime running lights, parking lights
Replacing the high beam lamp
Replacing the low beam lamp
Replacing the bulb in the direction indicators
Car handling and tires
Wheel reinstallation
Tires with tread wear indicator
Tread pattern height
Checking tire pressure
See similar information for other Peugeot models

➨ Rear brake shoe condition check — models with rear drum brakes Peugeot 106 (1991-2003)
➨ Replacing the rear bumper cover Peugeot 307 (2001-2008)
➨ Replacing rear brake shoes on drum brakes Peugeot 405 (1987-1997)
➨ Signal lights Peugeot 605 (1989-2000)
➨ Rear fog lights and fog lamps Peugeot 806 (1994-2002)
Link to this article in different formats
Comments and feedback from visitors
No comments yet


Add two numbers 27 + 32


Peugeot 207 (2006-2014) 
  • General information
  • Car care
  • Governing bodies
  • Driving and operation
  • Power unit
  • Engine characteristics
  • Engine repair
  • Cooling system
  • Lubrication system
  • Ignition system
  • Control system (gasoline)
  • Fuel system (gasoline)
  • Control system (diesel)
  • Transmission
  • Clutch
  • Mechanical gearbox
  • Automatic gearbox
  • Drive shafts
  • Chassis, running gear
  • Car suspension
  • Steering
  • Brake system
  • Body and interior
  • Exterior (external elements)
  • Interior (internal elements)
  • Heating and air conditioning
  • Electrical equipment
  • Equipment and devices
  • Headlights and lighting
  • Power devices
  • Electrical circuits
Peugeot 206 (1998-2012) 
  • General information
  • User manual
  • Maintenance
  • Power unit
  • Gasoline engines
  • Diesel engines
  • Diesel power system
  • Engine management system
  • Transmission
  • Clutch
  • Mechanical gearbox
  • Automatic gearbox
  • Drive shafts
  • Chassis, running gear
  • Front suspension
  • Rear suspension
  • Steering
  • Brake system
  • Body and interior
  • Body elements
  • Doors, locks and windows
  • Electrical equipment
  • Equipment and devices
  • Electrical circuits
PeugeotBook.ru © 2018–2026 | Mobile version | Sitemap: EN BG BY UA RS HR RO PL SK HU | Write message | Site search | Add to bookmarks | Peugeot owners
106 (1991-2003) | 206 (1998-2012) | 207 (2006-2014) | 305 (1977-1989) | 306 (1993-2002) | 307 (2001-2008) | 405 (1987-1997) | 406 (1995-2004) | 605 (1989-2000) | Partner-I (1996-2008) | Eurovans-807 (2002-2014) | Eurovans-806 (1994-2002) | J5 (1981-1993) |
Cookies are used to ensure the correct display of pages on the site.