
Suspension cylinder installation
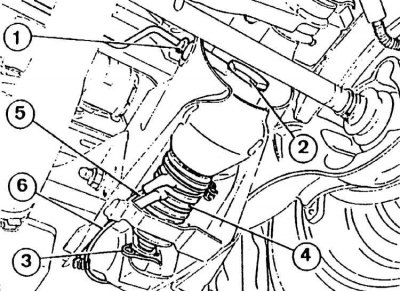
1 - high pressure connection, 2 - connection bolt, 3 - piston axle latch on the suspension arm, 4 - cylinder casing, 5, 6 - oil recirculation pipes
Suspension cylinder fasteners
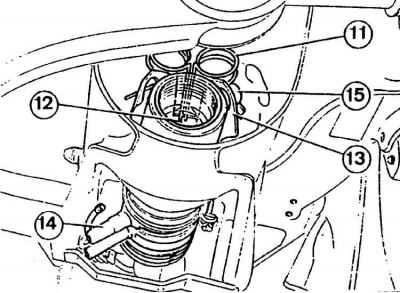
11 - engagement spring on the cross member, 12 - spring fastening, 13 - cylinder fastening element, 14 - casing connection, 15 - cylinder supporting element
1. Place the vehicle on a stationary lift.
2. Remove the left trunk liner.
3. Disconnect connector (red) hydraulic pump power supply (wires M326 and 326).
4. Connect the loose connector terminals next to the suspension up button.
5. Reduce the pressure so that the suspension cylinders can be moved by hand.
6. Unscrew the cylinder connection nut.
7. Remove the latch using a screwdriver.
8. Remove the cylinder retaining element.
9. Disconnect fluid outflow pipe from hanger cylinder (transparent pipeline) and air removal (label them with respect to their rubber tips).
10. Remove the latch connecting the suspension cylinder to the arm (see fig. Suspension cylinder installation).
11. Remove the suspension cylinder from under the vehicle.
12. To install the suspension cylinder, follow the steps in reverse order with respect to the removal process. New seals must be installed, air must be bled from the suspension circuit and LHM must be replenished to the correct level.