



Axle shaft seals
1. Remove the corresponding axle shaft as described in chapter 8.
2. Using a large flat-head screwdriver, carefully pry the seal out of the gearbox (figure 4.2).
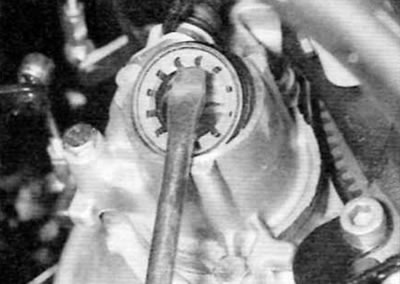
Figure 4.2. Using a large flat-head screwdriver, remove the right oil seal from the crankcase (vEZ/5 gearbox shown)
3. Completely remove all traces of dirt from the area around the seal bore, then apply a small amount of grease to the new seal along its outside diameter. Install the new cuff into the mounting hole. Make sure that the cuff is not skewed. When installing, use a suitable tubular mandrel (socket head type), which rests only on the hard outer edge of the cuff. The cuff should rest against the provided flange.
4. Apply a thin layer of grease to the sealing lip of the cuff.
5. Install the axle shaft as described in chapter 8.
Primary shaft seal
6. Remove the gearbox as described in paragraph 7, and the clutch release mechanism as described in chapter 6.
7. Remove the three clutch release bearing guide bushing mounting bolts and remove the guide bushing from the input shaft along with the corresponding sealing ring or gasket (whichever is applicable) (figure 4.7. a, b). Remove any shims or thrust washers that are stuck to the rear end of the guide bushing and install them onto the input shaft.
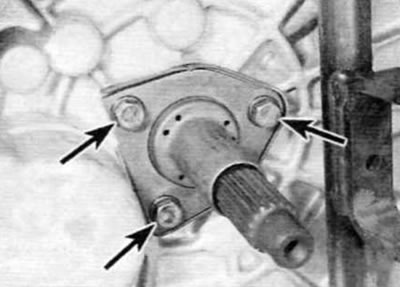
Figure 4.7, a. Fastening bolts (marked with arrows) guide sleeve of the clutch release bearing on the MA5 and VEZ/5 gearboxes...
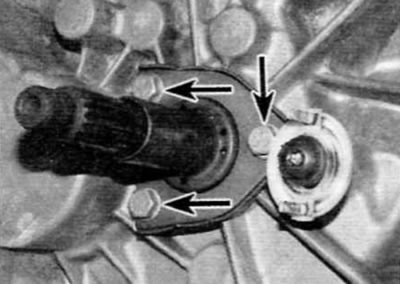
Figure 4.7, b....and on the BE4/5 gearbox
[Original text is located at PEUGEOTBOOK]
8. Using a suitable flat-head screwdriver, carefully remove the seal from the guide bushing (figure 4.8).
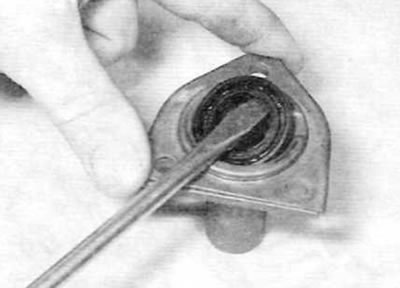
Figure 4.8. Carefully remove the cuff from the guide sleeve, noting how it is installed
9. Before installing a new seal, inspect the area of the shaft that contacts the seal for burrs, scratches or other damage that could cause damage to the seal. Minor defects of this kind can be removed with fine-grained sandpaper. However, more serious defects require replacement of the shaft. Clean and lubricate the input shaft to protect the seal lips during installation.
10. Dip the new seal in clean oil and install it on the guide sleeve.
11. Install a new O-ring or gasket (whichever is applicable) onto the rear end of the guide sleeve, and then carefully slide the sleeve into its normal position on the input shaft (figure 4.11). Screw in the bolts and tighten them to the specified torque.
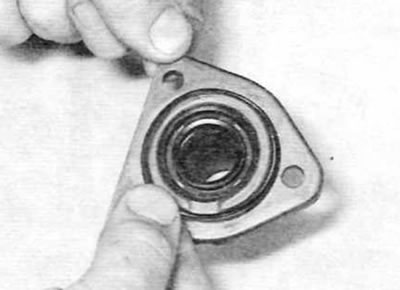
Figure 4.11. Install a new O-ring or gasket (whichever is applicable) on the back side of the guide sleeve
12. Take the opportunity to inspect the clutch components if you haven't already done so (see chapter 6). Finally, install the gearbox as described in paragraph 7.
Gear selector shaft seal
Gearbox MA5 13
On these models, the gearbox must be disassembled to replace the gear selector shaft seal. Therefore, this work should be entrusted to a Peugeot/Citroen dealer or a gearbox specialist.
Gearboxes VEZ/5 and VE4/5
14. Park the car on a level horizontal surface. Apply the parking brake. Loosen the left front wheel mounting bolts. Raise the front of the vehicle and support it securely (see "Lifting and installing the car on supports"). Remove the left front wheel.
15. Using a large flat-blade screwdriver, separate the ball joint of the tie rod from the gear selector shaft on the transmission and disconnect the tie rod.
16. Using a large flat-blade screwdriver, carefully pry the selector shaft seal out of the housing and slide it off the end of the shaft.
17. Before installing a new seal, inspect the area of the shaft that contacts the seal for burrs, scratches or other damage that could cause damage to the seal. Minor defects of this kind can be removed with fine-grained sandpaper. However, more serious defects require replacement of the shaft.
18. Apply a small amount of grease to the new oil seal around its outside diameter and to the sealing lip of the oil seal, then carefully slide the oil seal over the gear selector shaft. Press the seal completely into the mounting hole in the gearbox housing.
19. Connect the rod to the gear selector shaft, ensuring that the ball joint is tightly seated on the shaft. Lower the car.