



2. Drain the cooling system, as described in Chapter 1A or 1B, saving the coolant if it is fit for re-use. Squirt a little penetrating oil onto the hose clips if they are corroded.
3. Release the hose clips from the hose concerned. Three types of clip are used; worm-drive, spring and "sardine-can". The worm-drive clip is released by turning its screw anti-clockwise. The spring clip is released by squeezing its tags together with pliers, at the same time working the clip away from the hose stub (see illustration). The "sardine-can" clip is not re-usable and is best cut off with snips or side cutters.
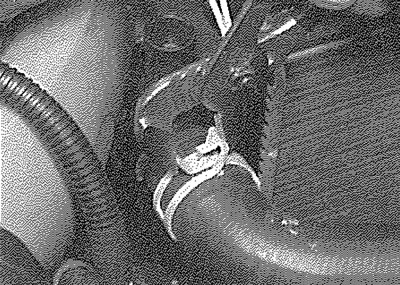
2.3. Releasing a radiator top hose spring clip
4. Unclip any wires, cables or other hoses which may be attached to the hose being removed. Make notes for reference when refitting if necessary.
5. Release the hose from its stubs, using a gentle twisting motion. Be careful not to damage the stubs on delicate components such as the radiator. If the hose is stuck fast, try carefully prising the end of the hose with a screwdriver or similar, taking care not to use excessive force. The best course is often to cut off a stubborn hose using a sharp knife, but again be careful not to damage the stubs.
6. Before fitting the new hose, smear the stubs with washing-up liquid or a suitable rubber lubricant to aid fitting.
Caution: Do not use oil or grease, which may attack the rubber.
7. Fit the hose clips over the ends of the hose, then fit the hose over its stubs. Work the hose into position. When satisfied, locate and tighten the hose clips.
8. Refill the cooling system as described in Chapter 1A or 1B. Run the engine and check that there are no leaks.
9. Recheck the tightness of the hose clips on any new hoses after a few hundred miles.
10. Top-up the coolant level if necessary (see "Weekly checks").