
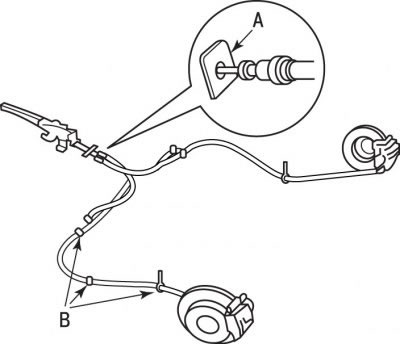
Pic. 8.18. Elements of the parking brake: A - floor fixing area; B - fixing clips on the body
The location of the elements of the parking brake is shown in fig. 8.18.
To test the parking brake:
- raise the car by hanging the rear wheels;
- make sure that a slight resistance to the rotation of the rear wheel begins after lifting the lever to the second click;
- make sure that the normal travel of the lever does not exceed eight clicks.
If the check showed unsatisfactory results, perform the following operations:
- check the correct laying of all cables;
Attention! Before adjusting the parking brake, bleed the hydraulic brake circuit.
- make sure the cables are not pinched (poor engagement of cables or sheaths);
- make sure that all parts and assemblies of the parking brake are free to move in both directions;
- adjust the parking brake.
To adjust the parking brake:
- raise the car by hanging the rear wheels;
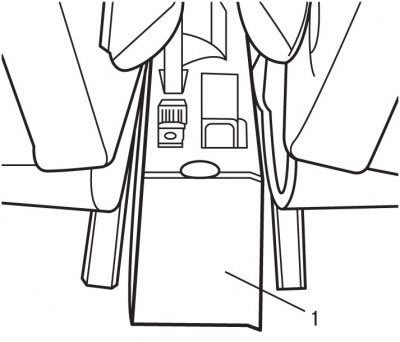
Pic. 8.19. Ashtray location (1) on the center console
- remove ashtray 1 (pic. 8.19) from the center console;
- fully release the parking brake lever inside the car;
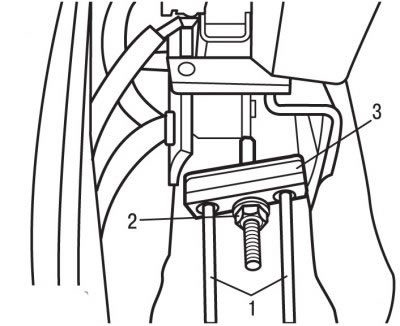
Pic. 8.20. Parking brake cable adjustment: 1 - parking brake cables; 2 - adjusting nut; 3 - compensator
- loosen the parking brake cables 1 by unscrewing the adjusting nut 2 of the compensator 3 a few turns (pic. 8.20);
- with the engine running and the parking brake lever applied, press the brake pedal 40 times;
- lightly tighten the adjusting nut 2 so that the cables begin to tighten;
- pull the parking brake lever in the usual way 10 times;
- set the lever to the position corresponding to the second click, starting from the bottom position;
- turn the adjusting nut 2 until the brake pads begin to brake the wheels;
- make sure that the normal travel of the lever does not exceed eight clicks;
- make sure that both cables 1 on compensator 3 move at the same time;
- make sure that the wheels turn freely when the parking brake is released;
- check that the parking brake indicator comes on when the lever is raised to the first click position.