
Starter (A - Bosch, B - Parish-Rhone, C - Mitsubishi)
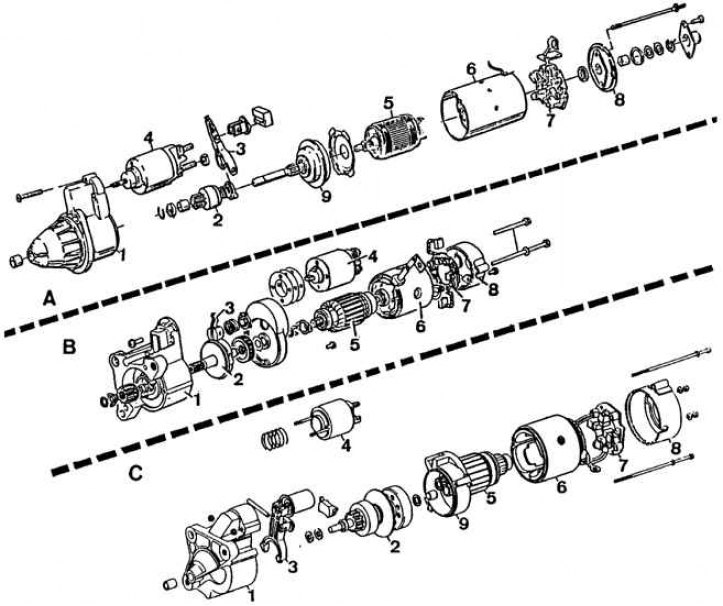
1 - starter cover, 2 - drive gear, 3 - lever, 4 - electromagnetic switch, 5 - rotor winding, 6 - starter housing, 7 - brush holder, 8 - rear cover, 9 - gearbox
Removing
1. Disconnect the negative cable from the battery.

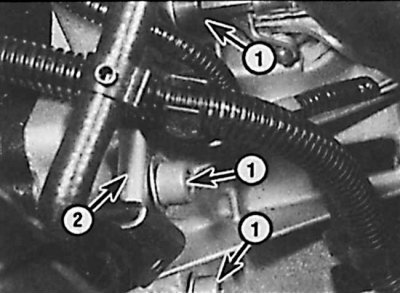
2. Disconnect the electrical connections from the electromagnetic switch (the arrows indicate the bolts for fastening the wires to the electromagnetic switch).
3. Remove the rear retainer plate connecting the starter to the engine block.
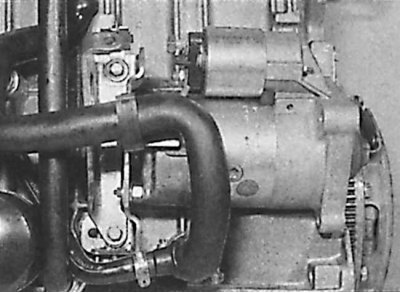
4. Unscrew the bolts securing the starter head to the clutch housing.
5. Remove starter.
Installation
1. Install the starter in its proper place.
2. Screw the bolts (1) starter to clutch housing (2 - suspension mounting bolts).
3. Insert the back plate of the holder and screw the starter support bolts not to the stop.
4. Screw the mounting bolts on the engine block, and then on the starter.
5. Connect the electrical connections to the electromagnetic switch.
6. Connect battery.
Starter repair
The steps for disassembling and assembling the starter are not difficult.
1. During mechanical repair of the starter, the following steps should be performed.
2. Assess the condition of the brushes, their degree of wear, check whether they move correctly in the corresponding guides.
3. Assess the pressure and position of the brush springs.
4. Assess the condition of the collector, which should be cleaned only with a piece of material soaked in gasoline or trichloroethylene, and polished with fine sandpaper; emery cloth should never be used.
5. Assess the condition of the bushings of self-lubricating bearings; if they are replaced, new bushings should be soaked in engine oil before installation (SAE 30/ 40) at least 20 minutes.
6. Assess the condition of the rotor and excitation windings; windings should not have breaks and traces of burnout.