



Note: Some vehicles may require a square-head wrench to remove the oil pan drain plug. These spanners can be purchased from many auto parts stores or your Peugeot/Citroen dealer.
1. Frequent replacement of engine oil and oil filter is the most important preventative maintenance procedure that you can perform yourself. As oil ages, it becomes thinner and dirtier, leading to premature engine wear.
2. Before starting the procedure, prepare all necessary tools and materials. To remove splashes and spilled oil, have plenty of clean rags and old newspapers on hand. Ideally, the motor oil should be warm: it will drain easier and the sludge will be washed out better along with it. Be careful! When working under the vehicle, do not touch the exhaust system or other hot engine parts. To avoid scalding, skin irritation, and protection from the various harmful impurities contained in used motor oil, it is recommended to wear gloves when performing this work. Access to the underside of the vehicle is greatly improved by raising the vehicle on a lift, placing it on a ramp, or jacking it up and placing secure supports underneath it (see "Lifting and installing the car on supports"). Whichever method is chosen, the car must be positioned horizontally, and if it is parked at an angle, the drain plug must be at the lowest point. If there is a lower engine guard, remove it by unscrewing the corresponding screws.
3. Loosen the drain plug approximately half a turn; on some models, a square-head wrench may be required to release the plug (figure 3.3). Place a suitable container under the drain plug and unscrew the plug completely. If possible, try to keep the plug pressed against the oil pan during the last two turns. Remove the sealing washer from the drain plug.
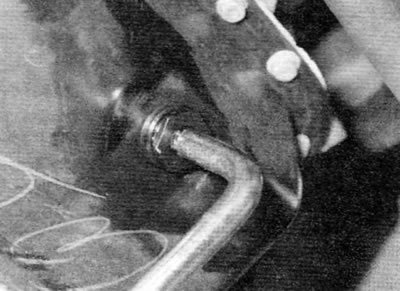
Figure 3.3. Releasing the oil pan drain plug with a square head wrench
(Source can be seen at: PeugeotBook)
Tip: After unscrewing the plug all the way, hold it against the pan, then quickly pull it to the side so that the oil flow from the pan goes into the container, not into your sleeve.
4. Allow the oil to drain. Please note that as the oil flow slows to a trickle, you may need to move the container.
5. Once all the oil has drained, wipe the drain plug with a clean rag. Replace the sealing washer on the plug with a new one. Clean the area around the drain hole and replace the drain plug. Tighten the plug securely.
6. Move the container under the oil filter, which is located on the front side of the cylinder block, under the intake manifold.
7. If necessary, using an oil filter removal tool, first loosen the filter and then unscrew it by hand (figure 3.7). Drain the oil from the old filter into a suitable container.
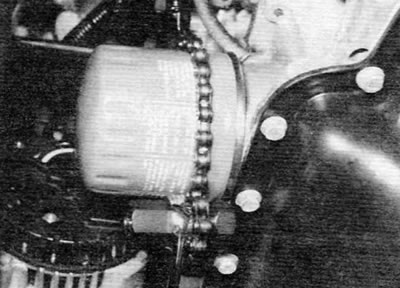
Figure 3.7. Using a special puller to release the oil filter
8. Using a clean cloth, remove all traces of oil, dirt and sediment from the engine mounting surface where the filter is installed. Inspect the old filter to ensure that the rubber seal is not stuck to the engine. If it sticks, carefully remove it.
9. Apply a thin layer of clean engine oil to the O-ring on the new filter. Screw the filter back into place. Tighten the filter securely using only your hands - do not use any tools.
10. Remove the container with the drained oil and all tools from under the car. Lower the car (if it was raised).
11. Remove the dipstick and loosen the oil filler cap on the cylinder head cover or on the oil filler neck/breather (whichever is applicable). Fill the engine with new oil of the correct grade (see "Lubricants and operating fluids"). Use a funnel to avoid spilling oil. First, pour in half the prescribed amount of oil and wait a few minutes for the oil to drain into the pan. Continue adding oil in small amounts until the level reaches the lower mark on the dipstick. Adding approximately 1.5 liters of oil will bring the level to the upper mark on the dipstick. Replace the oil filler cap.
12. Start the engine and let it idle for a few minutes while checking for leaks around the oil filter seal area and the oil pan drain plug. Please note that when starting the engine, the low oil pressure warning light may take a few seconds to go out. This is because the oil must pass through the new oil filter and the engine's oil galleries before the pressure can begin to build up.
13. Stop the engine and wait a few minutes to allow the oil to drain into the oil pan. Now that the new oil has completely filled the lines and filter, check the level again using the dipstick and add more oil if necessary.
14. Dispose of used engine oil and filter properly. For more information, please refer to the section "General tips for carrying out repairs". Do not dispose of the "old" filter in the household waste container. Typically, many oil change stations have a container for recycling used filters.