



Removal
1. Remove the oil pan as described in paragraph 14.
2. Unscrew the bolt securing the dipstick guide tube to the oil pump and remove the tube from the cylinder block (figure 15.2, a, b).
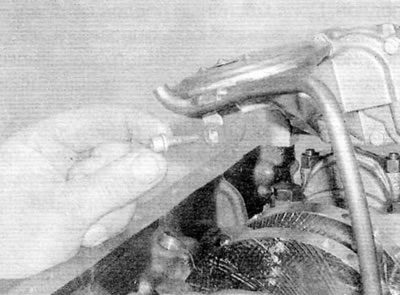
Figure 15.2, a. Remove the bolt securing the dipstick guide tube to the oil pump...
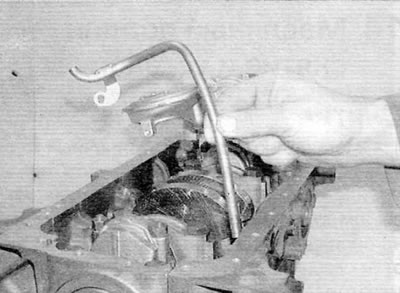
Figure 15.2, b....then remove the guide tube from the cylinder block (shown with the engine removed)
3. On 1.9L engines, loosen and remove the three oil pump mounting bolts. Mark the position for installing the longer bolt. Disengage the pump sprocket from the chain and remove the oil pump and separator plate from the engine.
4. On 2.0L engines, loosen and remove the three oil pump mounting bolts. Mark the installation position of each bolt (they have different sizes) and a sealing washer (figure 15.4). Disengage the pump sprocket from the chain and remove the oil pump from the engine.
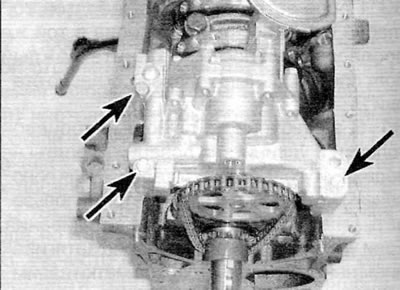
Figure 15.4. Mark the installation position of each oil pump mounting bolt (marked with arrows) when unscrewing it (2.0 L engines)
Inspection
5. Inspect the oil pump sprocket for signs of damage or wear, such as chipped or missing teeth. If the sprocket is worn, the pump assembly must be replaced as the sprocket is not supplied separately. In addition, it is recommended to simultaneously replace the chain and the drive sprocket located on the crankshaft. The oil pump drive sprocket and chain can be removed without removing the engine from the vehicle after removing the crankshaft timing pulley and crankshaft oil seal housing. For more information, please contact chapter 2D.
6. Loosen and unscrew the bolts securing the mesh filter cover to the pump body and remove the mesh filter cover. Remove the relief valve piston and spring (and guide pin - on 2.0L engines only), noting how they are installed (Figure 15.6, a-c).
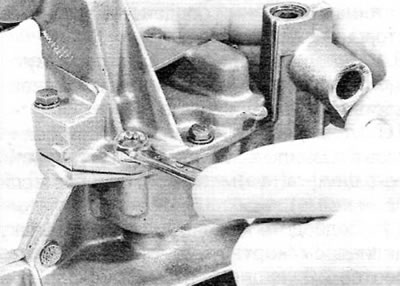
Figure 15.6, a. Remove the bolts...
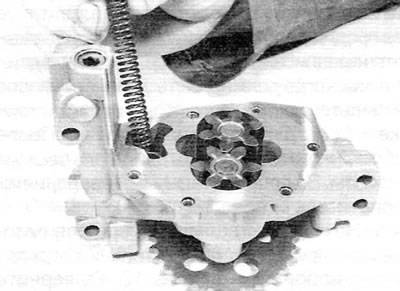
Figure 15.6, b....remove the cover, spring...
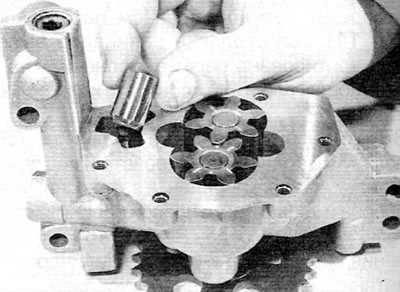
Figure 15.6, c....and the piston of the safety valve, noting how it is located
7. Inspect the impellers and pump housing for signs of wear and scoring. If there is wear, the pump assembly should be replaced.
(Data published on the website: PeugeotBook.ru)
8. Inspect the relief valve piston for signs of wear or damage and replace it if necessary. The condition of the safety valve spring can only be assessed by comparing it with a new one. If there is any doubt about the condition, it should also be replaced. The piston and spring are supplied separately.
9. Thoroughly clean the oil pump strainer with a suitable solvent and inspect it for any signs of blockage or damage. If the filter is damaged, the mesh filter assembly with the cover should be replaced.
10. Install the safety valve spring and piston and guide pin (if available) into the mesh filter cover. Install the cover onto the pump body. Align the relief valve piston with the corresponding mounting hole in the pump. Replace the cover mounting bolts and tighten them securely.
Installation
11. On 1.9L engines, install the spacer plate and then move the pump into its proper position, engaging the pump sprocket with the drive chain. Screw in the pump mounting bolts (a longer bolt should be screwed into the rear hole) and tighten them to the specified torque.
12. On 2.0L engines, engage the pump sprocket with the drive chain and then install the bolts. Install the sealing washer onto the rear bolt, then install the pump mounting bolts, aligning them to their original positions. Tighten the bolts to the specified torque.
13. On all engines, install the dipstick guide tube onto the cylinder block and securely tighten the appropriate bolt.
14. Install the oil pan as described in paragraph 14.