



Table of contents: Removal 🠇 Refitting 🠇
Note: Refer to the warning note in Section 1 before proceeding.
Removal
1. Before removing the fuel tank, all fuel must be drained from the tank. Since a fuel tank drain plug Is not provided, it is therefore preferable to carry out the removal operation when the tank is nearly empty. Before proceeding, disconnect the battery negative terminal (refer to "Disconnecting the battery") and syphon or handpump the remaining fuel from the tank.
2. Remove the exhaust system as described in Section 17.
3. Free both handbrake cables from theirretaining clips on the base of the fuel tank (see illustration).
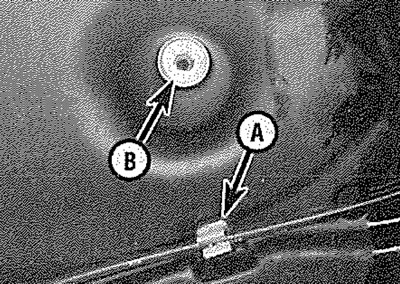
6.3. Fuel tank handbrake cable retaining clip (A) and retaining nut (B)
4. Disconnect the wiring connector and fuel hoses from the fuel gauge sender unit as described in paragraphs 2 to 5 of Section 5.
5. Unclip the fuel filter retaining strap and free the filter from the left-hand side of the fuel tank.
6. Working at the right-hand side of the fuel tank, release the retaining clips then disconnect the filler neck vent pipe and main filler neck hose from the fuel tank/filler neck. Where necessary, also disconnect the breather hose. Some breather hoses are joined to the tank with quick-release fittings; to disconnect these fittings, slide the cover along the hose then depress the centre ring and pull the hose out of its fitting (see illustrations).
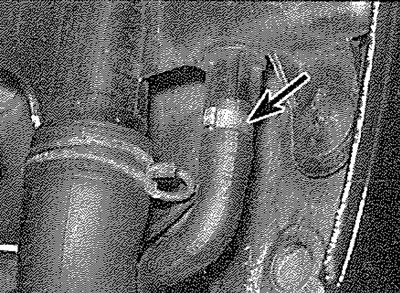
6.6a. Disconnect the main breather hose (arrowed) from the filler neck...
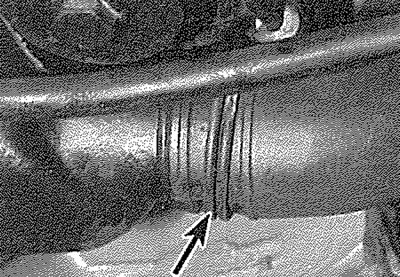
6.6b.... and the main filler hose (arrowed) from the fuel tank
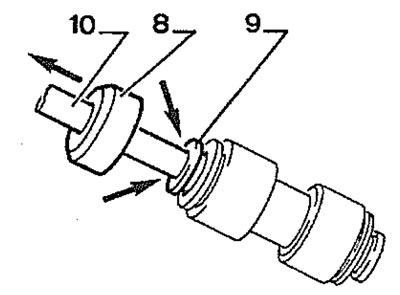
6.6c. Fuel tank breather hose quickrelease connector 8. Cover; 9. Centre ring; 10. Hose
7. Place a trolley jack with an interposed block of wood beneath the tank, then raise the jack until it is supporting the weight of the tank.
8. Slacken and remove the two retaining nuts and washers, then slowly lower the fuel tank out of position, disconnecting any other relevant vent pipes as they become accessible (where necessary). Remove the tank from underneath the vehicle and recover the tank mounting rubbers, noting their correct fitted positions.
9. If the tank is contaminated with sediment or water, remove the sender unit (Section 5) and swill the tank out with clean fuel. The tank is injection-moulded from a synthetic material -if seriously damaged, It should be renewed.
However, in certain cases, it may be possible to have small leaks or minor damage repaired. Seek the advice of a specialist.
Refitting
10. Refitting is the reverse of the removal procedure, noting the following points:
- a) When lifting the tank back into position, make sure that the mounting rubbers are correctly positioned and take great care to ensure that none of the hoses become trapped between the tank and vehicle body.
- b) Ensure all pipes and hoses are correctly routed and securely held in position with their retaining clips.
- c) On completion, refill the tank with a small amount of fuel and check for signs of leakage prior to taking the vehicle out on the road.