
English Русский
Български
Беларускі
Український
Српски
Hrvatski
Română
Polski
Slovenský
Magyar
Bookmark Articles Sitemap Contacts
Company Hyundai Company Opel Company Skoda Company Kia Company Mitsubishi Company LADA Company Audi
PeugeotBook.ru


Series 100   Series 200   Series 300   400-500   Series 600   Crossovers   Others
 
Peugeot 106 (1991-2003)

Fuel pump — testing, removal and refitting (Peugeot 106)

  • Main
  • 10X
  • Peugeot 106 (1991-2003)
  • Power unit
  • Fuel system (carburetor)
  • Fuel pump — testing, removal and refitting
0
Table of contents: Testing 🠇 Removal 🠇 Refitting 🠇
Note: Refer to the warning note in Section 1 before proceeding.


Testing


1. To test the fuel pump on the engine, disconnect the outlet pipe which leads to the carburettor. Hold a wad of rag by the pump outlet while an assistant spins the engine on the starter. Keep your hands away from the electric cooling fan. Regular spurts of fuel should be ejected as the engine turns. Be careful not to spill fuel onto hot engine components.

2. The pump can also be tested after removing it. With the pump outlet pipe disconnected but the inlet pipe still connected, hold the wad of rag by the outlet Operate the pump lever by hand, moving it in and out; if the pump is in a satisfactory condition, the lever should move and return smoothly and a strong jet of fuel should be ejected.

Removal


3. Identify the pump inlet and outlet hoses and slacken both retaining clips (see illustration). Where crimped-type hose clips are fitted, cut the clips and discard them; use standard worm-drive hose clips when refitting. Place wads of rag beneath the hose unions to catch any spilled fuel, then disconnect both hoses from the pump; plug the hose ends to minimise fuel loss.
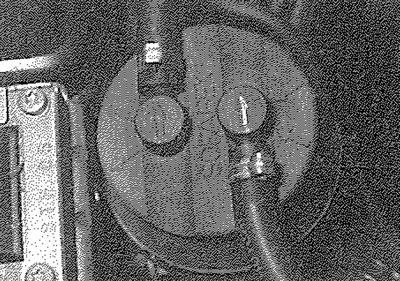
4.3. Arrows on fuel pump unions indicate the direction of fuel flow

4.3. Arrows on fuel pump unions indicate the direction of fuel flow


4. Slacken and remove the bolts securing the pump to the rear of the cylinder head. Remove the pump aiong with its gasket. Discard the gasket; a new one must be used when refitting.

Refitting


5. Ensure the pump and cylinder head mating surfaces are clean and dry, then offer up the new gasket and refit the pump to the cylinder head. Tighten the pump retaining bolts to the specified torque.

6. Reconnect the inlet and outlet hoses to the relevant pump unions and securely tighten their retaining clips.
This article is available at russian, bulgarian, belarusian, ukrainian, serbian, croatian, romanian, polish, slovak, hungarian
Article reviewed by editor: Matveev Demid
Share information:
Previous
Peugeot 106: Fuel system (carburetor)
Next

Air cleaner air temperature control system — information and…
Air cleaner assembly — removal and refitting
General information and precautions
Fuel/exhaust systems — carburettor petrol models — specifications
Fuel gauge sender unit — removal and refitting
Fuel tank — removal and refitting
Accelerator cable — removal, refitting and adjustment
Accelerator pedal — removal and refitting
Choke cable — removal, refitting and adjustment
See similar information for other Peugeot models

➨ Fuel lift pump (low pressure) Peugeot 207 (2006-2014)
➨ Fuel injection pump (Lucas CAV/Roto-Diesel) — checking and… Peugeot 305 (1977-1989)
➨ Removal and installation the high pressure fuel pump Peugeot 405 (1987-1997)
➨ High pressure fuel pump — removal, installation and adjustment Peugeot 605 (1989-2000)
➨ High-pressure fuel pump — removal and installation Peugeot Partner I (1996-2008)
Link to this article in different formats
Comments and feedback from visitors
No comments yet


Add two numbers 39 + 12


Peugeot 106 (1991-2003) 
  • General information
  • Introduction to manual
  • Weekly checks
  • Maintenance (petrol)
  • Maintenance (diesel)
  • Troubleshooting
  • Power unit
  • Petrol engines
  • Diesel engines
  • Engine overhaul
  • Cooling and heating
  • Fuel system (carburetor)
  • Single point injection (petrol)
  • Multipoint injection (petrol)
  • Fuel system (diesel)
  • Emission control system
  • Engine electrical equipment
  • Ignition system
  • Diesel heating
  • Transmission
  • Clutch
  • Manual gearbox
  • Automatic gearbox
  • Drive shafts
  • Chassis, running gear
  • Brake system
  • Car suspension
  • Steering
  • Body and interior
  • Exterior (external elements)
  • Interior (internal elements)
  • Doors, locks and windows
  • Electrical equipment
  • Equipment and devices
  • Electrical diagrams
PeugeotBook.ru © 2018–2026 | Mobile version | Sitemap: EN BG BY UA RS HR RO PL SK HU | Write message | Site search | Add to bookmarks | Peugeot owners
106 (1991-2003) | 206 (1998-2012) | 207 (2006-2014) | 305 (1977-1989) | 306 (1993-2002) | 307 (2001-2008) | 405 (1987-1997) | 406 (1995-2004) | 605 (1989-2000) | Partner-I (1996-2008) | Eurovans-807 (2002-2014) | Eurovans-806 (1994-2002) | J5 (1981-1993) |
Cookies are used to ensure the correct display of pages on the site.