



Table of contents: Old design of pads 🠇 New design of pads 🠇
When removing and installing brake pads at Peugeot service centers, the FACOM D60 A clamp is used.
Old design of pads
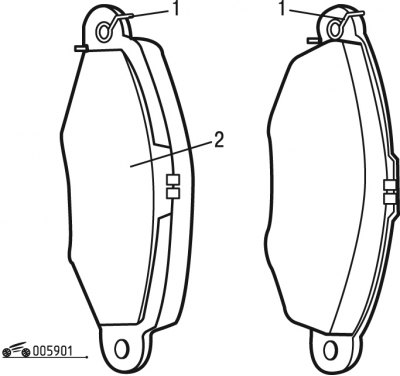
Figure 9.1. Old design of front brake pads: 1 - spring; 2 - brake shoe
The old design brake pads are equipped with cylindrical springs 1 (figure 9.1).
New design of pads
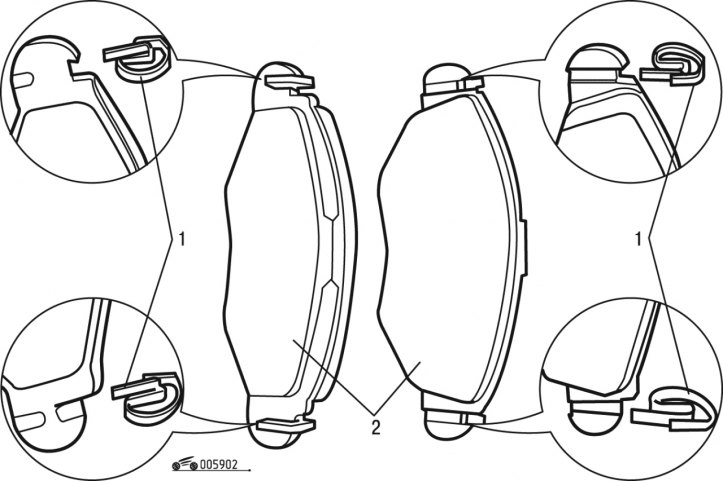
Figure 9.2. New design of front brake pads: 1 - spring; 2 - brake pads
The shape of the new design pads has been changed to allow the installation of leaf springs 1 (figure 9.2). Leaf springs are supplied as spare parts in a set with front brake pads. New brake pads can be installed in old brake mechanisms.
Remove the front brake pads in the following order:
1) Apply the parking brake to the car;
2) Raise the front of the car and place it on supports;
3) remove the wheel;
4) remove the filter of the brake fluid supply reservoir;
5) pump out some of the brake fluid from the reservoir using a syringe;
6) put the filter back in place;
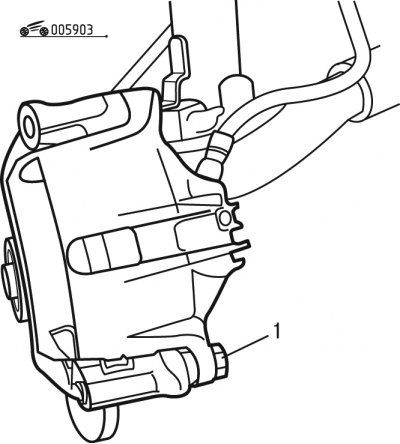
Figure 9.3. Unscrewing the guide pin bolt: 1 - bolt
7) unscrew the lower bolt 1 (figure 9.3) guide pin mounts;
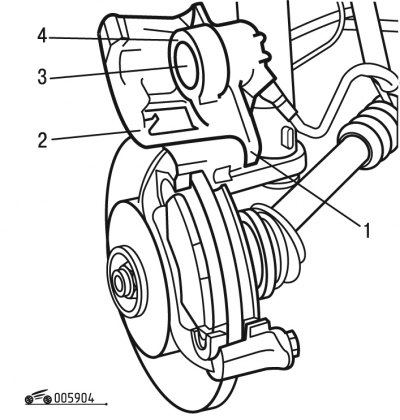
Figure 9.4. Turning the caliper: 1 - protective corrugated cap; 2 - support; 3 - piston; 4 - protective cuff
8) turn the caliper 2 (figure 9.4) around the top bolt;
9) remove the brake pads;
10) check visually:
- tightness around piston circumference 3;
- condition and correct fit of the protective cuff 4 and protective corrugated caps 1;
- brake disc wear;
- make sure the caliper guide pins move freely;
11) replace faulty parts.
Install the front brake pads in the following order:
- clean the brake mechanism parts and brake disc from dirt and dust;
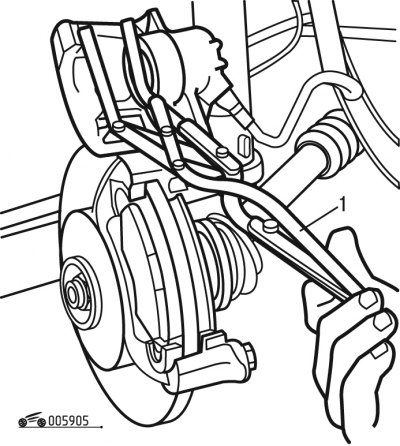
Figure 9.5. Sinking the piston into the cylinder: 1 - clamp
- press the piston into the cylinder using clamp 1 (figure 9.5) type FACOM D60 A;
Old design brake pads
- install brake pads;
New design brake pads
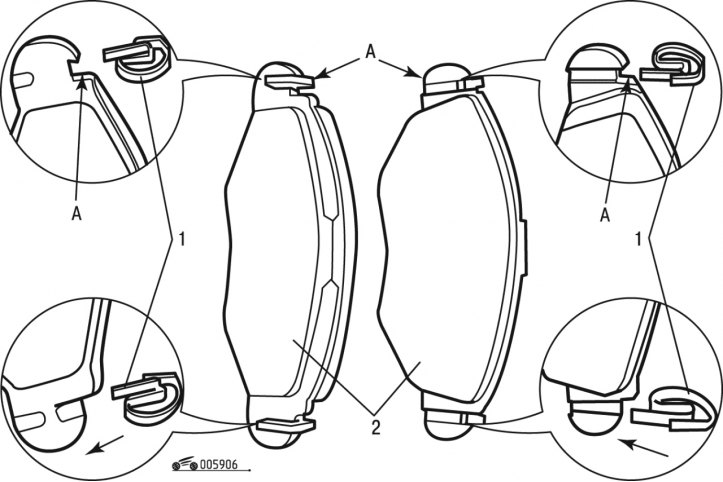
Figure 9.6. Installing springs on new design pads: 1 - springs; 2 - pads
- install springs 1 (figure 9.6) on pads 2, notch A should be located at the top;
Note: The spring coil should be located on the opposite side from the lining.
- install the brake pads, correctly positioning the springs 1. Notch A should be located at the top;
Both pad designs
- - turn the caliper down;
Caution: Do not pinch the upper guide pin when moving the caliper.
- install new bolt 1 (see figure 9.3) with a locking compound pre-applied to the threads;
- tighten bolt 1 to 30 Nm;
- check the brake fluid level in the supply tank and top up if necessary;
- reinstall the wheel, tightening the bolts to a torque of 85 Nm;
- lower the front of the car;
- start the engine and press the brake pedal several times with increasing force before starting to move.