English Русский
Български
Беларускі
Український
Српски
Hrvatski
Română
Polski
Slovenský
Magyar
Bookmark Articles Sitemap Contacts
Company Hyundai Company Opel Company Skoda Company Kia Company Mitsubishi Company LADA Company Audi
PeugeotBook.ru


Series 100   Series 200   Series 300   400-500   Series 600   Crossovers   Others
 
Peugeot 206 (1998-2012) Peugeot 207 (2006-2014)

Removal and installation air conditioning system tubes and compressor (Peugeot 207)

  • Main
  • 20X
  • Peugeot 207 (2006-2014)
  • Body and interior
  • Heating and air conditioning
  • Removal and installation air conditioning system tubes and compressor
0
Table of contents: Removal 🠇 Installation 🠇

Removal


Disconnect the battery.

Drain the fluid from the engine cooling system.

Remove:
  • protective shield under the engine (depending on the model);
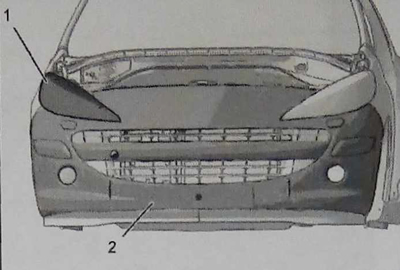
  • front bumper (2) (see the corresponding operation);
  • front right headlight (1).

front right headlight (1).


Loosen the screws securing the windshield washer reservoir.

Move the washer reservoir aside (without opening the circuit).

Place the car on a lift.

EP6DT/DTS engines


Remove the intake manifold (4) (from above).

Loosen the bolts (5) and remove the air filter unit cover (3).
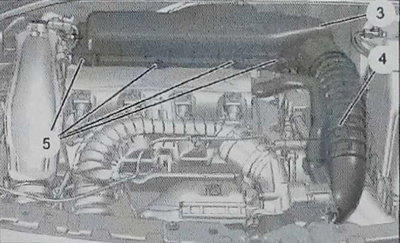
Loosen the bolts (5) and remove the air filter unit cover (3).


Unscrew the bolt (9) and remove the intake manifold (8) (lower).

Loosen the bolt (6) and remove the air filter (7).
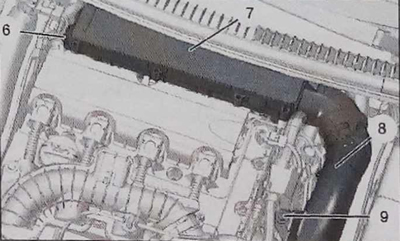
Loosen the bolt (6) and remove the air filter (7).


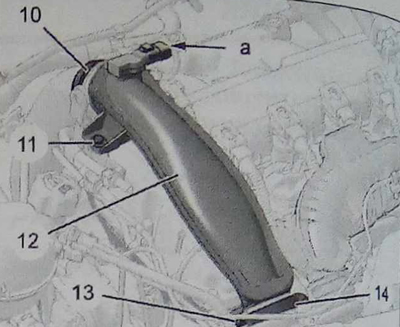
Disconnect the connector in area "a".


Loosen clamps (10) and (14).

Unscrew bolts (11) and (13) and remove the intermediate tube (12).

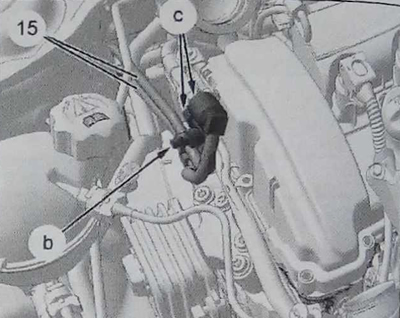
Caution: Release the fuel pressure by connecting the end of the tube to the SHRADER fitting and collect the drained fuel in a collecting container (in area "b").

Caution: Release the fuel pressure by connecting the end of the tube to the SHRADER fitting and…


Loosen and disconnect the fuel pipes (15) (in area "c").

Remove the lifting bracket.
Remove the lifting bracket.


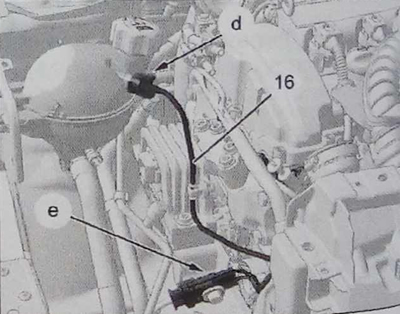
Disconnect the air bleed tube (16) (in area "d").

Disconnect the connector (in area "e").
Disconnect the connector (in area «e»).


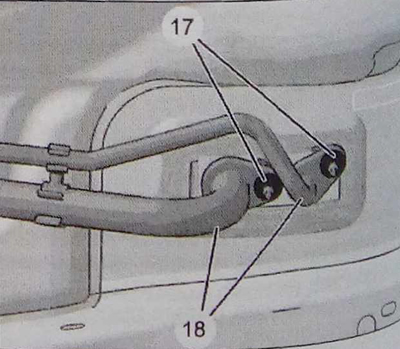
Unscrew the nuts (17).


Disconnect the air conditioning pipes (18) from the air conditioning reducer.
Disconnect the air conditioning pipes (18) from the air conditioning reducer.


Caution: Quickly close the air conditioner pipes to prevent refrigerant leakage.


Unscrew the nuts (19).

Disconnect the tubes (18) from the air conditioner condenser.
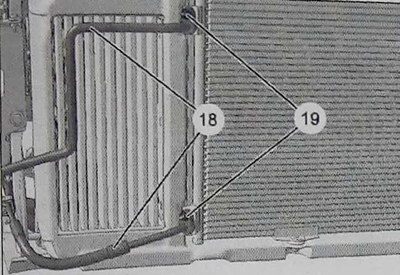
Disconnect the tubes (18) from the air conditioner condenser.


Caution: Quickly close the air conditioner pipes to prevent refrigerant from baking.


Move the accessory drive belt aside.

Disconnect the electrical connectors (21) of the air conditioning compressor (22).

Loosen the bolts (20).

Move aside the cooling compressor (22).

Loosen the bolts (20).
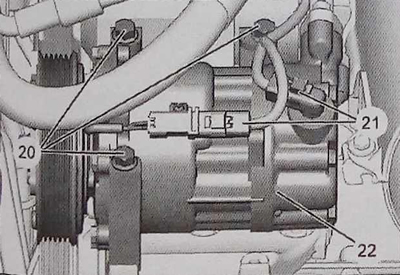
Loosen the bolts (20).


Unscrew the nuts (23).


Disconnect the air conditioning pipes (18) from the air conditioning compressor (22).

Caution: Quickly close the air conditioner pipes to prevent refrigerant leakage.


Disconnect the electrical connector from the air conditioning pressure sensor.
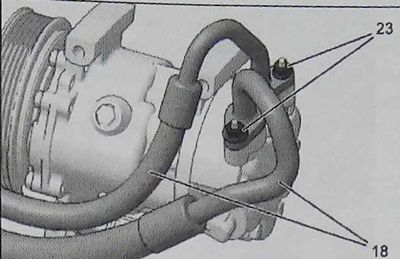
Disconnect the electrical connector from the air conditioning pressure sensor.


Remove the air conditioner tube retaining bolts.

Disconnect the air conditioning pipes (18).

Remove the high pressure (HP) and low pressure (LP) air conditioner pipes.

Loosen the bolts (24) and remove the air filter unit cover (25).
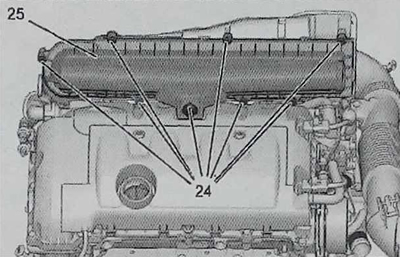
Loosen the bolts (24) and remove the air filter unit cover (25).


Engines EP6 / ERZ


Loosen the bolts (27) and remove the air filter unit (26) (intermediate piece).

Loosen the bolt (28) and remove the intake manifold (29) and air filter unit (30) (lower).
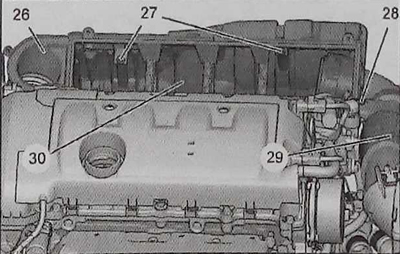
Loosen the bolt (28) and remove the intake manifold (29) and air filter unit (30) (lower).


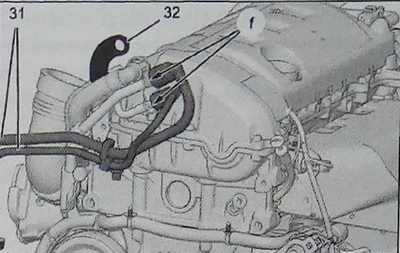
Disconnect the fuel hoses (31).


Disconnect the fuel hoses (31) (in area "f").

Remove the lifting bracket (32).

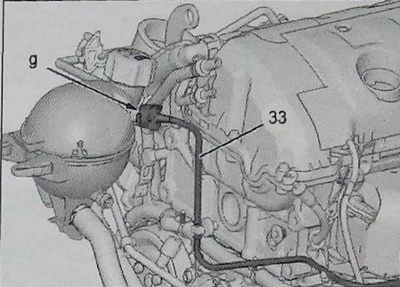
Disconnect the air bleed tube (33) (in area "g").

Unscrew the nuts (34).

Caution: Quickly close the air conditioner pipes to prevent refrigerant leakage.

Caution: Quickly close the air conditioner pipes to prevent refrigerant leakage.


Disconnect the air conditioner pipes (35) from the air conditioner reducer.
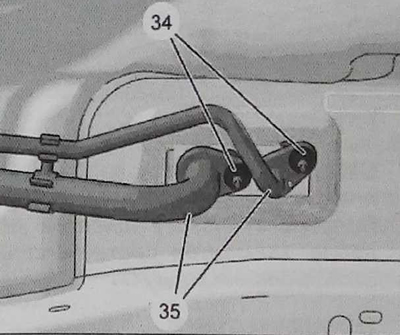
Disconnect the air conditioner pipes (35) from the air conditioner reducer.


Unscrew the nuts (36).


Caution: Quickly close the air conditioner pipes to prevent refrigerant leakage.


Disconnect the tubes (35) from the air conditioning compressor.
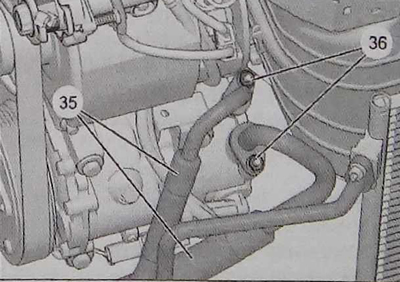
Disconnect the tubes (35) from the air conditioning compressor.


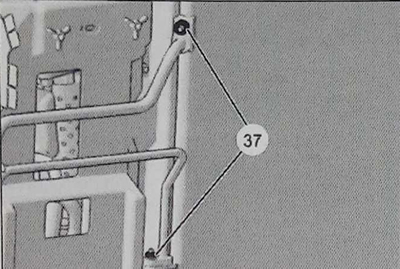
Unscrew the nuts (37).

Caution: Quickly close the air conditioner pipes to prevent refrigerant leakage.


Disconnect the tubes (35) from the air conditioner condenser.

Disconnect the electrical connector from the air conditioning pressure sensor.

Remove the air conditioner tube retaining bolts.

Disconnect the air conditioning pipes (35).

Remove the high pressure (HP) and low pressure (LP) air conditioner pipes.
Remove the high pressure (HP) and low pressure (LP) air conditioner pipes.


Installation


Caution: Check the cleanliness of the hoses before and after the air conditioning system components.


Note: Before installing the A/C tubes, install new gaskets lubricated with A/C compressor oil.


Caution: Observe the required tightening torques (see the corresponding tables).


Install all removed parts in reverse order.
This article is available at russian, bulgarian, belarusian, ukrainian, serbian, croatian, romanian, polish, slovak, hungarian
Article reviewed by editor: Matveev Demid
Share information:
Previous
Peugeot 207: Heating and air conditioning
Next

Removal and installation the fan control module
Removal and installation the gear motor and cabin fan
Removal and installation the dust filter
Tightening torques
Oil change — filling (air conditioning compressor)
Removal and installation the heater fan
Removal and installation the temperature sensors for the air…
Removal and installation the heater radiator
Removal and installation the capacitor
Removal and installation the pulley and clutch of the air…
See similar information for other Peugeot models

➨ Air conditioning system refrigerant check Peugeot 106 (1991-2003)
➨ Safety precautions when working with an air conditioning system Peugeot 307 (2001-2008)
➨ Heating and ventilation system switches Peugeot 405 (1987-1997)
➨ Air Conditioning — General Information Peugeot 605 (1989-2000)
➨ Air Conditioning System — general information and precautions Peugeot Partner I (1996-2008)
Link to this article in different formats
Comments and feedback from visitors
No comments yet


Add two numbers 50 + 48


Peugeot 207 (2006-2014) 
  • General information
  • Car care
  • Governing bodies
  • Driving and operation
  • Power unit
  • Engine characteristics
  • Engine repair
  • Cooling system
  • Lubrication system
  • Ignition system
  • Control system (gasoline)
  • Fuel system (gasoline)
  • Control system (diesel)
  • Transmission
  • Clutch
  • Mechanical gearbox
  • Automatic gearbox
  • Drive shafts
  • Chassis, running gear
  • Car suspension
  • Steering
  • Brake system
  • Body and interior
  • Exterior (external elements)
  • Interior (internal elements)
  • Heating and air conditioning
  • Electrical equipment
  • Equipment and devices
  • Headlights and lighting
  • Power devices
  • Electrical circuits
Peugeot 206 (1998-2012) 
  • General information
  • User manual
  • Maintenance
  • Power unit
  • Gasoline engines
  • Diesel engines
  • Diesel power system
  • Engine management system
  • Transmission
  • Clutch
  • Mechanical gearbox
  • Automatic gearbox
  • Drive shafts
  • Chassis, running gear
  • Front suspension
  • Rear suspension
  • Steering
  • Brake system
  • Body and interior
  • Body elements
  • Doors, locks and windows
  • Electrical equipment
  • Equipment and devices
  • Electrical circuits
PeugeotBook.ru © 2018–2026 | Mobile version | Sitemap: EN BG BY UA RS HR RO PL SK HU | Write message | Site search | Add to bookmarks | Peugeot owners
106 (1991-2003) | 206 (1998-2012) | 207 (2006-2014) | 305 (1977-1989) | 306 (1993-2002) | 307 (2001-2008) | 405 (1987-1997) | 406 (1995-2004) | 605 (1989-2000) | Partner-I (1996-2008) | Eurovans-807 (2002-2014) | Eurovans-806 (1994-2002) | J5 (1981-1993) |
Cookies are used to ensure the correct display of pages on the site.