
2. Place the front end of the machine on the repair ramps or jack up and support its front end. Engage the handbrake to prevent the machine from moving.
3. To inspect the front brake pads, remove the front wheels, behind which are the brake calipers. In the case of Teves brand calipers, it is also necessary to remove the damping spring, which closes the grooves on the pads, which can be used to judge pad wear. Remove the wheels and, in the case of Teves brakes, knock out the lower pin holding the brake pads. Remove the leaf damping spring. Each pad has a special groove on which you can judge the thickness of the remaining layer of friction material. If this groove is not visible, the pad is worn beyond the allowable limit and must be replaced. If at least one pad is worn out, all 4 must be replaced.
4. To replace the pads, remove the front wheels (if not already done, and then use a clean syringe to remove some fluid from the brake reservoir. When installing new pads, the pistons must be moved deeper into the cylinders in order to accommodate new, thicker pads. In this case, part of the brake fluid will flow back into the reservoir, and if measures are not taken in advance, it may spill out. The fluid removed from the reservoir cannot be reused.
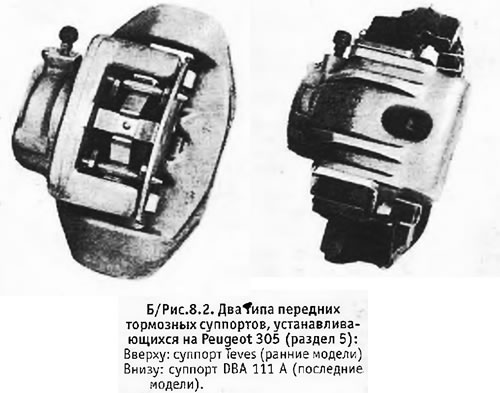
5. On B / fig. Figure 8.2 shows two types of front brake calipers used on the Peugeot 305. Although in principle they are interchangeable, it is important that both front calipers on the machine are of the same type.
Brakes
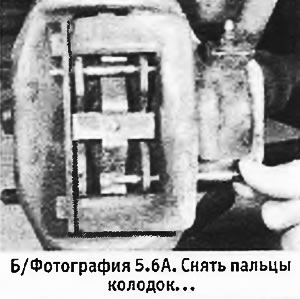
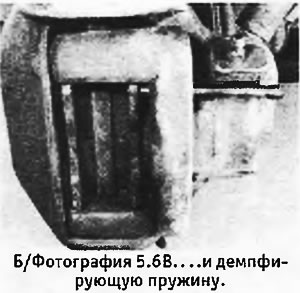
6. To remove the pads, knock out 2 fingers holding the pads, using, if necessary, a punch with a diameter of 3 mm. Remove fixing spring (see pictures).
 |  |
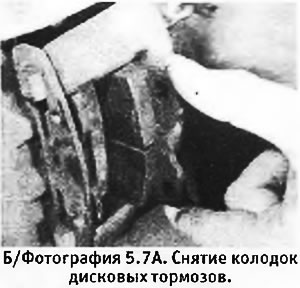
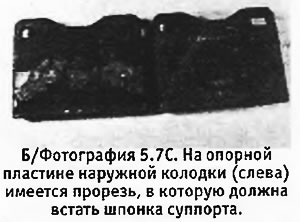
7. Press the caliper towards the middle of the machine and remove the inner pad (see photo). After that, press the caliper back and remove the outer pad. Please note that the outer pad on the base plate has a recess into which the caliper key fits (see pictures).
 |  |
8. Inspect the friction surface of the disc. If it is badly worn or has scratches or cracks, the disc should be replaced. Removing the disc from the suspension strut must be done by a specialist (see chapter 9, section 7). If the wear of the discs is within tolerance, the discs can be reground in a specialized workshop.
9. If the pads are not very worn, but have a black shiny surface, sand them with sandpaper before installing them in place. Be careful not to remove too much material. The pads must be installed in their original positions.
10. Before installing the pads in place, inspect the caliper, brake disc and cylinders for wear and signs of leakage. Remove all traces of corrosion. If the shoe pins and spring are worn or corroded, they should be replaced.
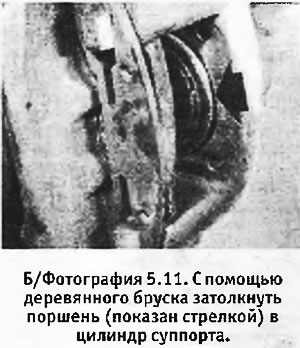
11. If you are going to replace pads (all 4) you must first remove some of the fluid from the brake reservoir (see paragraph 4). Using a block of wood or a blunt tool, push the piston into the caliper cylinder (see photo). Compare the new pads with the old ones to make sure they are identical.
12. Spray the pad support plates with a special Penatex compound to muffle the sound (detail "Peugeot" N 9730.61). Check that the composition does not get on the friction material of the pads. Let it dry and check that there are no traces of oil or grease on the disc and pad. Oiled pads must not be installed. An oily disc must be cleaned with methyl alcohol and wiped with a clean cloth.
13. Installing the pads is done in reverse order. Install the outer shoe first, making sure the key fits into the slot in the shoe backing plate, then the inner shoe, spring, and pins.
Brakes
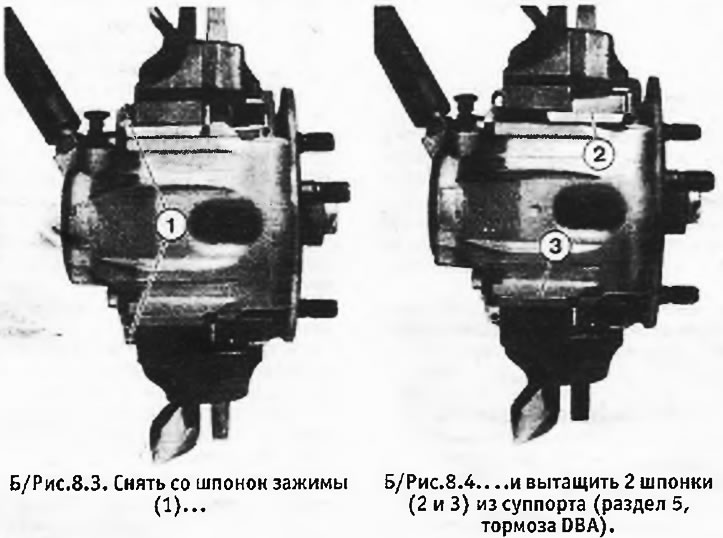
14. Using long-nose pliers, remove the clips from the keys and pull the keys out of the mounting slots.
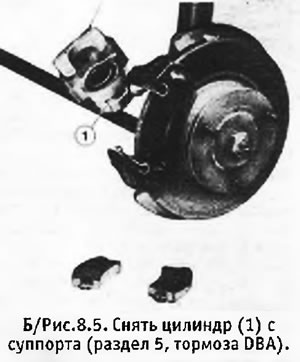
15. After removing the keys, you can remove the wheel cylinder from the caliper and, without disconnecting the brake hose from it, turn the cylinder to the side so as not to interfere. Check that the hose is not under tension.
16. Remove the old pads from the caliper, paying attention to the springs attached to the upper ends of the pads (How are they secured and installed?).
17. Carry out the operations indicated in paragraphs 8-12. Inspect the slots into which the dowels fit, and remove all bumps and burrs with sandpaper, carefully removing all traces of abrasive material after that.
18. Fix the springs on the shoes exactly in their original position (see paragraph 16). The coil of the spring must pass over the recess in the block (see b/fig. 8.6).

19. Apply a thin coat of Molykote 321 R (or any other dry anti-friction lubricant) on the dowels of the pads and let it dry.
20. Attach the pads with their front surfaces to each other and, after checking the correct installation of the springs, install the pads in the caliper with the springs up.
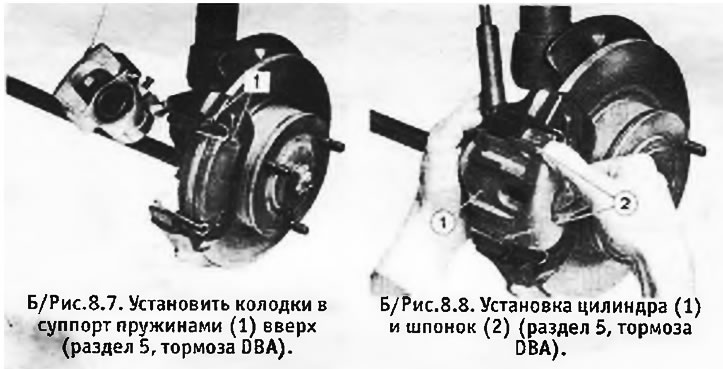
21. Install the caliper cylinder and slide the keys into place. Make sure the wire springs run under the sliders on the cylinder and not between the sliders and keys.
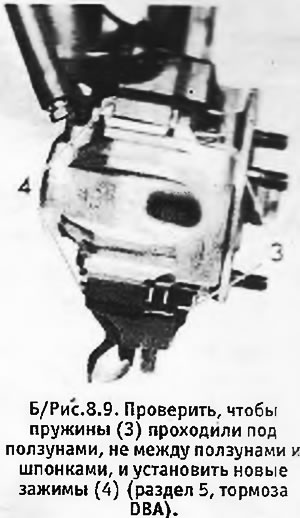
22. Install new clips to secure the keys in the sliders.
All front brakes
23. Repeat the entire procedure on the second front brake, reinstall the wheels and tighten the wheel nuts to the desired torque.
24. Add fresh fluid to the brake reservoir and, with the engine running, press the brake pedal several times so that the pistons fall into place. Upon completion, refill the liquid in the reservoir (of necessity).
25. Remember that new pads need grinding in, so at first you should drive carefully and do not brake at high speed.