English Русский
Български
Беларускі
Український
Српски
Hrvatski
Română
Polski
Slovenský
Magyar
Bookmark Articles Sitemap Contacts
Company Hyundai Company Opel Company Skoda Company Kia Company Mitsubishi Company LADA Company Audi
PeugeotBook.ru


Series 100   Series 200   Series 300   400-500   Series 600   Crossovers   Others
 
Peugeot 305 (1977-1989) Peugeot 306 (1993-2002) Peugeot 307 (2001-2008)

Adjusting the gear shift lever mechanism (Peugeot 305)

  • Main
  • 30X
  • Peugeot 305 (1977-1989)
  • Transmission
  • Mechanical gearbox BE1
  • Adjusting the gear shift lever mechanism
0
Table of contents: Early models (without reverse gear…🠇 Latest models (with reverse gear…🠇 Gear shift and selection levers…🠇

Early models (without reverse gear lock cable)


35. Set the gearbox to neutral and check that the levers on the gearbox are positioned correctly (see B/Figure 12.51). Due to the lack of main splines, it is quite possible to install the levers in the wrong position after disassembling the box.
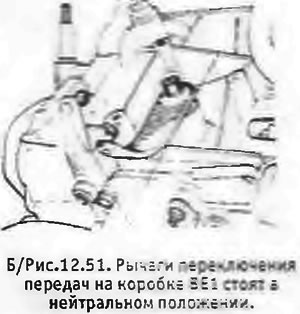
35. Set the gearbox to neutral and check that the levers on the gearbox are positioned correctly…


36. Measure the length of the gear engagement rod and the gear selection rod and compare the obtained values with those shown in B/Figure 12.52. If necessary, adjust the length of the rods by loosening the lock nut and screwing the rod into the threaded end (or turning it out of it) (the ball joints must be disconnected).
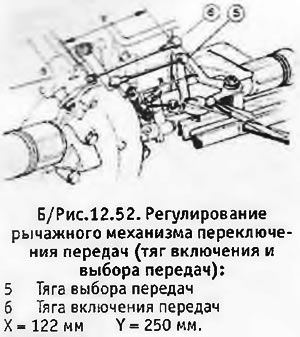
36. Measure the length of the gear engagement rod and the gear selection rod and compare the…


37. While working inside the car, detach the rubber boot from the gear shift lever and move it up the lever. Engage 2nd gear.


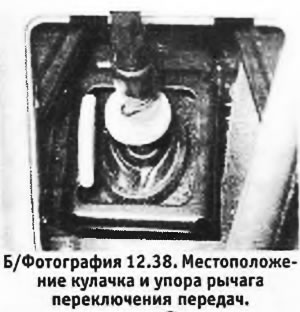
38. Measure the gap between the plastic cam and the stop in the gear shift lever housing. If the gap is not equal to that shown in B/Figure 12.53, remove the spring clip and lift the cam off its splines. Move the cam to obtain the required clearance and secure it with the spring clip. Apply a small amount of grease to the side surface of the cam where it rubs against the stop (see photo).
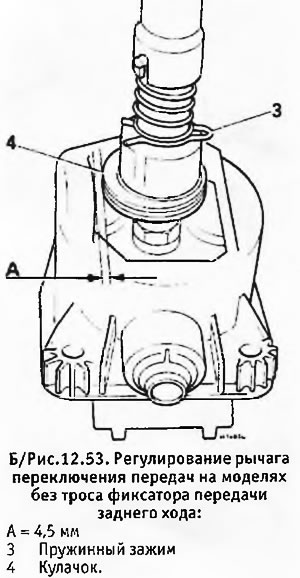
38. Measure the gap between the plastic cam and the stop in the gear shift lever housing. If the…

39. If, even after adjusting the cam, the 1st and 2nd gears are difficult to engage, it is necessary to measure the lever travel in the direction of the 1/2 gear plane.

40. Place the gear shift lever in neutral, then carefully move it to the left until you begin to feel resistance.

41. Place a ruler on the gear shift knob so that the zero mark is aligned with the 1/2 gear line on the knob.


42. Move the lever all the way to the left without moving the ruler, and measure the distance the handle moves. Repeat this operation 2-3 times. The required displacement should be 38±2 mm.

43. If necessary, move the plastic cam (see above) to obtain the desired stroke value.

44. If the cam has been moved to the position corresponding to the maximum lever stroke, but the required stroke has not been achieved, it is necessary to lengthen the gear selection rod by 6 mm and measure the stroke again.

45. If the cam has moved to the position corresponding to the minimum lever travel, but its travel still exceeds the required value, it is necessary to shorten the gear selection rod by 6 mm and check the lever travel again.

46. After completing the adjustment, check the engagement of all gears and make sure that reverse gear cannot be engaged without lifting the ring on the lever.

47. Install and secure the rubber boot of the gear shift lever.

Latest models (with reverse gear lock cable)


48. In 1985, the model in question began to be equipped with a new type of gear shift lever mechanism. It can be identified by the presence of a reverse gear lock cable.

49. The new type of gear shift lever mechanism does not require adjustment. The length of the engagement and gear selection rods is adjusted in the same way as specified in paragraph 36.
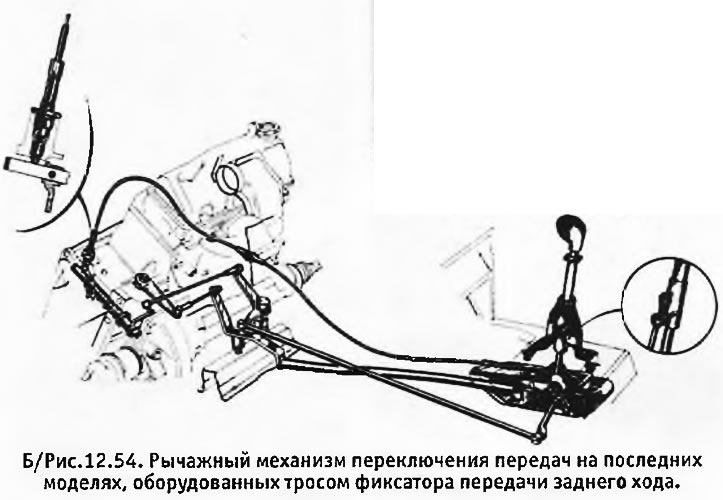
49. The new type of gear shift lever mechanism does not require adjustment. The length of the…


Gear shift and selection levers (models since February 1987.)


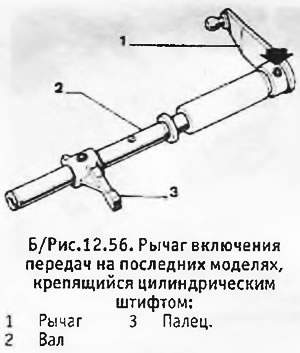
50. Beginning in February 1987, the gearshift and selector levers were secured to the rods with cylindrical pins rather than a key and nut.
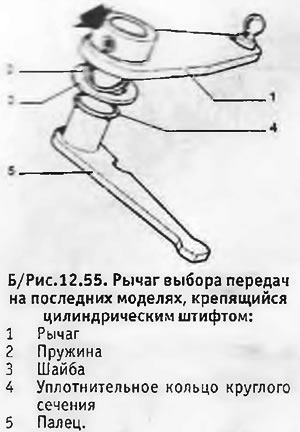
50. Beginning in February 1987, the gearshift and selector levers were secured to the rods with…
This article is available at russian, bulgarian, belarusian, ukrainian, serbian, croatian, romanian, polish, slovak, hungarian
Article reviewed by editor: Ostrovsky Fedor
Share information:
Previous
Peugeot 305: Mechanical gearbox BE1
Next

Gearbox — removal and installation
Routine maintenance
General description of the BE1 manual transmission
Gearbox specification
Gearbox (5-speed) — disassembly into main components
Gearbox (4-speed) — disassembly into main components
Gearbox — inspection and maintenance
Drive shaft — disassembly and assembly
Output shaft — disassembly and assembly
See similar information for other Peugeot models

➨ Clutch adjustment check and control mechanism lubrication Peugeot 106 (1991-2003)
➨ Adjusting the gear shift mechanism Peugeot 206 (1998-2012)
➨ Adjusting the gear shift rod Peugeot 405 (1987-1997)
➨ Gear Shift Mechanism — Removal Peugeot 605 (1989-2000)
➨ Gear shift lever mechanism — removal and installation Peugeot Partner I (1996-2008)
Link to this article in different formats
Comments and feedback from visitors
No comments yet


Add two numbers 28 + 17


Peugeot 307 (2001-2008) 
  • User manual
  • Keys, doors and alarm
  • Controls and instruments
  • Driving and operation
  • Maintenance
  • Power unit
  • Petrol engines TU3 and TU5
  • Petrol engines EW10
  • Diesel engines DV10
  • Diesel engines DW10
  • Transmission
  • Clutch and drive shafts
  • Mechanical gearbox
  • Automatic gearbox
  • Chassis, running gear
  • Front suspension
  • Rear suspension
  • Steering
  • Brake system
  • Body and interior
  • Exterior (external elements)
  • Interior (internal elements)
  • Doors, locks and windows
  • Heating and air conditioning
  • Electrical equipment
  • Equipment and devices
  • Power devices
  • Airbags
  • Electrical circuits
Peugeot 306 (1993-2002) 
  • General information
  • Introduction to manual
  • Specifications
  • Gasoline engine
  • Engine repair
  • Lubrication system
  • Cooling system
  • Fuel injection
  • Ignition system
  • Diesel engine
  • Engine repair
  • Lubrication system
  • Cooling system
  • Fuel injection
  • Transmission
  • Clutch
  • Gearbox
  • Drive shafts
  • Chassis, running gear
  • Steering system
  • Front suspension
  • Rear suspension
  • Brake system
  • Electrical equipment
  • Power devices
  • Electrical circuits
Peugeot 305 (1977-1989) 
  • General information
  • Maintenance
  • Power unit
  • Gasoline engines
  • Diesel engines
  • Cooling system (gasoline)
  • Cooling system (diesel)
  • Fuel system (gasoline)
  • Fuel system (diesel)
  • Ignition system
  • Transmission
  • Clutch
  • Mechanical gearbox BB8
  • Mechanical gearbox BE1
  • Automatic gearbox ZF4
  • Shafts, hubs and wheels
  • Chassis, running gear
  • Brake system
  • Car suspension
  • Steering
  • Body and interior
  • Exterior (external elements)
  • Interior (internal elements)
  • Electrical equipment
  • Equipment and devices
  • Headlights and lighting
  • Power devices
  • Electrical circuits
  • Wiring diagrams (diesel)
PeugeotBook.ru © 2018–2026 | Mobile version | Sitemap: EN BG BY UA RS HR RO PL SK HU | Write message | Site search | Add to bookmarks | Peugeot owners
106 (1991-2003) | 206 (1998-2012) | 207 (2006-2014) | 305 (1977-1989) | 306 (1993-2002) | 307 (2001-2008) | 405 (1987-1997) | 406 (1995-2004) | 605 (1989-2000) | Partner-I (1996-2008) | Eurovans-807 (2002-2014) | Eurovans-806 (1994-2002) | J5 (1981-1993) |
Cookies are used to ensure the correct display of pages on the site.