



- disconnect the ground wire from the battery;
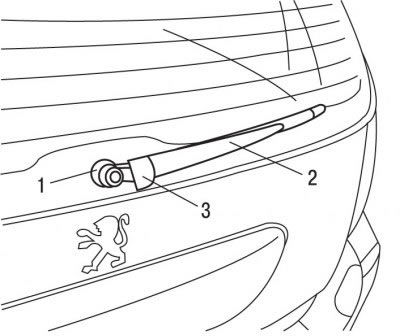
Figure 9.43. Windshield wiper mounting location: 1 - windshield wiper arm mounting nut; 2 - windshield wiper lever; 3 - lid
- lift cover 3 from the base of wiper arm 2 (figure 9.43);
- unscrew nut 1 securing the windshield wiper arm;
- using a large screwdriver as a lever, remove the wiper arm from the shaft. If the wiper arm fits very tightly on the axle, you will need to use a special puller to remove it;
- open the trunk door and remove the interior trim;
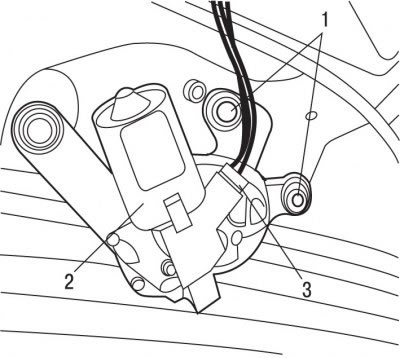
Figure 9.44. Rear window wiper: 1 - rivets; 2 - windshield wiper motor; 3 - electrical connector
- disconnect electrical connector 3 from rear window wiper motor 2 (figure 9.44);
- using a 7.5 mm drill, drill out rivets 1 of the windshield wiper mount. The drilling depth should be no more than 15.0 mm. To prevent any loose rivets from getting lost, place a rag on each side of the wiper arm;
Caution! Wear safety glasses when drilling out rivets. When removing rivets, take care to protect the rear window and tailgate.
- remove the rear window wiper from the vehicle.
Installation is carried out in the reverse order of removal, taking into account the following:
- remove any rivets that have fallen inside the tailgate to prevent them from causing any noise in the future;
- before installing the arms with the brushes, turn on the windshield wiper, set the COM 2000 steering column switch to the "Stop" position and correctly install the brushes on the marks on the rear window;
- tighten the windshield wiper arm mounting nut to a torque of 12 N·m;
- connect the ground wire to the battery;
- check the operation of the windshield wiper;
- initiate all electronic systems.