
English Русский
Български
Беларускі
Український
Српски
Hrvatski
Română
Polski
Slovenský
Magyar
Bookmark Articles Sitemap Contacts
Company Hyundai Company Opel Company Skoda Company Kia Company Mitsubishi Company LADA Company Audi
PeugeotBook.ru


Series 100   Series 200   Series 300   400-500   Series 600   Crossovers   Others
 
Peugeot 106 (1991-2003)

Cylinder head cover — removal and refitting (Peugeot 106)

  • Main
  • 10X
  • Peugeot 106 (1991-2003)
  • Power unit
  • Diesel engines
  • Cylinder head cover — removal and refitting
0
Table of contents: Removal 🠇 Refitting 🠇

Removal


1. Disconnect the breather hose from the lefthand end of the cylinder head cover.

2. Remove the upper timing belt cover as described in Section 5.

3. Unscrew the eight retaining bolts in a spiral sequence starting from the outside. Note their correct fitted locations, as they are of two different lengths. Recover the washers from the bolts/cover (see illustrations).
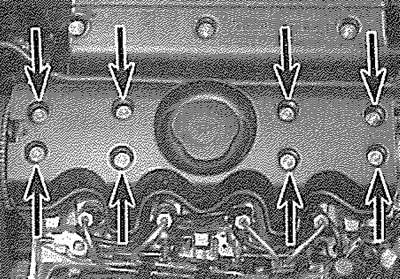
4.3a. Unscrew the eight retaining bolts (arrowed)...
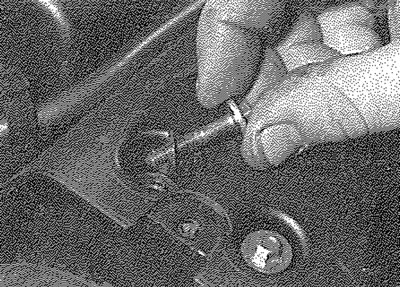
4.3a. Unscrew the eight retaining bolts (arrowed)...


4.3b.... and remove them along with their washers

4.3b.... and remove them along with their washers


4. Lift the cover away from the engine (see illustration), and recover the rubber seal.
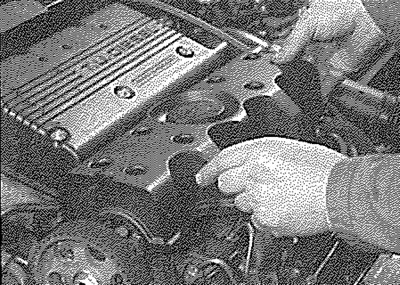
4.4. Lift the cover away from the engine and recover the seal

4.4. Lift the cover away from the engine and recover the seal


Examine the seal for signs of damage and deterioration, and if necessary, renew it.

Refitting


5. Carefully clean the cylinder head and cover mating surfaces, and remove all traces of oil.

[Source of the article is website: peugeotbook.ru]

6. Fit the rubber seal to the cylinder head cover groove, ensuring that it is correctly located along its entire length (see illustration).
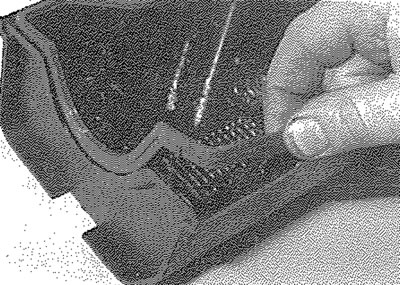
4.6. Ensure that the rubber seal is correctly located in the cover groove prior to refitting

4.6. Ensure that the rubber seal is correctly located in the cover groove prior to refitting


7. Carefully refit the cylinder head cover to the engine, taking great care not to displace the rubber seal.

8. Install the retaining bolts and washers, and tighten them to the specified torque setting. On TUD 5 engines, initially screw the bolts through to the head in the following order 8-5-7-6-4-1-3-2 (see illustration). Then pretighten them (to the specified torque), in numerical sequence (1 through to 8) and then finally complete by tightening to the specified torque, again in numerical sequence.
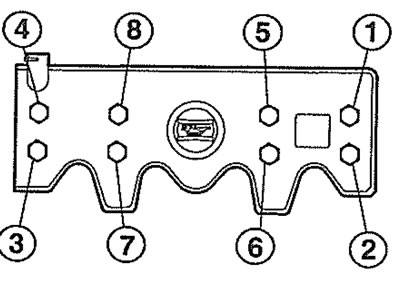
4.8. Cylinder head cover tightening sequence (TUD 5 engine)

4.8. Cylinder head cover tightening sequence (TUD 5 engine)


9. Refit the upper timing belt cover as described in Section 5.

10. Reconnect the breather hose to the cylinder head cover, and securely tighten its retaining clip.
This article is available at russian, bulgarian, belarusian, ukrainian, serbian, croatian, romanian, polish, slovak, hungarian
Article reviewed by editor: Matveev Demid
Share information:
Previous
Peugeot 106: Diesel engines
Next

Location of TDC on No 1 cylinder — general information and usage
Compression and leakdown tests — description and interpretation
General information
Diesel engine in-car repair procedures — specifications
Timing belt covers — removal and refitting
Timing belt — general information, removal and refitting
Timing belt tensioner and sprockets — removal, inspection and…
Camshaft oil seal — renewal
Camshaft and followers — removal, inspection and refitting
See similar information for other Peugeot models

➨ Cylinder head (petrol engines 1.4 and 1.6 l, EPZ, TU5) Peugeot 207 (2006-2014)
➨ Disassembling the cylinder head (XU series engines) Peugeot 305 (1977-1989)
➨ Cylinder Head Cover — Removal and Installation Peugeot 405 (1987-1997)
➨ Cylinder head — removal Peugeot 605 (1989-2000)
➨ Cylinder head cover — removal and installation Peugeot Partner I (1996-2008)
Link to this article in different formats
Comments and feedback from visitors
No comments yet


Add two numbers 50 + 41


Peugeot 106 (1991-2003) 
  • General information
  • Introduction to manual
  • Weekly checks
  • Maintenance (petrol)
  • Maintenance (diesel)
  • Troubleshooting
  • Power unit
  • Petrol engines
  • Diesel engines
  • Engine overhaul
  • Cooling and heating
  • Fuel system (carburetor)
  • Single point injection (petrol)
  • Multipoint injection (petrol)
  • Fuel system (diesel)
  • Emission control system
  • Engine electrical equipment
  • Ignition system
  • Diesel heating
  • Transmission
  • Clutch
  • Manual gearbox
  • Automatic gearbox
  • Drive shafts
  • Chassis, running gear
  • Brake system
  • Car suspension
  • Steering
  • Body and interior
  • Exterior (external elements)
  • Interior (internal elements)
  • Doors, locks and windows
  • Electrical equipment
  • Equipment and devices
  • Electrical diagrams
PeugeotBook.ru © 2018–2026 | Mobile version | Sitemap: EN BG BY UA RS HR RO PL SK HU | Write message | Site search | Add to bookmarks | Peugeot owners
106 (1991-2003) | 206 (1998-2012) | 207 (2006-2014) | 305 (1977-1989) | 306 (1993-2002) | 307 (2001-2008) | 405 (1987-1997) | 406 (1995-2004) | 605 (1989-2000) | Partner-I (1996-2008) | Eurovans-807 (2002-2014) | Eurovans-806 (1994-2002) | J5 (1981-1993) |
Cookies are used to ensure the correct display of pages on the site.