
Drained coolant must be collected and disposed of.
The coolant must be drained on a cold engine.
Attention! When opening the expansion tank cap on a hot engine, care must be taken, as escaping vapors can cause severe burns. To do this, close the expansion tank cap with a thick layer of cloth and slowly unscrew it until a hissing sound is heard. After the hiss stops, slowly unscrew and remove the cap from the expansion tank.
Remove the expansion tank cap.
Remove the plastic cross member of the windshield.
Install a coolant collection pan under the engine.
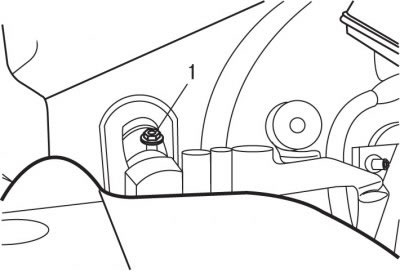
Pic. 4.24. Bolt location (1) removal of air from the cooling system of the DV4TD diesel engine
Unscrew bolt 1 (pic. 4.24) to remove air from the cooling system.
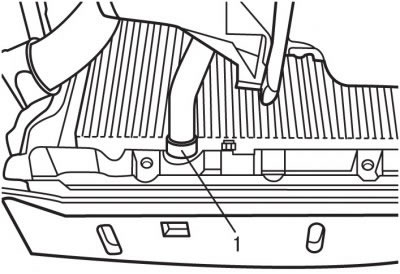
Pic. 4.25. Place of installation of the hose on the lower branch pipe (1) radiator
Loosen the clamp, remove the hose from the lower radiator pipe 1 (pic. 4.25), drain the coolant from the radiator and hose.
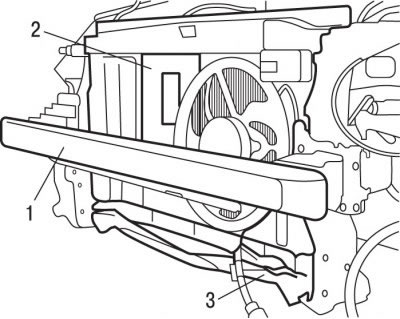
Pic. 4.1. Front panel cross member location (1), cooling cassettes assy (2) together with radiator and lower cross member (3) front panel
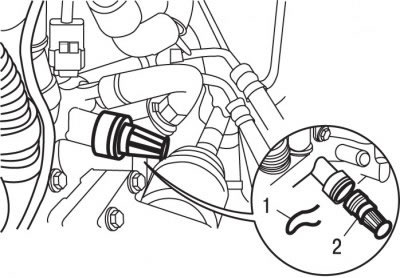
Pic. 4.26. Lock Location (1) drain plug (2) coolant
Remove latch 1 (pic. 4.1 4.26), remove drain plug 2 and drain the coolant from the engine cooling system.
After draining the coolant, reinstall drain plug 1 with a new sealing ring and secure it with a new retainer.
If the coolant is heavily contaminated, flush the cooling system. Since the coolant cannot be completely drained from the cooling system, it is recommended to flush the cooling system each time the coolant is drained.
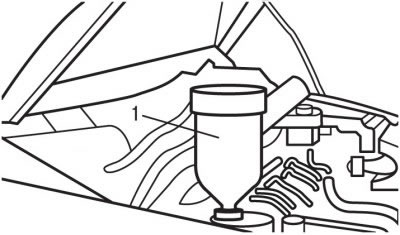
Pic. 3.47. Mounting on a special expansion tank 0173/2 (1) for filling coolant
Instead of the cap of the expansion tank, screw in a special container 1 (see fig. 3.47) 0173/2 for filling coolant. This is necessary in order to completely fill the engine cooling system with coolant and remove air from it. In the absence of a special container, you can make it yourself.
Slowly pour BASF GLYSANTIN G33-23F or GUTIT ESSEX REVKOGEL 2000 coolant into the cooling system.
Pour coolant into the expansion tank until it flows out through the hole for the bleed bolt. Screw on bolt 1 (see fig. 4.24).
For proper bleeding of the cooling system, a special container 1 (see fig. 3.47) 0173/2 to fill the coolant must be filled up to the 1 liter mark.
Start the engine and let it run at 2000 rpm-1 until the end of the second cooling cycle (turning on/off the radiator fan), while maintaining the fluid level at 1 liter.
Stop the engine.
Remove special container 1 (see fig. 3.47) 0173/2 to fill the coolant and screw on the expansion tank cap.
Install the plastic windshield cross member.
Note. If the cooling system was filled with coolant that is not recommended by the manufacturer, drain it from the cooling system. Pour clean water into the cooling system, start the engine and let it idle for 2 minutes. Drain the water from the cooling system, blow the engine cooling system with compressed air. Fill with fresh, manufacturer-recommended coolant.
Check the coolant level and top up if necessary.
On a hot engine, the coolant level should be at the mark «Max», on a cold engine - between the marks «Max» And «Min».