



Brake discs
Brake discs can be modified as long as they are not ground or turned to the minimum permissible thickness. When the brake disc wears down to its minimum thickness, it must be replaced with a new one. When checking the thickness of the disc, please refer to the specifications.
The working surface of the brake disc must also be checked for axial runout without removing it from the vehicle.
19. Attach the dial indicator using the holder to the wheel suspension so that the measuring pin is approximately 2 mm from the outer edge of the disc (see illustration).
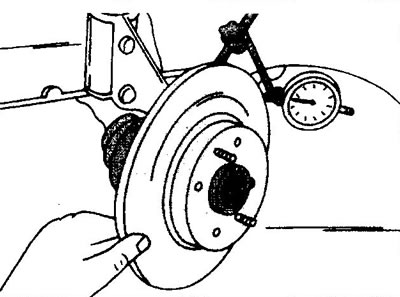
2.19 Checking the axial runout of the brake disc
20. Rotate the dial. When rotating the brake disc, the indicator arrow should not deviate by more than 0.15 mm.
Assuming that the brake disc is sufficiently worn and has reached the maximum permissible thickness, this can be checked without removing the brake disc from the car.
21. Measure the thickness of the brake disc using a micrometer. Since the surface of the brake disc wears unevenly, the measurement should be taken at several points around the entire circumference of the disc (see illustration).
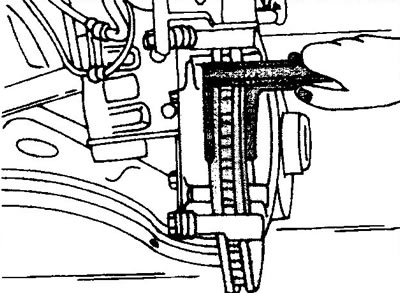
2.21 Measuring the residual thickness of a brake disc without removing the disc from the vehicle. The illustration shows a ventilated brake disc
The permissible overall deviation should not exceed 0.025 mm. Nominal values are specified in the specifications. If the brake disc has been removed, the remaining thickness can be checked by clamping the disc in a vice (see illustration 2.0a).
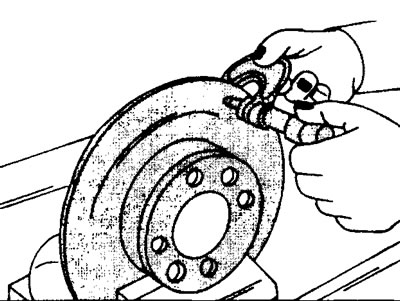
2.0a Measuring the residual thickness of a brake disc removed from a vehicle.
In order to remove the brake disc from the car, you must remove the brake pads, first removing the caliper and the pad guide. Removing the brake disc of a fixed-brake mechanism is possible without dismantling the brake shoe guide.
(Source available on the website: «www.PeugeotBook.ru»)
22. Unscrew the brake disc mounting bolts and remove it. The bolt tightening torque is 25 Nm. If the brake disc is tightly seated on the hub, it can be knocked off with a rubber mallet.
Installation of the brake disc is carried out in reverse order.
23. Install the shoe guide and tighten the mounting bolts to the appropriate tightening torque (see specifications).
24. Install the brake pads.
25. Take the vehicle for a test drive and check the brakes for proper operation. Be careful. The brakes need to be worked in, which takes some time.