
English Русский
Български
Беларускі
Український
Српски
Hrvatski
Română
Polski
Slovenský
Magyar
Bookmark Articles Sitemap Contacts
Company Hyundai Company Opel Company Skoda Company Kia Company Mitsubishi Company LADA Company Audi
PeugeotBook.ru


Series 100   Series 200   Series 300   400-500   Series 600   Crossovers   Others
 
Peugeot 106 (1991-2003)

Fuel system — priming and bleeding (Peugeot 106)

  • Main
  • 10X
  • Peugeot 106 (1991-2003)
  • Power unit
  • Fuel system (diesel)
  • Fuel system — priming and bleeding
0
1. After disconnecting part of the fuel supply system or running out of fuel, it is necessary to prime the system and bleed off any air which may have entered the system components.

2. All models are fitted with a hand-operated priming pump, consisting of a rubber bulb, which is clipped onto the side of the left-hand suspension strut turret.

3. To prime the system, first loosen the bleed screw located on the top of the fuel filter/thermostat housing, mounted on the lefthand end of the cylinder head (see illustration). If no bleed screw is fitted, loosen the outlet union itself (either at the filter/thermostat housing or at the injection pump).
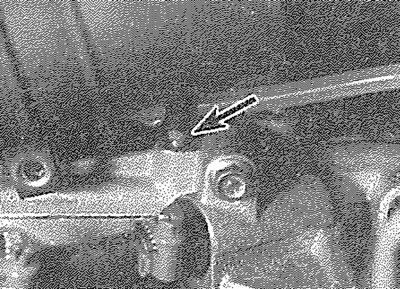
8.3. Fuel system bleed screw (arrowed) is located on the top of the fuel filter/thermostat housing

8.3. Fuel system bleed screw (arrowed) is located on the top of the fuel filter/thermostat housing


4. Pump the priming plunger until fuel free from air bubbles emerges from the outlet union or bleed screw (as applicable). Retighten the bleed screw or outlet union.

5. Switch on the ignition (to activate the stop solenoid) and continue pumping the priming plunger until firm resistance is felt, then pump a few more times.

6. If a large amount of air has entered the pump, place a wad of rag around the fuel return union on the pump (to absorb spilt fuel), then slacken the union. Operate the priming plunger (with the ignition switched on to activate the stop solenoid), or crank the engine on the starter motor in 10-second bursts, until fuel free from air bubbles emerges from the fuel union. Tighten the union and mop up split fuel.


Warning: Be prepared to stop the engine if it should fire, to avoid excessive fuel spray and spillage.


7. If air has entered the injector pipes, place wads of rag around the injector pipe unions at the injectors (to absorb spilt fuel), then slacken the unions. Crank the engine on the starter motor until fuel emerges from the unions, then stop cranking the engine and retighten the unions. Mop up spilt fuel.

(Original published on the portal: www.PeugeotBook.ru)

Warning: Be prepared to stop the engine if it should fire, to avoid excessive fuel spray and spillage.


8. Start the engine with the accelerator pedal fully depressed. Additional cranking may be necessary to finally bleed the system before the engine starts.
This article is available at russian, bulgarian, belarusian, ukrainian, serbian, croatian, romanian, polish, slovak, hungarian
Article reviewed by editor: Matveev Demid
Share information:
Previous
Peugeot 106: Fuel system (diesel)
Next

Fuel pick-up unit — removal and refitting
Accelerator cable — removal, refitting and adjustment
Air cleaner housing — removal and refitting
General information and precautions
Fuel/exhaust systems — diesel models — specifications
Maximum engine speed — checking and adjustment
Fast idle thermostatic valve — renewal, testing and adjustment
Fuel injection systems — testing and adjustment
Throttle housing — removal and refitting
Bosch and Sagem system components — removal and refitting
See similar information for other Peugeot models

➨ Fuel system Peugeot 207 (2006-2014)
➨ Fuel and exhaust system specifications Peugeot 305 (1977-1989)
➨ Filling and bleeding the fuel system Peugeot 406 (1995-2004)
➨ Cooling system — bleeding Peugeot 605 (1989-2000)
➨ Fuel system — filling and bleeding Peugeot Partner I (1996-2008)
Link to this article in different formats
Comments and feedback from visitors
No comments yet


Add two numbers 13 + 42


Peugeot 106 (1991-2003) 
  • General information
  • Introduction to manual
  • Weekly checks
  • Maintenance (petrol)
  • Maintenance (diesel)
  • Troubleshooting
  • Power unit
  • Petrol engines
  • Diesel engines
  • Engine overhaul
  • Cooling and heating
  • Fuel system (carburetor)
  • Single point injection (petrol)
  • Multipoint injection (petrol)
  • Fuel system (diesel)
  • Emission control system
  • Engine electrical equipment
  • Ignition system
  • Diesel heating
  • Transmission
  • Clutch
  • Manual gearbox
  • Automatic gearbox
  • Drive shafts
  • Chassis, running gear
  • Brake system
  • Car suspension
  • Steering
  • Body and interior
  • Exterior (external elements)
  • Interior (internal elements)
  • Doors, locks and windows
  • Electrical equipment
  • Equipment and devices
  • Electrical diagrams
PeugeotBook.ru © 2018–2026 | Mobile version | Sitemap: EN BG BY UA RS HR RO PL SK HU | Write message | Site search | Add to bookmarks | Peugeot owners
106 (1991-2003) | 206 (1998-2012) | 207 (2006-2014) | 305 (1977-1989) | 306 (1993-2002) | 307 (2001-2008) | 405 (1987-1997) | 406 (1995-2004) | 605 (1989-2000) | Partner-I (1996-2008) | Eurovans-807 (2002-2014) | Eurovans-806 (1994-2002) | J5 (1981-1993) |
Cookies are used to ensure the correct display of pages on the site.