



Table of contents: Cars with BE4 gearbox 🠇 Gearbox MA 🠇
Cars with BE4 gearbox
Before you begin adjusting the clutch drive, check the following:
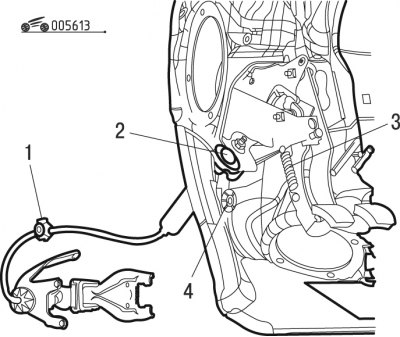
Figure 6.13. Checking the clutch parts: 1 - retainer; 2 - bushing; 3 - spring; 4 - stop
- no mat on bottom stop 4 (figure 6.13);
- correct installation of spring 3;
- no obstructions when moving the clutch pedal;
- the presence of a connecting sleeve 2 on the front shield;
- cable routing;
- fastening 1 cable to the side member.
Adjust the clutch drive in the following order:
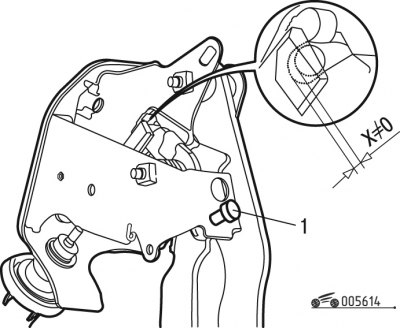
Figure 6.14. Adjusting bolt: 1 - bolt
- check for minimum clearance X (figure 6.14); if it is not there, turn bolt 1;
Caution: Having too much clearance can cause the gears in the gearbox to grind.
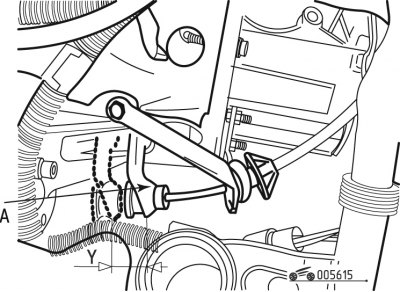
Figure 6.15. Checking the clutch release fork lever travel (gearbox BE4)
- pull the clutch release fork lever at location A (figure 6.15);
- check the lever stroke. If the Y stroke is greater than or equal to 24 mm, the adjustment is correct. If Y is less than 24 mm, the clutch cable should be replaced.
Gearbox MA
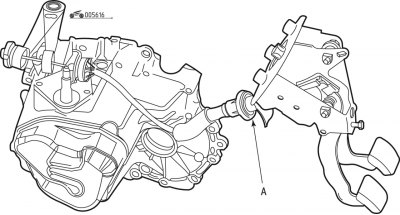
Figure 6.16. Fastening the clutch cable to the front shield (mA gearbox)
Before starting the adjustment, check the clutch parts and units in the same way as on cars with the BE4 gearbox. In addition, check the fastening of the clutch drive cable on the front shield in zone A (figure 6.16).
Adjust the clutch drive in the following order:
- check for minimum clearance X (see figure 6.14); if it is not there, turn bolt 1;
Caution: Having too much clearance can cause the gears in the gearbox to grind.
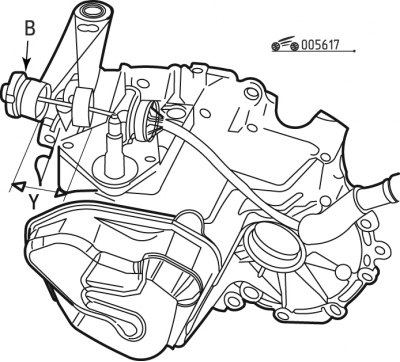
Figure 6.17. Adjusting the clutch drive (mA gearbox)
- pull the cable at location B (figure 6.17);
- if the cable moves at least 5 mm, then the clutch drive is adjusted correctly;
- if the cable does not move, it should be replaced with a new one;
- check the lever stroke. If the Y stroke is greater than or equal to 24 mm, the adjustment is correct. If Y is less than 24 mm, the clutch cable should be replaced.