



Caution! Use the recommended DOT4 brake fluid when performing the bleeding operation. Do not use an automatic bleeding device (this may cause air bubbles to form in the liquid filling the circuit).
Remove air in the following order:
- remove the protective cover;
- remove the air filter;
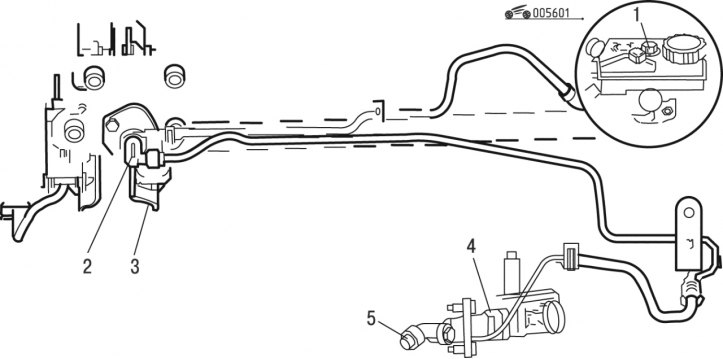
Figure 6.1. Hydraulic clutch drive: 1 - feed tank; 2 - master cylinder; 3 - clutch pedal; 4 - working cylinder; 5 - air bleed valve
- fill the feed tank completely 1 (figure 6.1.) brake fluid;
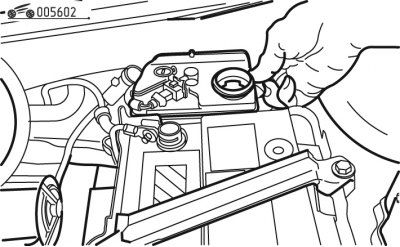
Figure 6.2. Clutch hydraulic drive supply tank
- shake the tank (figure 6.2.), to remove air pockets;
- connect a transparent tube to the bleed valve on the slave cylinder, lower the other end of the tube into a container with brake fluid, while the container should be located below the slave cylinder;
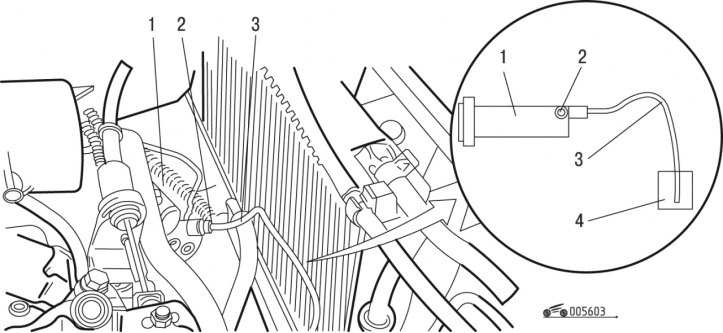
Figure 6.3. Removing air from the clutch hydraulic drive: 1 - working cylinder; 2 - bleed valve; 3 - tube; 4 - capacity
- bend the clear tube to create a siphon pointing upwards, with the tube touching the bottom of the container (figure 6.3);
- quickly depress the clutch pedal to its full travel, pressing and releasing it approximately 12 times;
- at the end of each press, keep the clutch pedal pressed all the way down;
- your assistant at this pedal position should open and close the air bleed valve after the pedal hits the floor;
- release the clutch pedal so that it returns to the top position;
- check the brake fluid level in the reservoir and top it up;
- repeat similar operations until air bubbles stop coming out into the container;
- start the engine and warm it up;
- engage first gear and begin to release the clutch pedal;
(Original published on the portal: PEUGEOTBOOK)
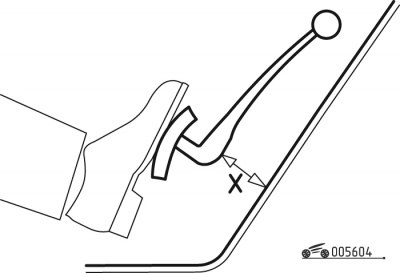
Figure 6.4. Clutch pedal position
- the start of the clutch "grabbing" should occur when the dimension X (figure 6.4) will be equal to or greater than 35 mm.