



Note: Before starting work, refer to the warning at the beginning of Section 4 concerning the dangers of asbestos dust.
Inspection
Note: If either disc requires renewal, BOTH should be renewed at the same time, to ensure even and consistent braking. New brake pads should also be fitted.
1. Chock the rear wheels then jack up the front of the vehicle and support it on axle stands (see "Jacking and vehicle support"). Remove the appropriate front roadwheel.
2. Slowly rotate the brake disc so that the full area of both sides can be checked; remove the brake pads (see section 4 or 27) if better access is required to the inboard surface. Light scoring is normal in the area swept by the brake pads, but if heavy scoring or cracks are found, the disc must be renewed.
3. It is normal to find a lip of rust and brake dust around the disc's perimeter; this can be scraped off if required. If, however, a lip has formed due to excessive wear of the brake pad swept area, then the disc's thickness must be measured using a micrometer. Take measurements at several places around the disc, at the inside and outside of the pad swept area; if the disc has worn at any point to the specified minimum thickness or less, the disc must be renewed.
4. If the disc is thought to be warped, it can be checked for run-out. Either use a dial gauge mounted on any convenient fixed point, while the disc is slowly rotated, or use feeler blades to measure (at several points all around the disc) the clearance between the disc and a fixed point, such as the caliper mounting bracket. If the measurements obtained are at the specified maximum or beyond, the disc is excessively warped and must be renewed; however, it is worth checking first that the hub bearing is in good condition (Chapters 1A or 1B and/or 10). Also try the effect of removing the disc and turning it through 180°, to reposition it on the hub; if the run-out is still excessive, the disc must be renewed.
5. Check the disc for cracks, especially around the wheel bolt holes and any other wear or damage and renew if necessary.
Removal
6. Remove the brake pads as described in Section 4 or 27.
7. On certain models, it may be necessary to remove the brake caliper as described in Section 10 in order to allow sufficient clearance to remove the disc. Note that in this case there is no need to disconnect the brake fluid hose from the caliper. Support the caliper with wire or string, taking care not to strain the hose.
8. Use chalk or paint to mark the relationship of the disc to the hub, then remove the screws securing the brake disc to the hub and withdraw the disc (see illustrations). Note that it may be necessary to use an impact screwdriver to free the disc securing screws. If the disc is tight, lightly tap its rear face with a hide or plastic mallet. Where applicable (if the brake caliper is still fitted), tilt the disc as necessary to clear the hub and caliper.
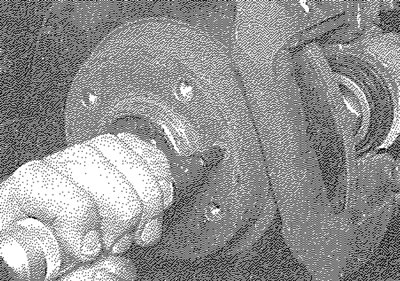
7.8a. Using an impact screwdriver to free a brake disc securing screw
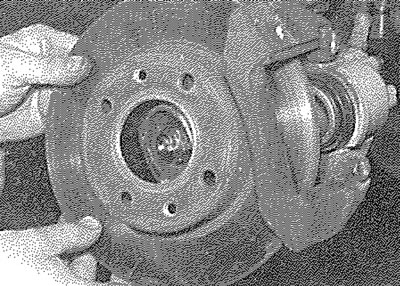
7.8b. Removing a brake disc - model with Bendix caliper
Refitting
9. Ensure that the mating faces of the disc and the hub are clean and flat. If necessary, wipe the mating surfaces clean.
10. Refit the disc, then refit and securely tighten the disc retaining screws.
11. If a new disc has been fitted, use a suitable solvent to wipe any preservative coating from the disc.
12. Where applicable, refit the caliper as described in Section 10.
13. Refit the brake pads as described in Section 4 or 27.