



Note: Before starting work, refer to the warning at the beginning of Section 2 concerning the dangers of hydraulic fluid and to the warning at the beginning of Section 4 concerning the dangers of asbestos dust.
Removal
1. Chock the rear wheels then jack up the front of the vehicle and support it on axle stands (see "Jacking and vehicle support"), Remove the appropriate front roadwheel.
2. Minimise fluid loss by first removing the master cylinder reservoir cap, then tightening it down onto a piece of polythene, to obtain an airtight seal. Alternatively, use a brake hose clamp, a G-clamp or a similar tool to clamp the flexible hose running to the caliper.
3. Remove the brake pads as described in Section 4 or 27.
4. Clean the area around the union, then loosen the brake hose union nut.
5. Where applicable, remove the dust cover from the caliper securing bolts, then slacken the two bolts securing the caliper assembly to the hub carrier and remove them. On models with Bendix calipers, recover the mounting plate from the bolts, noting which way around the plate is fitted (see illustrations).
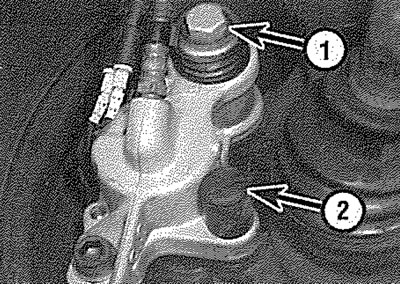
10.5a. ATE brake caliper mountings 1. Upper (M12) mounting bolt; 2. Lower (M8) mounting bolt dust cover
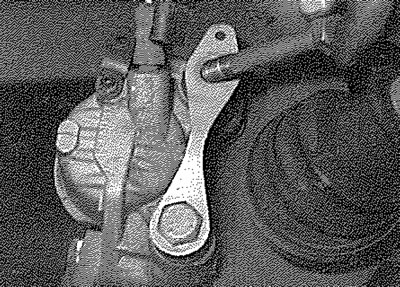
10.5b. Removing a brake caliper mounting bolt - Bendix caliper
6. Lift the caliper assembly away from the brake disc (see illustration) and unscrew it from the end of the brake hose.
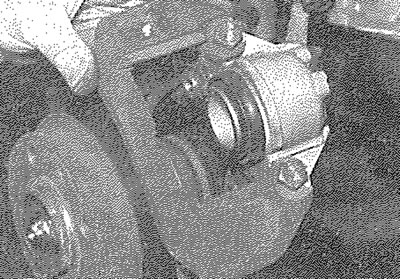
10.6. Withdrawing a brake caiiper
Overhaul
7. With the caliper on the bench, wipe away ail traces of dust and dirt, but avoid inhaling the dust, as it is a health hazard.
8. Where necessary, use a small flat-bladed screwdriver to carefully prise the dust seal retaining clip out of the caliper bore (see illustration).
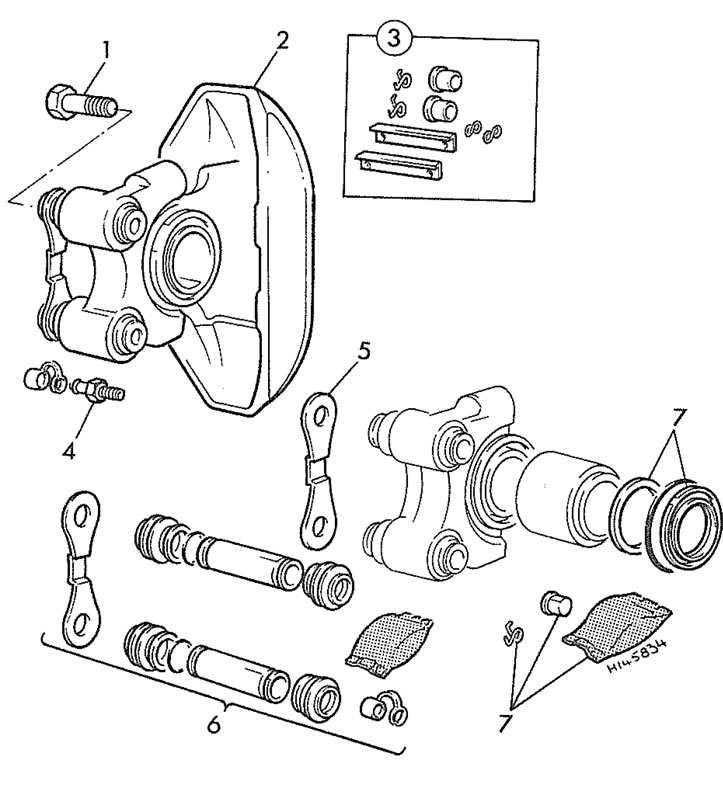
10.8. Bendix brake caliper components 1. Mounting bolt; 2. Caliper assembly; 3. Pad retaining plate; 4. Bleed screw; 5. Mounting plate; 6. Guide pin kit with grease; 7. Caliper repair kit with grease.
9. Withdraw the partially-ejected piston from the caliper body and remove the dust seal. The piston can be withdrawn by hand, or if necessary pushed out by applying compressed air to the brake hose union hole. Only low pressure should be required, such as is generated by a foot pump.
Caution: The piston may be ejected with some force.
10. Using a small screwdriver, extract the piston hydraulic seal, taking great care not to damage the caliper bore.
11. Where applicable, prise off the retaining clips, then withdraw the guide sieeves/pins from the caliper body/mounting bracket (as applicable) and remove the rubber gaiters.
12. Thoroughly clean all components, using only methylated spirit, isopropyl alcohol or clean hydraulic fluid as a cleaning medium. Never use mineral-based solvents such as petrol or paraffin, as they will attack the hydraulic system's rubber components. Dry the components immediately, using compressed air or a clean, lint-free cloth. Use compressed air to blow clear the fluid passages.
Warning: Wear eye protection when using compressed air!
13. Check all components and renew any that are worn or damaged. Check particularly the cylinder bore and piston; these should be renewed (note that this means the renewal of the complete body assembly) if they are scratched, worn or corroded in any way. Similarly check the condition of the guide sleeves/pins and their bores in the caliper body/mounting bracket (as applicable); both sleeves/pins should be undamaged and (when cleaned) a reasonably tight sliding fit in the body/mounting bracket bores. If there is any doubt about the condition of any component, renew it.
14. If the assembly is fit for further use, obtain the appropriate repair kit; the components are available from Peugeot dealers in various combinations.
15. Renew all rubber seals, dust covers and caps disturbed on dismantling as a matter of course; these should never be re-used.
16. On reassembly, ensure that all components are absolutely clean and dry.
17. Soak the piston and the new piston (fluid) seal in clean hydraulic fluid. Smear clean fluid on the cylinder bore surface.
18. Fit the new piston (fluid) seal, using only your fingers (no tools) to manipulate it into the cylinder bore groove. Fit the new dust seal to the piston and refit the piston to the cylinder bore using a twisting motion; ensure that the piston enters squarely into the bore. Press the piston fully into the bore, then press the dust seal into the caliper body.
19. Where fitted, install the dust seal retaining clip, ensuring that it is correctly seated in the caliper groove.
20. Apply the grease supplied in the repair kit, or a copper-based high-temperature brake grease or anti-seize compound (eg Duckhams Copper 10), to the guide sleeves/pins. Fit the guide sleeves/pins to the caliper body/mounting bracket and fit the new rubber gaiters, ensuring that they are correctly located in the grooves on both the sleeve/pin and body/mounting bracket (as applicable).
Refitting
21. Screw the caliper fully onto the flexible hose union, then position the caliper over the brake disc.
22. If the threads of the new caliper mounting bolts are not already pre-coated with locking compound, apply a suitable locking compound to them. Refit the bolts, along with the mounting plate on models with Bendix calipers, ensuring that the plate is fitted so that its bend curves away from the caliper body (see illustration). Tighten the caliper bolts to the specified torque. Where applicable, refit the dust cover to the bolt.
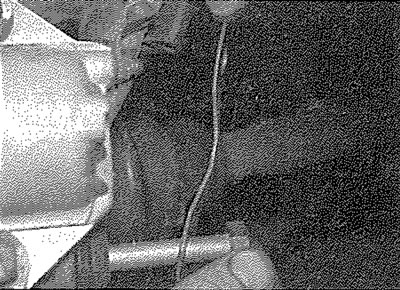
10.22. The mounting plate fits with the bend curving away from the caliper body - Bendix caliper
23. Securely tighten the brake hose union nut, then refit the brake pads as described in Section 4 or 27,
24. Remove the brake hose clamp, or remove the polythene from the fluid reservoir, as applicable and bleed the hydraulic system as described in Section 2. Note that, providing the precautions described were taken to minimise brake fluid loss, it should only be necessary to bleed the relevant front brake circuit.
25. Refit the roadwheel, then lower the vehicle to the ground and tighten the roadwheel bolts to the specified torque.