
Attention! Take steps to ensure that even the smallest contaminants do not enter the system. Use only fresh working fluid to top up and fill the system.
Drain the working fluid in the following order:
- stop the engine and disconnect the wire from the negative terminal of the battery;
- open the filler cap;
- remove the protection under the power unit;

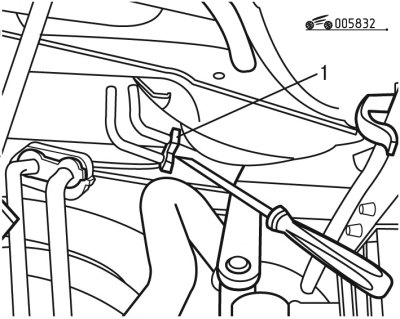
Pic. 8.31. Unscrewing the bolt when draining the working fluid: 1 - bolt; 2 - collar
- use the lever to remove the clamp 2 from the valve (pic. 8.31);
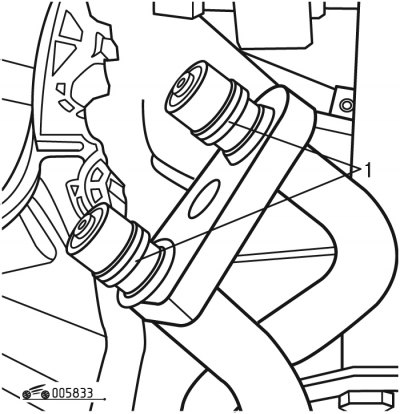
Pic. 8.32. Removing the bracket: 1 - bracket
- unscrew bolt 1 and remove bracket 1 (pic. 8.32);
- lower the ends of the hoses into the container;
- slowly turn the steering wheel all the way to the left, then to the right;
- wait until the working fluid is completely drained.
Fill the hydraulic circuit with working fluid in the following order:
Pic. 8.33. Gasket installation: 1 - gaskets
- install new sealing rings 1 (pic. 8.33);
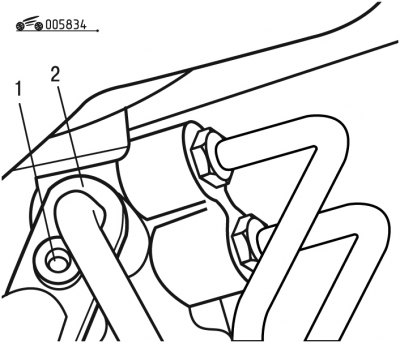
Pic. 8.34. Clamp installation: 1 - bolt; 2 - clamp
- install clamp 2 (pic. 8.34) and tighten bolt 1 to 20 Nm;
- remove the protective shield under the power unit;
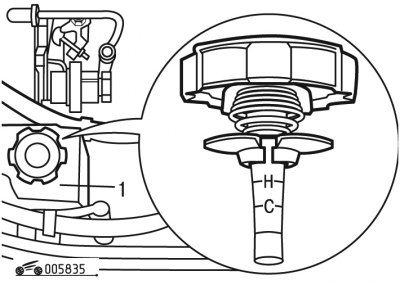
Pic. 8.35. Checking the level of the working fluid: 1 - tank
- fill tank 1 (pic. 8.35) power steering fluid 10 mm above the maximum level «H» («H» - the maximum level on a warm engine; «WITH» - maximum level on a cold engine);
- with the engine stopped, slowly turn the steering wheel left and right from lock to lock about 10 times;
- refill the tank to the maximum level.
Remove air from the hydraulic circuit in the following order:
- start the engine and let it idle for 2-3 minutes without turning the steering wheel;
- top up tank 1 (see fig. 8.35) working fluid to normal;
- bleed the air from the hydraulic circuit by turning the steering wheel left and right several times;
- add working fluid to the maximum level (the fluid level should be checked with the engine stopped and the wheels in a straight line).