



Remove the gearbox in the following order:
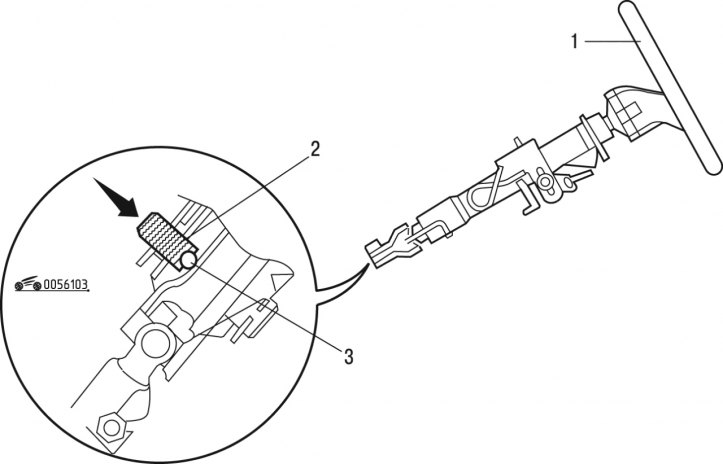
Figure 6.103. Steering column offset: 1 - steering wheel; 2 - button; 3 - hinge
- before removing the subframe, install the steering column with the steering wheel 1 (figure 6.103) to the bottom position and move it back as far as possible;
- press button 2 on the cardan joint indicator 3 and lock the column;
- unscrew the left wheel drive shaft mounting nut;
- lift the car;
- remove the exhaust pipe to avoid damaging the flexible bellows;
- remove the left front wheel drive shaft;
- move the front wheel drive shaft to the right;
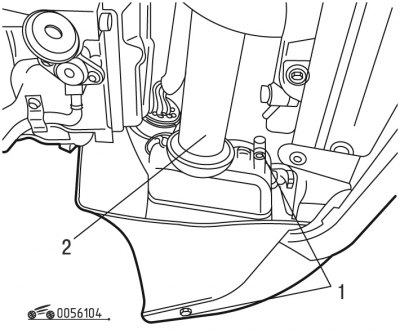
Figure 6.104. Left mudguard: 1 - bolts; 2 - air intake nozzle
- unscrew bolts 1 (figure 6.104) and remove the nozzle 2 of the air intake;
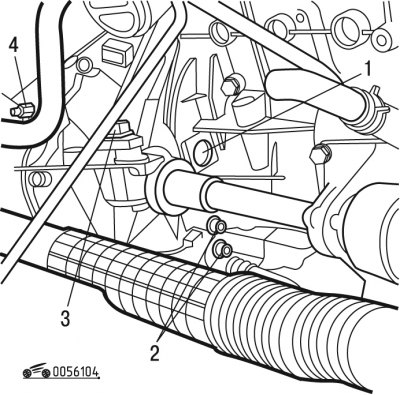
Figure 6.105. Disconnecting the contact connector: 1 - nut; 2 - bolts; 3-pin connector; 4 - nut
- unscrew nut 4 (figure 6.105), three nuts 1, bolts 2 and disconnect the contact connector 3;
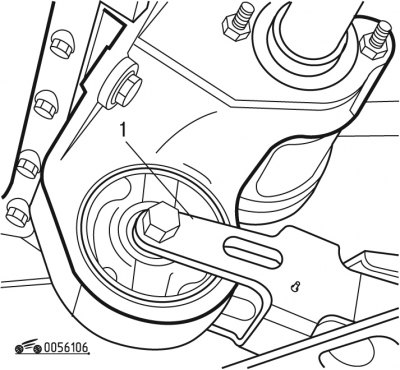
Figure 6.106. Disconnecting the traction: 1 - traction
- disconnect rod 1 (figure 6.106);
- unscrew the starter mounting bolts, move it to the side without disconnecting it;
- unscrew the lower bolts securing the gearbox to the engine;
- lower the car;
- disconnect the wires from the battery terminals;
- remove the battery cover;
- remove the battery and its tray;
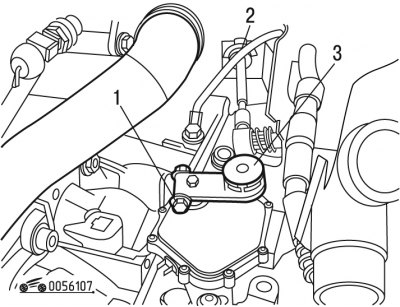
Figure 6.107. Disconnecting the control rod: 1 - bolt; 2 - clamp; 3 - ball joint element
- unscrew bolt 1 (figure 6.107);
- remove element 3 of the ball joint using the device;
- remove clamp 2;
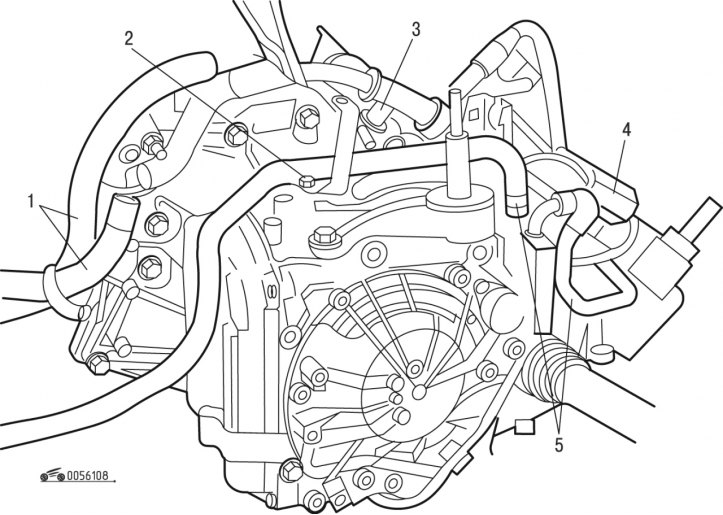
Figure 6.108. Removing external parts: 1 - wire harnesses; 2 - support; 3 - rotation speed sensor; 4 - connector; 5 - pipelines
- install the device on the pipelines 5 (figure 6.108);
- remove support mount 2;
- remove speed sensor 3;
- disconnect pipes 5;
- move aside the wire harnesses 1 and disconnect the connector 4;
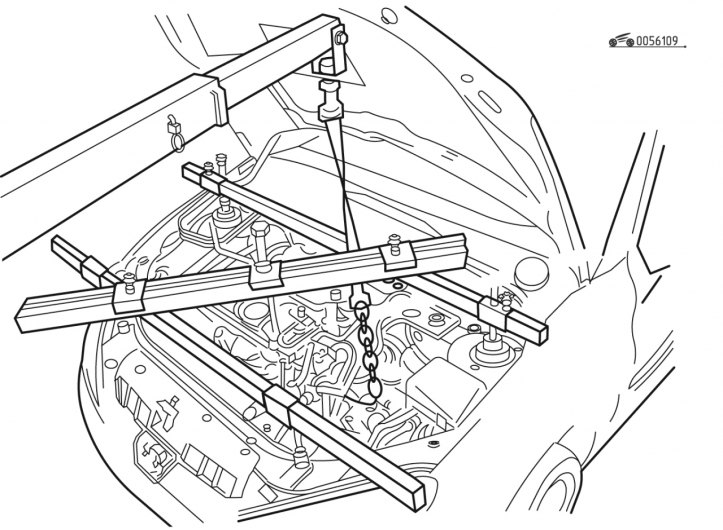
Figure 6.109. Installing the crossbar
- install the automatic transmission lifting crossbar as shown in Figure 6.109;
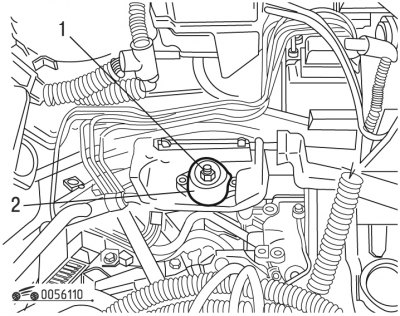
Figure 6.110. Removing the support: 1 - bolt; 2 - support
- remove rubber support 2 (figure 6.110), unscrewing bolt 1 using the device;
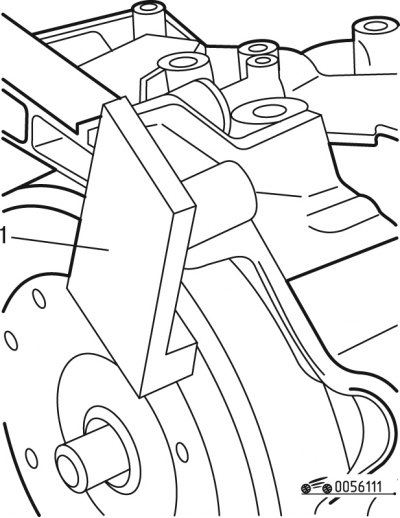
Figure 6.111. Fixing the torque converter: 1 - device
- fix the torque converter by installing tool 1 (figure 6.111);
- unscrew the upper bolts securing the gearbox to the engine, tilt the power unit slightly and remove the gearbox.
Install the automatic transmission in the following order:
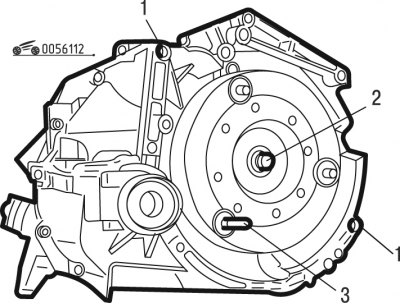
Figure 6.112. Preparing for installation of automatic transmission: 1 - mounting bushings; 2 - shaft; 3 - pin
- make sure the mounting bushings are present 1 (figure 6.112);
- put pin 3 back in place;
- apply Molycote Br2 grease to shaft 2;
- connect the gearbox to the engine so that pin 3 aligns with the hole in the drive plate;
- tighten the upper gearbox-to-engine mounting bolts to a torque of 52 N·m;
- remove fixture 1 (see figure 6.111);
- tighten the lower gearbox-to-engine mounting bolts to a torque of 52 N·m;
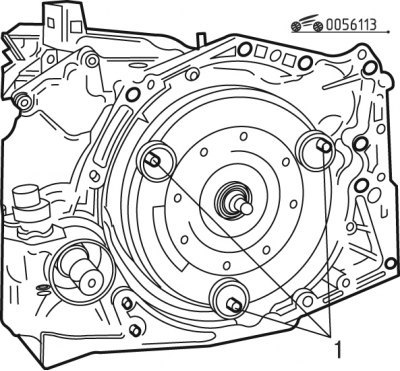
Figure 6.113. Installing torque converter mounting nuts: 1 - nuts
(Original publication on the website: «peugeotbook.ru»)
- install new nuts 1 (figure 6.113) torque converter mounts to the plate and pre-tighten them to 10 Nm, finally tighten to 30 Nm;
- make sure there is no gap;
- install the starter and tighten its mounting bolts to a torque of 35 Nm;
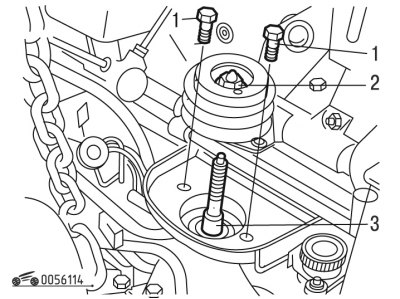
Figure 6.114. Installing the gearbox support: 1 - bolts; 2 - nut; 3 - axis
- lubricate axle 3 with LOCTITE FRENETANCH grease (figure 6.114) gearbox supports;
- install axle 3 with washer and tighten to 50 Nm using the tool;
- install the spacer and lubricate it with PCAS SPASGRAM grease;
- install the gearbox mount rubber cushion;
- install nut 2 of the support axle with a washer without tightening;
- install the bolts 1 of the cushion mounting without tightening;
- center the powertrain installation before final tightening of the support fasteners;
- tighten nut 2 to 65 Nm and bolts 1 to 30 Nm;
- continue installing the gearbox in the reverse order of removal;
- check the level of working fluid in the gearbox;
- check the coolant level.
Note: If you replace the automatic transmission, update the working fluid aging counter database using the DIAG 2000 diagnostic tool.