



Table of contents: Adjusting the starting air gap on…🠇 Adjusting the automatic choke on the…🠇 Adjusting the automatic choke on a…🠇 Adjusting the automatic choke on the…🠇
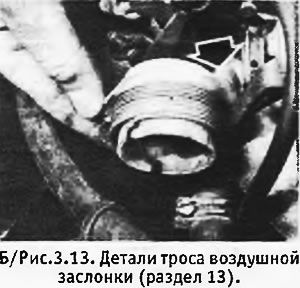
1. Loosen the clamp bolt securing the cable to the air damper drive rod (see photo).
 |
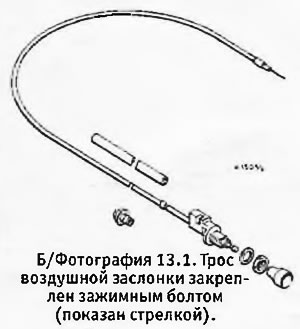 |
2. Loosen the bolt securing the clamp plate that holds the cable housing to the carburetor bracket. Disconnect the cable from the carburetor.
3. While working in the cabin, remove the choke handle and unscrew the lock nut. Push the end of the cable through the dashboard and disconnect the wire of the choke indicator light from the switch on the end of the cable.
4. Pull the cable into the passenger compartment, helping it pass through the rubber bushing on the engine compartment bulkhead.
5. The cable is installed in reverse order. After installing the cable, remove the air cleaner and check that the air damper is fully open when the choke handle is fully pushed in, and closed when the handle is fully pulled out. Check that the indicator light comes on when the choke handle is pulled out.
Adjusting the starting air gap on the Weber 36 TLP carburetor
1. Adjusting the choke clearance on this carburetor is generally not necessary, but you will need to do so if you experience problems with cold starting.
Air damper starting clearance
2. Disconnect the air intake duct from the top of the carburetor. Pull the choke handle all the way out to close the air damper.
3. Disconnect the vacuum tube from the air damper unloader vacuum capsule. Connect a hand vacuum pump to the capsule.
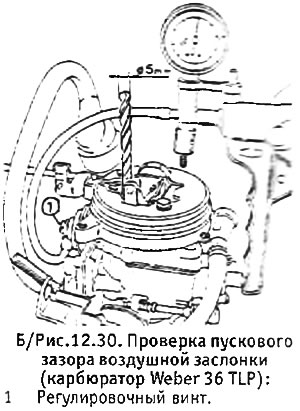
4. Apply a vacuum of approximately 400 mmHg to the capsule. The choke valve should open sufficiently to allow a 5 mm diameter drill to be inserted between it and the carburetor body.
5. If necessary, adjust the opening of the air damper using the screw located on the end of the vacuum capsule.
6. Disconnect the vacuum pump, reconnect the vacuum tube and close the air damper.
Mechanical opening of the air damper
7. After adjusting the vacuum capsule (see above), move the air damper roller into the recess on the cam (see B/Figure 12.31).
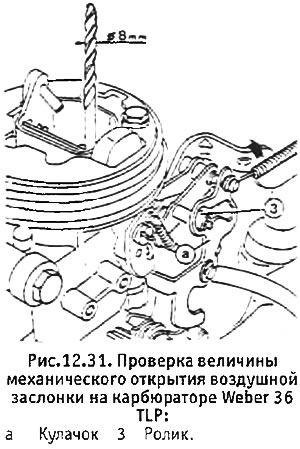
8. Check that the air damper opening is such that a drill with a diameter of 8 mm just passes between the damper and the carburetor body.
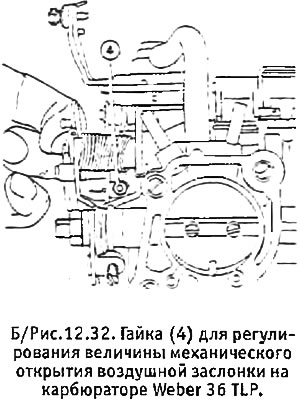
9. The necessary adjustment is made using the nut shown in B/Figure 12.32 (after removing the carburetor).
10. After completing the adjustment, install the carburetor in place (if it was filmed) and connect the air intake duct.
Adjusting the automatic choke on the Solex 32-35 TACIC carburetor
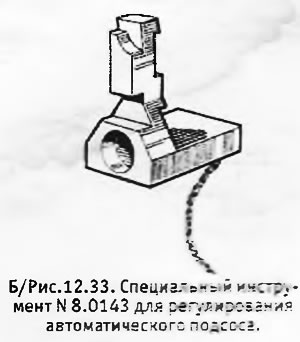
1. To adjust the automatic choke on this carburetor you will need the Peugeot tool No. 8.0143 and a tachometer.
 |
 |
Air damper starting clearance
2. Bring the engine to operating temperature. Remove the air cleaner adapter from the carburetor. Remove the cover from the automatic choke mechanism.
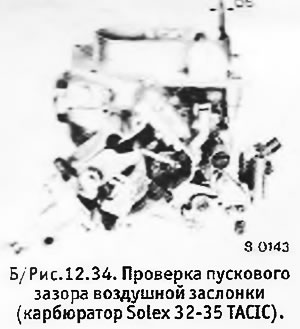
3. With the engine idling, place tool No. 8.0143 with the hole on the swivel roller and move it so that it touches the automatic choke mechanism housing. In this position, a 5 mm diameter drill should just fit between the edge of the air damper and the carburetor body.
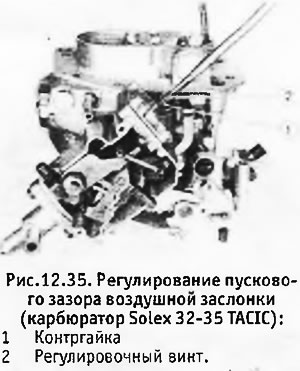
4. If adjustment is necessary, loosen the lock nut and adjust the air damper clearance using the adjusting screw located on the top of the automatic choke housing. Once the correct position is achieved, tighten the lock nut, remove the drill and put away the special tool.
Positive throttle opening
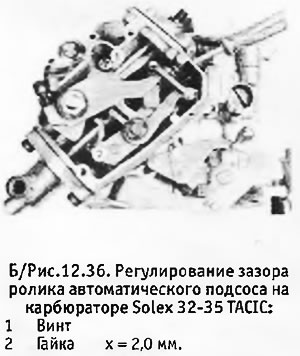
5. With the idle speed and starting clearance of the air damper adjusted, check that with the engine running at idle speed, the distance between the swivel roller and the automatic choke housing is as shown in B/Figure 12.36. Adjustment is made using the adjusting screw and nut shown in the same figure.
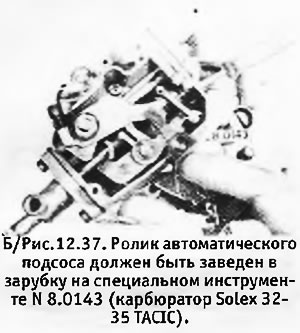
6. Install tool N 8.0143 on the automatic choke housing (see B/Figure 12.37) and tighten the adjusting screw so that the swivel roller fits into the notch on the tool. Once this is achieved, remove the tool and tighten the screw another full turn.
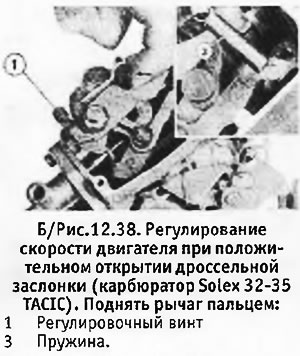
7. Remove the spring connecting the roller to the lever. Raise the lever without pressing too hard until it makes contact. In this position, the engine speed should be 3300±50 rpm (the fan is off).
8. If adjustment is necessary, turn the screw shown in B/ Figure 12.38 clockwise to increase the speed or counterclockwise to decrease it.
9. Once completed, reinstall the spring, automatic choke cover and air cleaner adapter.
Adjusting the automatic choke on a Solex Z-type carburetor
1. See the adjustment procedure for the Solex 32-35 TACIC carburetor, taking into account the following differences:
- a. The tool required for adjustment is number 8.0143 ZZ
- b. The air damper has a different starting gap size (see Specifications)
- c. Positive throttle opening occurs at a different engine speed (see Specifications).
Adjusting the automatic choke on the Weber 32/34 DRTC4 100 carburetor
1. You will need the Peugeot tool N 8.0145 F and a tachometer.
Cam position
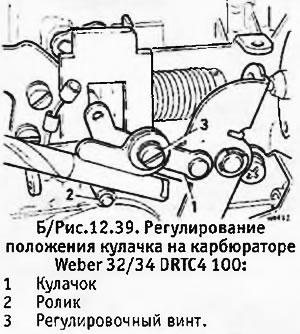
2. With the engine idling, position tool No. 8.0145 F as shown in Figure 12.39. In this position, a drill bit with a diameter of 8.5 mm should just fit between the cam and the roller. If necessary, adjust the clearance using the adjusting screw.
 |
 |
Air damper starting clearance
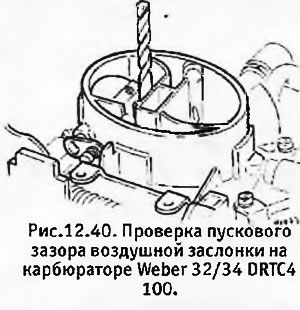
3. With the engine idling and the special tool remaining in the same position (see B/Figure 12.39) check that a 5.5 mm diameter drill bit just fits between the air damper and the carburetor body.
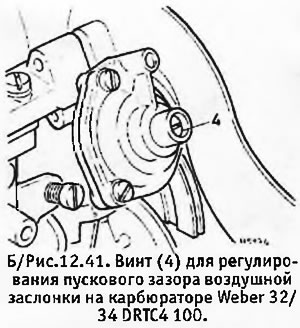
4. If necessary, adjust the gap using the screw shown in B/Figure 12.41.
Positive throttle opening
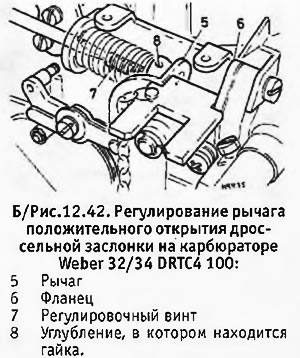
5. Check the fit of the special tool tip between the lever and the flange (see B/Figure 12.42). If the fit is too tight or too loose, use the lever adjusting screw to adjust the tip of the tool just enough to fit between the lever and the flange.
6. Set the tool to the position shown in B/Figure 12.43 and use a tachometer to measure the engine speed, which should be equal to 3200±50 rpm (the engine is warm, the fan is off).
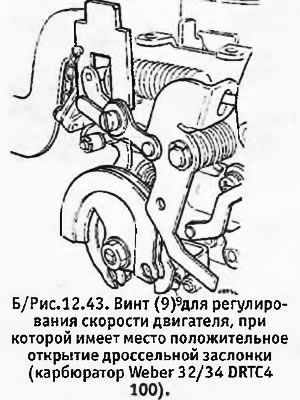
7. If necessary, turn the adjusting screw to achieve the correct engine speed. Remove the tool, increase the speed, and then reinstall the tool and check that the engine returns to the correct speed.
8. Turn off the engine, remove the tool and disconnect the tachometer.