English Русский
Български
Беларускі
Український
Српски
Hrvatski
Română
Polski
Slovenský
Magyar
Bookmark Articles Sitemap Contacts
Company Hyundai Company Opel Company Skoda Company Kia Company Mitsubishi Company LADA Company Audi
PeugeotBook.ru


Series 100   Series 200   Series 300   400-500   Series 600   Crossovers   Others
 
Peugeot 305 (1977-1989) Peugeot 306 (1993-2002) Peugeot 307 (2001-2008)

Adjusting valve clearances (XU series engines) (Peugeot 305)

  • Main
  • 30X
  • Peugeot 305 (1977-1989)
  • Power unit
  • Gasoline engines
  • Adjusting valve clearances (XU series engines)
0
9. Remove the camshaft (see below).

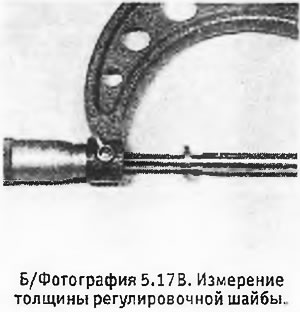
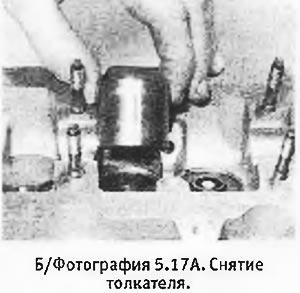
10. Remove one of the tappets with its adjusting washer (make sure that the washer does not fall out of the pusher). Clean the washer and measure its thickness with a micrometer (see photos).
10. Remove one of the tappets with its adjusting washer (make sure that the washer does not fall…

11. See what clearance value was obtained for the corresponding valve. If the gap was larger than necessary, it is necessary to install a thicker washer; if it was too small, a thinner one.

Example calculation for too large valve clearance:
  • Required valve clearance (A) = 0.20 mm
  • Measured gap value (B) = 0.28 mm
  • Difference (B-A) = 0.08 mm
  • Thickness of the original washer = 2.62 mm
  • Required washer thickness = 2.62 + 0.08 = 2.70 mm

Example calculation for too small valve clearance:


  • Required valve clearance (A) = 0.40 mm
  • Measured gap value (B) = 0.23 mm
  • Difference (B-A) = 0.17 mm
  • Thickness of the original washer = 2.86 mm
  • Required washer thickness = 2.86 - 0.17 = 2.69 mm

12. Shims are available in thicknesses from 1.650 mm to 4.000 mm with a step of 0.025 mm in the middle of the range and 0.075 mm at its edges. Before measuring or installing new gaskets, they should be cleaned.
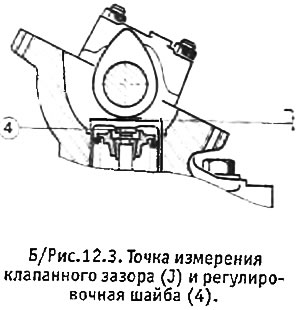
12. Shims are available in thicknesses from 1.650 mm to 4.000 mm with a step of 0.025 mm in the…


13. Repeat the above operations on the remaining tappets and washers. When installing the tappets in place, be careful not to mix them up.

14. When assembling, lubricate the washer with oil and install it on the valve stem. Lubricate the plunger and carefully lower it into place. Be careful not to let the washer move.

15. After installing all the tappets, reinstall the camshaft. Before installing the camshaft drive belt, the valve clearances must be checked again. (All pistons should be at the middle of their stroke; to check the clearances, the camshaft should be rotated through its sprocket).

16. If the tappets are noisy when the engine is warm, the noise can be eliminated or reduced by setting the valve clearances to the minimum permissible value.


17. The latest models are equipped with a modified tube for lubrication of bearing caps, which helps eliminate tappet noise. This modified tube can also be installed on earlier models.
17. The latest models are equipped with a modified tube for lubrication of bearing caps, which…
This article is available at russian, bulgarian, belarusian, ukrainian, serbian, croatian, romanian, polish, slovak, hungarian
Article reviewed by editor: Ostrovsky Fedor
Share information:
Previous
Peugeot 305: Gasoline engines
Next

Checking valve clearances (XU series engines)
Engine and gearbox installation
Engine assembly — final operations
Clutch — installation
Valve clearances — checking and adjustment
Removal and installation the camshaft drive belt (engine is on…
Removal and installation the camshaft (engine is on the car)
Removal and installation the cylinder head (engine is on the car)
Modification of the crankcase ventilation system
Cylinder Head Bolt Modifications (XU Series Engines from…
See similar information for other Peugeot models

➨ Valve clearances (8-valve engines) — checking and adjustment Peugeot 106 (1991-2003)
➨ Characteristics of ignition components (EP series gasoline… Peugeot 207 (2006-2014)
➨ Checking and adjusting valve clearances of 1.6L engines Peugeot 406 (1995-2004)
➨ Specification of cars with petrol engines of the ZPJ series Peugeot 605 (1989-2000)
➨ Adjusting valve clearances Peugeot J5 (1981-1993)
Link to this article in different formats
Comments and feedback from visitors
No comments yet


Add two numbers 13 + 16


Peugeot 307 (2001-2008) 
  • User manual
  • Keys, doors and alarm
  • Controls and instruments
  • Driving and operation
  • Maintenance
  • Power unit
  • Petrol engines TU3 and TU5
  • Petrol engines EW10
  • Diesel engines DV10
  • Diesel engines DW10
  • Transmission
  • Clutch and drive shafts
  • Mechanical gearbox
  • Automatic gearbox
  • Chassis, running gear
  • Front suspension
  • Rear suspension
  • Steering
  • Brake system
  • Body and interior
  • Exterior (external elements)
  • Interior (internal elements)
  • Doors, locks and windows
  • Heating and air conditioning
  • Electrical equipment
  • Equipment and devices
  • Power devices
  • Airbags
  • Electrical circuits
Peugeot 306 (1993-2002) 
  • General information
  • Introduction to manual
  • Specifications
  • Gasoline engine
  • Engine repair
  • Lubrication system
  • Cooling system
  • Fuel injection
  • Ignition system
  • Diesel engine
  • Engine repair
  • Lubrication system
  • Cooling system
  • Fuel injection
  • Transmission
  • Clutch
  • Gearbox
  • Drive shafts
  • Chassis, running gear
  • Steering system
  • Front suspension
  • Rear suspension
  • Brake system
  • Electrical equipment
  • Power devices
  • Electrical circuits
Peugeot 305 (1977-1989) 
  • General information
  • Maintenance
  • Power unit
  • Gasoline engines
  • Diesel engines
  • Cooling system (gasoline)
  • Cooling system (diesel)
  • Fuel system (gasoline)
  • Fuel system (diesel)
  • Ignition system
  • Transmission
  • Clutch
  • Mechanical gearbox BB8
  • Mechanical gearbox BE1
  • Automatic gearbox ZF4
  • Shafts, hubs and wheels
  • Chassis, running gear
  • Brake system
  • Car suspension
  • Steering
  • Body and interior
  • Exterior (external elements)
  • Interior (internal elements)
  • Electrical equipment
  • Equipment and devices
  • Headlights and lighting
  • Power devices
  • Electrical circuits
  • Wiring diagrams (diesel)
PeugeotBook.ru © 2018–2026 | Mobile version | Sitemap: EN BG BY UA RS HR RO PL SK HU | Write message | Site search | Add to bookmarks | Peugeot owners
106 (1991-2003) | 206 (1998-2012) | 207 (2006-2014) | 305 (1977-1989) | 306 (1993-2002) | 307 (2001-2008) | 405 (1987-1997) | 406 (1995-2004) | 605 (1989-2000) | Partner-I (1996-2008) | Eurovans-807 (2002-2014) | Eurovans-806 (1994-2002) | J5 (1981-1993) |
Cookies are used to ensure the correct display of pages on the site.