
2. Before lowering the engine, check that all hoses, wires, etc. were moved to the side. Apply a few drops of threadlocker to the hole in the gear case cover where the vertical bolt on the selector lever should fit. Unscrew the stud with locknut on the front speedometer cable so that the lug can be inserted.
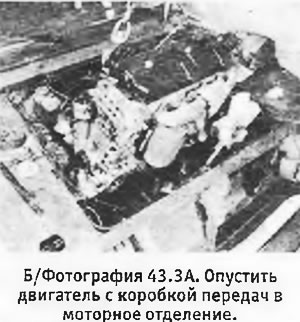
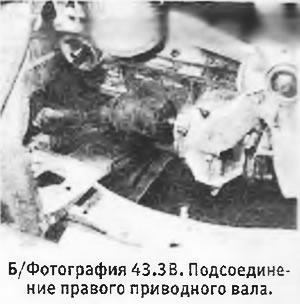
3. Carefully lower the engine with gearbox while moving it to one end of the engine compartment. Once the box is low enough, insert the first drive shaft being careful not to damage the oil seal. Move the motor to the side of the connected drive shaft and turn it outward in order to create more room to work. Insert the second drive shaft, rocking the machine slightly if necessary to make this easier. And in this case, make sure not to damage the final drive oil seal (see pictures).
 |  |
4. After installing both shafts, insert the tip of the speedometer cable into the adapter of its drive. Install the set screw and locknut and tighten them both in this sequence.
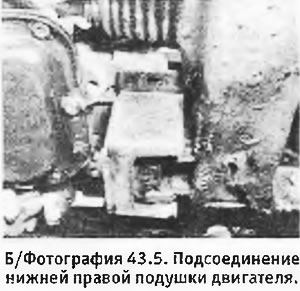
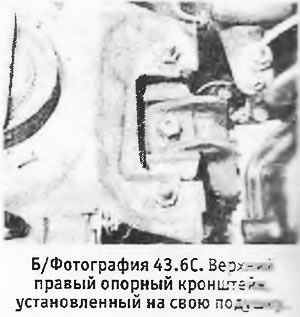
5. Move the engine with gearbox and slowly lower them so that the rear edge of the gearbox housing is under the steering box. Install the lower right pillow of the power unit (see photo).
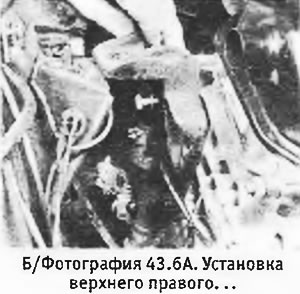
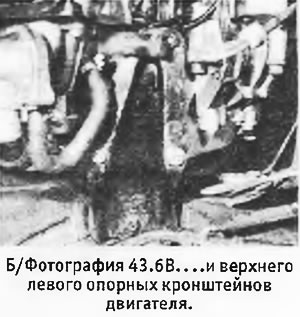
6. If not already done, install the 2 upper support brackets on the engine and lower it to its final position. Install and tighten all nuts and bolts of the top cushions to the correct torque. Install and tighten the lower cushion bolts to the correct torque. Disconnect from the hoist motor.
 |  |
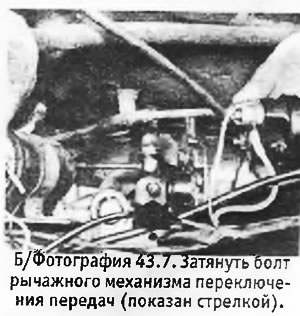
7. Clean the gearshift linkage front bolt threads and lubricate the ball joint parts with the correct type of grease. Assemble the ball joints and install the bolt, tightening it to the desired torque (see photo).
8. Install starter if not already done (see chapter 10). Connect the wires to the starter and tighten the fixing nuts.
9. Install and adjust the clutch cable (see chapter 5).
10. Connect the wires to the ignition coil and distributor.
11. Install intake manifold and carburetor, making sure all 8 hose clamps are in good condition and secure. Install the manifold support bracket by tightening the bolt on the engine/gearbox connector surface to the correct torque. Connect the fuel supply line and the tube of the vacuum ignition regulator to the carburetor, and the vacuum hose of the brake booster to the manifold.
12. Install generator (see chapter 10) and tension its drive belt. Install the voltage regulator in its place on the left fender.
13. Install exhaust pipes (see chapter 3) and check that the gap between the rear subframe (behind the pallet) and the exhaust pipe was at least 35 mm.
14. Install the radiator (see chapter 2). If the radiator hoses are not in very good condition, it is best to replace them. Install the air deflectors in front of the radiator and then the front grille.
15. Connect the remaining water hoses and after the final check, pour liquid into the cooling system (see chapter 2).
16. Connect the electrical connectors of the wiring harnesses and the remaining unconnected single wires. Check that the distributor slider is in place, install the distributor cover and connect the wires to the distributor. Install new spark plugs, having previously checked their spark gap, and connect the ignition wires to them. Please note that on the engines in question, the spark plugs must be tightened to a certain torque (see chapter 4).
17. Connect the air and throttle cables (see chapter 3). The air filter should be installed after a trial run-in of the engine.
18. Fill the engine with oil up to the upper mark on the dipstick.
19. Check again carefully that everything is connected (pay particular attention to ground wires, drive belt tension, and carburetor controls). Look for obvious oil or coolant leaks, and for rags, tools, etc. left in the engine compartment.
20. Replace the battery and secure it with the clamp plate. Connect the wires to the battery and check the operation of the electrical circuits.
21. If the suspension was disconnected to remove the engine / gearbox, reconnect it (see chapter 9).
22. The engine is ready for a trial run.